Introduction
As seen in the About CAN-8 users section, one of the functions available to instructors is to create lesson plans and to author lessons and tests.
This chapter discusses how to create a lesson plan that can be used for either a lesson or a test. It will cover the different types of items that can be used in a lesson plan and how to create them, the information that can be included in each of them, how to enter or import the data, and the different settings that can be applied to these items to change the exercise behavior.
Familiarity with the previous chapters of this manual is strongly suggested before starting this one as it refers to topics previously addressed.
About the Planner
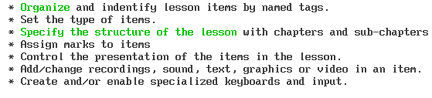
The Planner is where the layouts for lessons or tests are designed and their content created.
Its functions are:
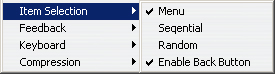
- Organize and identify lesson or test items by named tags.
- Set the type of items.
- Specify the structure of the lesson or test with chapters and sub-chapters
- Assign marks to items
- Control the presentation of the items in the lesson or test.
- Add/change recordings, sound, text, graphics or video in an item.
- Create and/or enable specialized keyboards and input.
Before you start
Preparing the menu
The System Supervisor (Master) is the only user who can add a new menu entry. When a new lesson needs to be created, the instructor must first contact the System Supervisor to request the new entry, specify the title and the location of this new entry in the main system menu.
This new menu entry (lesson) can be placed in the Instructor's menu while it is being worked on to prevent students from accessing it until it is ready. Once it is complete the system supervisor can move it to the student's menu. The new menu entry can also be made directly in the student menu and made unavailable to the student's by setting its mode to Wait to Start.
As soon as the menu entry is created, the instructor can enter the Planner and proceed with the lesson item creation.
This includes:
- Defining an item type types and their names.
- Recording audio for the item.
- Importing graphic images or video into the item.
- Entering text for the item.
- Synchronizing text and sound.
- Selecting correct answers for Multiple Choice or Fill-in-the-blank questions.
Preparing for Recording
It is worthwhile creating quality recordings. In order to ensure that the recordings are the best possible, the following instructions are suggested.
- Always use a good quality microphone.
- Ensure the environment you are recording in is quiet.
- Place the microphone as far as possible from the computer to minimize noise from fans or other devices.
- While recording, observe the volume graph and ensure that the sound shows approximately three quarters of the total height of the graph.
- Review and edit the recording to minimize pauses and noises at the beginning and end.
The Planner's Interface
 The Planner's interface is placed within the user's main Work Area, thus leaving the User Tab Bar
visible and available at all times for the instructor.
The Planner's interface is placed within the user's main Work Area, thus leaving the User Tab Bar
visible and available at all times for the instructor.
This allows the instructor to easily switch from a Planner to a lesson or a tracker without having to first exit the Planner.
The icon  located at the left of the tab identifies the function related to the tab
  , in this case, the Planner.
Since up to 7 tabs (Planners, Trackers and Students Programs tabs) can be opened simultaneously, this icon helps locate Planners at a glance.
, in this case, the Planner.
Since up to 7 tabs (Planners, Trackers and Students Programs tabs) can be opened simultaneously, this icon helps locate Planners at a glance.
A blue tab indicates which window is active. Only one tab can be active at a time.
 Tabs that are inactive are displayed grey with a thinner font.
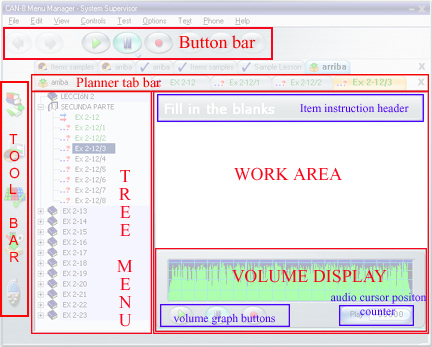
The Planner interface is composed of:
|
- The Tool Bar, always visible as part of the CAN-8 interface. It allows access to the main CAN-8 functions.
- The Button Bar, always visible as part of the CAN-8 interface. Different buttons will become active depending on the type of item being worked on in the Planner.
- The lesson Tree Menu, where the list of items forming the lesson is displayed.
- The Planner Tab Bar, where up to 8 tabs can be displayed. It shows the items of the Planner that are currently opened for editing.
- The Work Area, where text, images and video can be placed.
- The Volume Display, where the recorded or imported sound will show.
- The volume graph buttons, that duplicate the available functions in the main interface button bar.
|
Note:
 It is important to be familiarized with the layout of this interface and the names that have been given to each area of the Planner as they will be referred to all along this chapter. It is important to be familiarized with the layout of this interface and the names that have been given to each area of the Planner as they will be referred to all along this chapter.
|
1. The Planner Tab Bar
The Planner tab bar is located below the user tab bar.
When a lesson's Planner is first opened, the Planner tab bar is empty. As the items are being created and edited, tabs (up to a maximum of 8) are added to the Planner tab bar
Each item tab shows the item's title and the icon corresponding to the item's type.
The content of the work area is related to its tab. When the content of an item is displayed in the work area, the tab becomes active and turns orange.
Only one tab can be active at a time. Grey tabs represent items that are opened but not active (not currently displayed).
To display the content of another opened item, click on the corresponding tab, recognizable by its name.
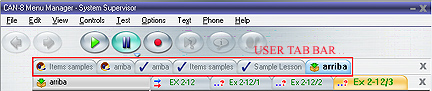
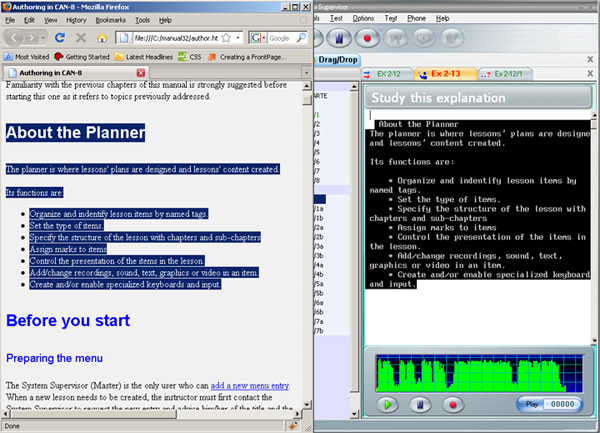
Below is a sample of a Planner being worked on:
| User Tab Bar |

|
| Planner Tab Bar |
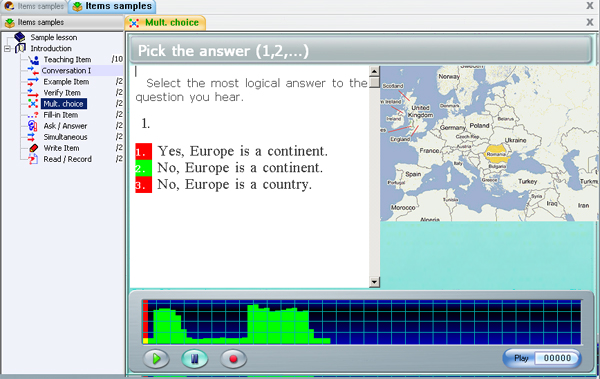
The upper bar shown is the User Tab Bar. In this example, the user has the student screen, the tracker and the Planner of the lesson named Items Samples simultaneously opened. The active tab in that bar is the tab highlighted blue. It indicates that the Planner of the lesson Items Samples is being worked on. The grey tabs present in that bar correspond to the player and the tracker for the same lesson (as indicated by the icon on the left of the tab and the lesson title).
The bar below is the Planner Tab Bar. 7 tabs are present, each corresponding to one item being edited. In this example, each item is of a different type. The tab highlighted orange is the active tab and corresponds to the item currently displayed in the work area. The icon and title indicate its type (write/dictation item) and its name (Write item).
NOTE:
A maximum of eight items can be simultaneously opened for editing. The Planner Tab Bar will therefore display up to eight tabs only.
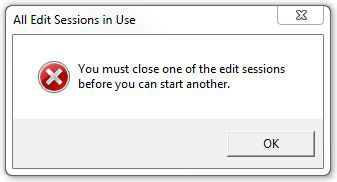
When attempting to open more than eight tabs, a system warning will show. Select OK in the warning window, and then close one or more tabs in order to open a new one.
To close a tab, click on it to highlight it and then select the Exit button at the far right of the Planner Tab Bar. Repeat these steps for each tab you wish to close.
The changes are available to the students only once the Planner tab is exited in the User Tab Bar.
The text and background colour of the item names in the tree menu and of the text in the item tab
change depending on the status of the item.
This is meant as a visual help while editing a Planner.
The colour code is the following:
| TEXT COLOUR: |
Indicates the state of an item currently on screen.
GREEN : Item has not been changed.
RED : Item has been changed.
|
| BACKGROUND COLOUR: |
Indicates the final state of a previously closed tab.
 : Saved without changes. : Saved without changes.
 : Saved with changes. : Saved with changes.
 : Empty item from previous session. : Empty item from previous session.
|
When working on a Planner, you may find the following combination of text and background colours:
| Tree Menu entry |
Description |
Tab text colour |
 |
Newly created or existing item from previous Planner session - Not opened |
No Tab |
 |
New or existing item from previous Planner session - Item is currently opened for editing - Has not yet been modified |
 |
 |
Existing item from previous Planner session. Item was opened then closed without being modified during this session |
No Tab |
 |
Existing item from previous Planner session - was edited once during this Planner session. currently re-opened for editing but not yet modified |
|
 |
Newly created or existing item from previous Planner session - currently opened for editing - has been modified
|
 |
 |
Opened and modified twice during this Planner session then closed |
No Tab |
 |
Previously modified item - opened for editing - not modified in editor yet |
|
 |
Previously modified item, re-opened and modified, still opened |
|
 |
Empty item from a previous Planner session - not opened |
No Tab |
 |
Empty item from a previous Planner session - opened for editing but not yet modified |
|
 |
Empty item from a previous Planner session, currently opened, has been modified |
|
2. The Tree menu
The tree menu displays the layout of the lesson, and allows navigation through the lesson's items. The view of the lesson menu in the Planner is the identical to the one displayed to the students in the player, except for empty or disabled items, and conversation type items which arenot displayed in the student menu but are available in the Planner so they may be edited.
 When the Planner is first opened, the items' titles, their type and mark (if applicable) are displayed in the Planner's tree menu, as illustrated.
- Type
The type of each item (represented by a unique icon) specifies the purpose of the item, its presentation, and what is required of the student.
- Title
The title of an item contains 14 characters.
This title is used to name the item in the menu of the student player and in the lesson Tracker.
- Mark
Items may be assigned a mark of 1 to 9 using their Properties box.
Not all items require a mark, or can be marked. Only Example, Read/Record , Multiple Choice , Simultaneous , Verify , Write , Ask/Answer, and Fill in the blanks items can be assigned a gradable mark. Introduction , Teach and Conversation items cannot, as they require no input from the student.
As the Planner is being created or edited, the text and background colour of the items titles in the menu change, depending on the item's status. Read more.
3. The Working Area
The work area is where the exercises content (text, graphics, videos and sound) will be created or edited.
Work areas may differ in appearance depending on the item type. Certain item
type may not have all the areas shown such as audio, text or graphics.
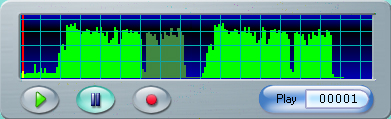
4. The Volume Graph
The volume graph displays the graph for the sound that has been recorded or imported in the exercise.
It is similar in appearance to the volume graph in the student's program.
The volume graph components are:
- A red cursor
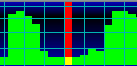 moves through the volume graph as the sound plays. It gives a visual indication of the level of the audio.
Clicking with the mouse anywhere on the sound graph places the sound cursor in the area clicked on, and the sound starts playing from there. For editing purpose, this is used to synchronize the text with the sound, or to edit or snip part of the sound.
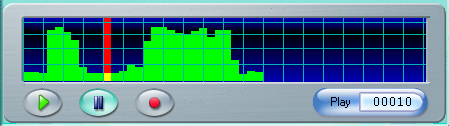
- A cursor counter display indicates the position of the red cursor within the audio displayed.
In the player, the user can see two counters:
| The example counter |
|
The play counter |
 |
Place your mouse cursor over any of the 2 counters shown to see the alternate display.
|
 |
By default, the number displayed is a position based on the number of audio samples in the sound. Clicking on the counter display will show the cursor location in mm:ss:tt (minute, second and tenth of seconds)
|
The example counter is present under all recordings that are part of the lesson (recorded by the instructor)
|
|
The play counter is on the volume graph representing user's answer |
This tool can be used by the instructor:
- to synchronize sound and text
- to snip audio
- to locate the error when monitoring
|
|
It can be used by the students
- to isolate a specific sound or word in the example audio
- to interrupt or start a recorded example when comparing with their recorded answer.
|
- The graph
 is a representation of the sound in a graphic format. This allows the user to visualize breaks in the sound for editing purpose. The vertical access represents the loudness. Care should be taken when recording or importing sounds that the height of the green bars does not exceed the first blue line from the top of the graph to avoid noises unrelated to the actual audio.
- The volume graph buttons
 behave identically
to those present in the button bar above the work area; highlighted when
active, greyed out when inactive. Using a keyboard Function key
highlights its corresponding volume-graph button.
behave identically
to those present in the button bar above the work area; highlighted when
active, greyed out when inactive. Using a keyboard Function key
highlights its corresponding volume-graph button.
Building a New Plan
A lesson plan organizes a group of items into a lesson or a test.
There are four basic steps to create a plan:
The plan can be changed at any time; more items can be added, and the content of each item adjusted. Items may be copied or moved from one plan to another.
The content of the plan will depend on what the ultimate goal is for this lesson: if it is a test, the plan will contain primarily question type items; if it is a practice or teaching lesson, then the plan will have explanations, examples and potentially some questions. It is therefore important to start the process with some planning as to what the student will be expected to do before embarking on the creation of the plan
This section will guide you through the steps required to create a generic plan.
Accessing the Planner
A Planner can be accessed using any of the following methods:
From the Menu Bar
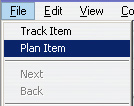
Select a lesson in the main tree menu and then File > Plan Item.
The lesson must first be selected in the menu or the Plan Item option in the drop down menu is greyed out.
From the Contextual Menu

Right click on a lesson in the main tree menu. This will bring up the contextual popup menu. Select the option Plan Item.
Using the Toolbar Planner Icon
 Located in the Tool Bar on the left side of the tree menu. This icon is only available to users who sign in as instructor or master.
Select a lesson in the main menu, then click on the Planner icon.
A lesson has to be selected first for this buttons to be activated. If none is selected or if the menu entry selected is not a CAN-8 lesson but some other menu entry type, like a submenu for example, the icon remains greyed out.
Once the Planner is opened, a tab corresponding to that Planner will show in the User Tab Bar of the CAN-8 screen.
Adding Items to the Planner's Menu
Items can be either created by the instructor as part of their lesson design, or they can be copied from an existing Planner and then edited for the purpose of the new lesson.
NOTE:
Users who are new to CAN-8 should familiarize themselves with the several
item types available and their description before reading the next section.
Create a New Item
Open the lesson Planner.
If the Planner is new, there will be one empty Introduction item shown in the tree menu.
In the tree menu
- Locate where you wish to place or insert the item.
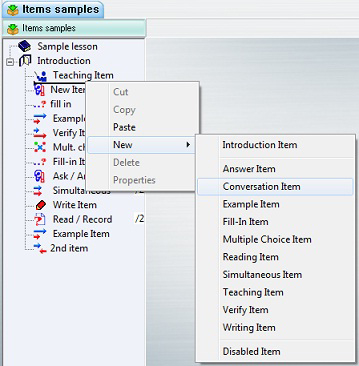
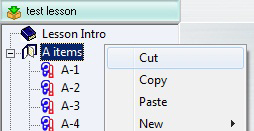
- Right click on the existing item under which the new item will be placed. A horizontal cursor will appear where the new item will be placed.
- In the drop down menu select with a left click New. This will open another drop down menu.
- In the list presented, select with a left click the type of item you wish to insert.
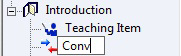
In this illustration, a Conversation item will be inserted under the Teaching item.
Once you select the type, the new item is added to the menu:
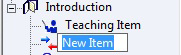
 The item title can be changed once it is created. The title can also be changed later on from the item property box or by double clicking on the item's title in the treeview and re-typing the name.
Making changes to this item such as the item type, item name, item mark, and item specific options can be done once the item is created using the item's Properties dialog box.
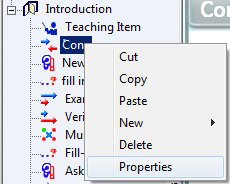
To open an item's Properties dialog box, right click on the item in the treeview and select Properties from the popup menu.
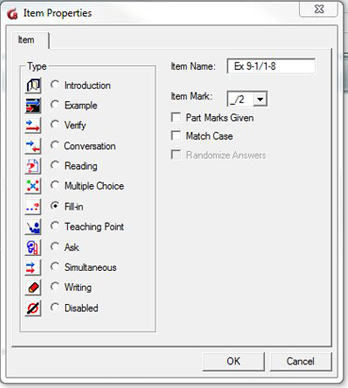
- To change the item type, click on the radio button corresponding to the type.
- To edit the item name, click on the Item Name field and type the new name.
- To assign a mark, select the total mark to be assigned in the drop down menu of the Item Mark field.
- Depending on the type of item selected, more options are available, like Part Marks, Match Case and Randomized Answers.
Select OK when the changes are done.
Note:
If you chose Disabled, the item will be shown in the Planner tree menu, but will not show in the student menu. The content of the item is preserved until the item is re-activated.
Creating item by dropping content into the menu
Items can also be created by simply dropping either audio or text directly into the Planner menu.
This content can be dragged from a file accessible on the system, from a browser, or it can be dragged directly from another CAN-8 item located in the same lesson or in a different lesson.
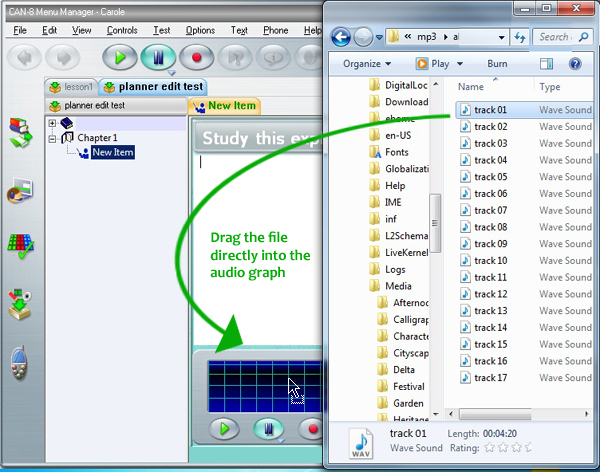
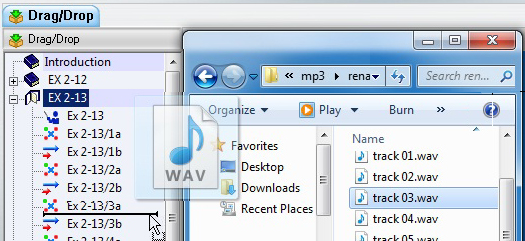
From a file
- Open a Planner
- Locate and select an audio file or text file on the drive (local, external, network or removable drive)
- Drag the file directly from the drive into the Planner's menu holding the mouse button down.
-
 Drop the file in the menu by releasing the mouse button. If the file is an audio file, as soon as the button is released, a mini volume graph window appears and displays the progress of importing the sound. For text files, the item is created directly. The newly create item will be marked as Disabled with a title of New Item.
- To enable the item and make it visible in student interface open the item properties, select an item type and change its name.
From a CAN-8 item
You can select some previously existing audio in a CAN-8 item, or some text and drag it directly into the tree menu to create a new item. This method does not copy the sound section; it clips the selected part from the original audio. The procedure below describes the steps to create an item from a CAN-8 audio recording. The same steps apply to create an item from selected text. In order to make a copy of the selected audio or text the same proceedure is used but the CTRL key is held down on the keyboard prior to letting go of the mouse button.
- Open an item that contains the audio you wish to move or copy.
- Place the mouse cursor at the start of the audio section that is desired.
- Hold the mouse button down while dragging the mouse across the sound graph to the end of the audio section you wish to move or copy.
- Release the mouse button at the end. The sound selected is highlighted dark green.
- Place the mouse on that darker section, Press and hold the mouse button down again.
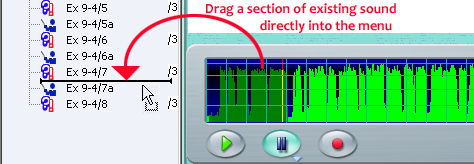
- With the mouse button still held down drag the selection over the tree menu.
- An insertion bar will appear in the treeview. When the bar is where you wish to create the new item, release the mouse button.
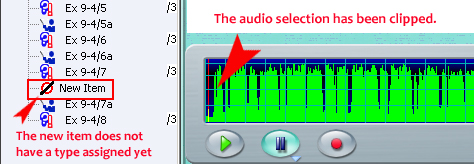
- A new item has been created from the section of audio, placed where the insert bar was. No type has been assigned to this item.
- Right click on the new item to open its properties box where you can assign it a title and an item type.
Moving Items From A Planner To Another
The CAN-8 multitab interface allows easy transfer of existing items from one Planner to another.
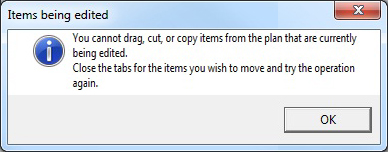
Items currently being edited (item tab opened) cannot be moved until they are saved or the tab exited.
You will receive this prompt if you attempt to move an item being edited. Close the tab of the item you wish to move then try again.
Introduction items, which may be used to divide the lesson in sections, behave slightly differently than any other items when cut or deleted. Please carefully read the NOTES at the end of the following sections.
The following 3 methods are available to move or copy items between Planners.
Be aware that a Planner may contain a maximum of 240 items and attempting to
move or copy extra items into an already full Planner will result in the
option to paste, or drag to become disabled.
Method 1: Copy/paste
This method consists of copying an existing item from one Planner (Planner A), and pasting it in the second Planner (Planner B) where desired:
- Open the 2 Planners.
- Select (click once) on the item you wish to copy in the Planner A
- Right click on this item and select Copy in the popup menu. Alternatively, select EDIT > COPY from the menu bar
- Select the tab of Planner B to activate it.
- Locate where you want to paste your item.
- Right click under the item at the location you want to paste the item.

The insertion bar will appear under the item and popup menu is presented.
- Select Paste from the popup menu or EDIT > PASTE from the menu.
Note:
Changes made to the copied items will not affect the original copy of the item.
The same item(s) can be pasted several times in one or several Planners.
When copy/pasting Introduction Items all items included between the selected Introduction item and the next Introduction item will be copied and pasted as a group.
To select more than one item at a time for copy or cut, use the usual windows multiple selection method.
Click on the first item, press and hold the shift key down,
select the last of the items you wish to select, and then release the shift key.
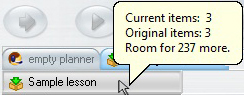
Note that a Planner cannot hold more than 240 items. If the number of items pasted exceeds the spaces left in the Planner, the paste command will be aborted. To know how many spaces are left in a Planner, place the mouse cursor on the bar above the menu as illustrated. The tooltip indicates how many more items can be added; in this example, 237 items can be added.
Method 2: Cut/paste
Similar in procedure as the copy/paste method. This technique results in items being moved from the first plan to another plan:
- Open the 2 Planners.
- Select (click once) on the item you wish to move from the Planner A
- Right click on this item and select Cut in the popup menu or select EDIT > CUT from the menu bar.
- Select the Planner B tab to activate it.
- Locate where you want to paste your item.
- Right click at the location you wish to paste the item.
The Insertion Bar will appear under the item and a popup menu is presented.
- Select PASTE from the popup menu or EDIT > PASTE from the menubar.
Note:
The behaviour of Introduction items varies depending if the items it includes are shown:
 If the items are hidden, they will be cut and moved along with the Introduction Item.
 If the items were shown in the menu, only de introduction is cut and moved. The remaining items are placed at the end of the preceding Introduction item.
The items that are cut from Planner A are no longer available in Planner A.
The same item can be pasted several time in one or several Planner.
Use the menu tooltip to see how many items can be inserted in this Planner.
Method 3: drag/drop
The third method consists of dragging an item from one Planner (Planner A), and dropping it in the second Planner (Planner B) where desired. Items may also be copied using this method:
- Open the 2 Planners.
- Select (click once) on the item you wish to drag from Planner A.
- Press and hold the left mouse button on the previously selected item. While holding the mouse button, move the mouse over the tab of Planner B.
- As the other Planner B tab highlights, the screen for Planner B will display.
- With the mouse button still pressed, navigate over the menu.
The insertion bar indicates where the item will be dropped.
- When the insertion bar is where the item should be placed, release the mouse button.
Note:
By default, this method is equivalent to the cut/paste method. Items dragged and dropped into another Planner no longer show in the original Planner.
The drag/drop method can be used to copy items if the CTRL key is held down while the item(s) is (are) being dragged.
When dragging you may also simply release the mouse button on the tab for Planner B. This will place a copy of the item at the end of Planner B's menu.
Use the menu tooltip to see how many items can be inserted in this Planner.
Adding content to an item
Once an item has been created in a Planner, content (text, graphics, video, and sound) can be added.
Adding text
Text can be entered in Teach, Answer, Read/Record, Example, Verify, Simultaneous, Multiple Choice and Fill in the Blanks items only.
Instruction, Write and Conversation items do not display text to the students.
Any text entered in any of these 3 last items will simply be ignored and not displayed in the student's interface.
 The text is displayed in a rectangular screen window. The size of the window depends on the type of the item and the presence of an imported graphic.
If an image is imported in an Example, Simultaneous, or Verify the text window is reduced to 3 lines. However, more text can be entered, and if so, the text can be viewed by scrolling down in the window.
There are several ways to enter text:
- Type with the keyboard.
- Type with a CAN-8 Virtual Keyboard.
- Import from a text file
- Drag and drop text directly from a file (or a selected part of a file) into the item in the Planner.
- Copy paste from another item or from a file (.doc, html, .txt, etc...)
Entering Text Using the Machine's Keyboard
Characters that are typed in are inserted at the text cursor position.
Characters at and to the right of the text cursor are moved one space to the right to make room for the new character.
Keyboard shortcuts:
- The cursor keys (Up, Down, Left, Right) move the text cursor in the window.
- The Home and End keys move to the start and end of the current line in the text window.
- The character at the text cursor can be deleted with the Del key.
- The character to the left of the text cursor can be deleted with the Backspace key. If the text cursor is at the beginning of a text line when the Backspace key is pressed, the line is joined to previous line.
Lines that would be too long to fit in the window are broken at a word boundary and continued on the next line.
All the normal display characters can be entered from the keyboard.
Accented characters that are required for some languages can also be entered by
- typing the character to be accented and then typing CTRL - A to cycle through various accented alternatives
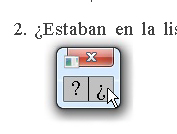
- using the following steps to choose a character from a table
- Right click on the typed character to be accented.
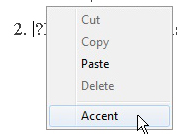
- Selecting Accent in the popup menu.
- Clicking on the appropriate accented character in the popup selection box.
Entering Text Using a Virtual Keyboard
In other languages where the standard keyboard may not contain the characters
needed, the course author may define a keyboard for the particular language
in use that contains the required characters.
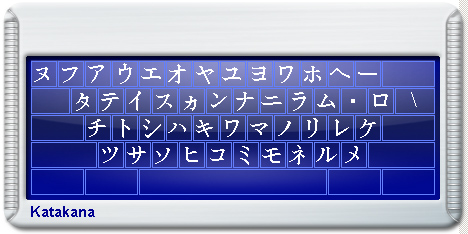 CAN-8 comes with 20 pre-defined keyboards. These keyboards can be selected and used as they are to create a lesson, or can be edited to suit the need or layout that the instructor may prefer.
When a Virtual Keyboard is added to a Planner, the instructor has the option to use both the physical AND the virtual Keyboard, thus is able to enter text from both set of characters.
The user toggles between these keyboards by either clicking on the Virtual Keyboard interface to activate it, or on the text area to de-activate it. When the Virtual Keyboard is deactivated, it becomes semi-transparent.
When the virtual keyboard is activated, each key of the virtual Keyboard is linked to the corresponding key on the physical keyboard. Therefore the user can type in text in the language of the virtual keyboard using the machine's physical keyboard.
The user can also enter text by clicking on the desired character key on the virtual keyboard using the mouse.
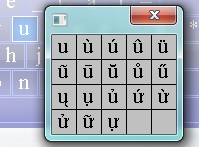
When using the Virtual Keyboard an accented version of a character can be entered using the following method:
- right click on the keyboard key
- then select the character variation you wish to type.
For information regarding the creation or editing of virtual keyboards and how to make them part of a lesson or how to save them on the server you should look in the Virtual Keyboard section.
Importing text from a file
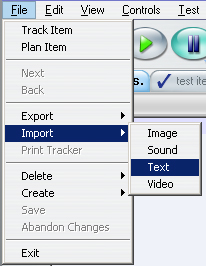
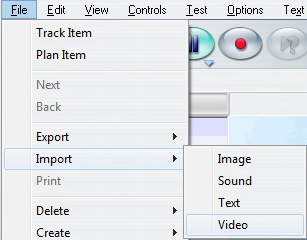
Located under the File Menu, the Import > Text option allows to import the content of a text file located either on the local drive, a network share or a removable data storage
device.
Note:
Text fonts not supported by CAN-8 will be replaced by CAN-8 default font when importing.
Adding text using drag/drop
Text can also be entered by selecting and dragging the content (or a section) of a file directly in the item.
You can drag/drop text:
- From a CAN-8 item to a different place in the same CAN-8 item
- From a CAN-8 item to another item in the same Planner
- From a CAN-8 item in a Planner to an item in a different Planner
- From any word processor document (.DOC, .PDF etc...) into a CAN-8 item as long as the word processor support the drag/drop function.
- From a browser (Explorer, Firefox,...) into a CAN-8 item
Drag/Drop steps are:
- open the document, CAN-8 tab or web page you want to copy some text from,
- drag the mouse over the text while holding the left mouse button to select it,
- release the left mouse button and move the mouse pointer into the selected area,
- press the left mouse button again and hold it then move the mouse pointer to where you want to drop the text,
- with the left button still pressed, hold the mouse over the CAN-8 Item's tab to cause it to activate and display the page,
- release the mouse button where you wish to place the text.
Procedures:
- When the document you wish to drag text from and the CAN-8 interface are tiled next to each other on your screen,
- Select the text in the document.
- While pressing the mouse button, drag directly from the document into the text area of the item in CAN-8.
- Release the mouse button to drop the text
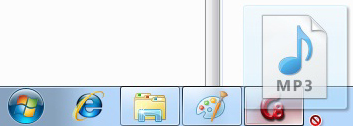
- When both interfaces (CAN-8 and the word editor or browser) are layered on the screen one above the other:
- Select the text with the mouse.
- With the left mouse button still pressed
 drag the mouse cursor
 on to the CAN-8 icon or tab in the task bar and hold it there until the CAN-8 interface displays on your screen.
- Place the cursor over the item tab in the CAN-8 system you wish to drop the text into if it is not already displayed.
- Finally drag the mouse pointer into the text area of the CAN-8 item and release the mouse button. A copy of the selected text will appear.
- To drag/drop text from an item to another item in the same Planner:
- Select the text.
- Drag it over the item tab you wish to drop it in.
- The item will then display and you can place the drag cursor where the text should be dropped.
- Release the mouse button to drop the text.
- To drag/drop text from a Planner to another Planner:
- Select the text.
- Drag it over the Planner tab you wish to drop it in and hold it there until the Planner displays.
- Drag it over the item tab you wish to drop it in and hold it there until the item displays.
- Place the drop cursor where you want the text.
- Release the mouse button.
Note:
Text font not supported by CAN-8 will be replaced by CAN-8 default font when dropping.
Adding text using copy/paste
Text can be copy pasted using:
- CTRL + C to copy then CTRL + V to paste from the keyboard
- Use EDIT > COPY and EDIT > PASTE from the menu bar
- or right click > copy on the selected text to copy, and then right click > Paste on the CAN-8 text area.
The text can be copied from:
- A file that is open in a text editor
- A browser
- An existing CAN-8 item.
The copied text can be pasted into:
- an existing CAN-8 item
- a new CAN-8 item
- directly into the Planner tree menu to create a new item from the text selection:
- Select text from an appropriate source.
- Place the mouse over the Planner tree menu.
- Right click and select Paste from the popup menu, or edit > paste
from the menu bar.
- A new item has been created from the text selection. Open its properties box to change its name and type.
Note:
Text fonts or attributes not supported by CAN-8 will be replaced by CAN-8 default font when pasting.
Editing/Formatting Text
 |
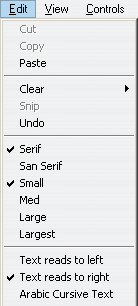
The tools for editing text are found under the Text menu and the Edit menu in the top menu bar. |
|
| Text may be altered by selecting the text with the mouse (dragging the cursor over the text or a portion of it)
and selecting an edit function. In this manner text can be cut, font size changed, type of font altered and text deleted. |
Alternatively the choice of font, font size and text direction can be made before typing.
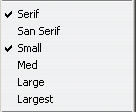 There are several text sizes to choose from as well as 2 types of fonts (Serif and San Serif). These are found under the Text menu.
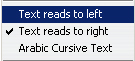 In some languages text is written from right to left. Selecting the to left option in the Text menu will orient the cursor and text flow direction properly for writing in these languages.
The Text menu also offers an Arabic Cursive Text. This option unique to Arabic-like languages and has no effect on any other language other then to align the writing to the left.
In Arabic-like languages however this option formats the proper cursive script display, as Arabic letters vary depending on whether they are connected to another letter before or after them.
In some cases it is desired to draw attention to a particular part of the on-screen text. In this case a word, or a sentence, or a text section can be highlighted to make it stand out as follows:
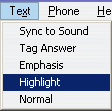
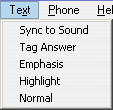
Place the text cursor at the start of a word and then, from the Text option in the menu bar, select Highlight. The word to the next space will be displayed in green.
Alternatively, drag the mouse over a sentence or a text section and select Highlight to have that section highlighted
Adding a recording or an audio file.
Sound can be added in any of the available items, but will be displayed or will behave differently depending on the item type.
To add audio in CAN-8, you can:
- Record a voice using a microphone.
- Import audio files using the import function.
- Drag/Drop audio files into an item in the Planner.
- Copy/Paste or Cut/Paste sound from a file or from a CAN-8 item
- Cut some audio from a CAN-8 item and paste the clip into another item.
NOTE:
The maximum length for a recording or an audio file in an item is 40 minutes.
Sound files in .wav, .mp3 and certain .wma format can be imported into the CAN-8 system. The .wav audio format must be PCM at 44.1, 22.5 or 11.25 KHz.
Although you may grab files from a CD ROM, they have to be in a supported format. Native CDA files as found on regular audio CD disks cannot be dropped into CAN-8.
Recording sound with a microphone
As advised in a previous section of this chapter, when recording from a microphone:
Always use a good quality microphone.
Ensure the environment you are recording in is quiet.
Place the computer as far as possible from the microphone to minimize noise from fans or other devices.
While recording, observe the volume graph and ensure that the sound shows approximately three quarters of the total height of the graph during loud parts.
Review and edit the recording to minimize pauses and noises at the beginning and end.
There are three ways to record sound in an item:
-
 Press the Record button. The same record button is available from the interface main menu bar, or from the volume graph button bar.
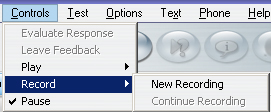 You may also use the RECORD option under Controls in the menu bar:
- New Recording: Starts a new recording. Will erase any previous recordings made.
- Continue Recording. Will append recording to the existing recording.
- use F3 from the keyboard.
To stop recording:
-
 Press the Pause button available on the screen.
- Press the F4 key on your keyboard.
- Select the Pause option under the Controls menu.
Recordings can be resumed by pressing
- the Pause button again
- the Record button again
- The F3 or F4 key
- or selecting the Continue Recording option under Controls > record.
The new recording is appended to the end of the previous recording.
 As sound is recorded, the volume graph (in green) is drawn across the screen.
The volume graph shows the loudness of the recorded sound. This helps in judging how loud to speak or in adjusting the playback volume of other sound sources
which might be attached to the sound input of the comptuter.
The sound recorded should come close to the top of the graph but not touch the top. When the sound level touches the top of the graph it causes a distortion that sounds like a loud click in the recorded audio.
The volume graph is also useful in achieving a consistent level of recorded sound across multiple lesson items. That way, once the student has adjusted the play volume at the start of a lesson, it will not have to be changed at each item.
The volume graph also gives a visual cue as the locations of words to the course author when synchronizing text and sound.
Importing Audio Files
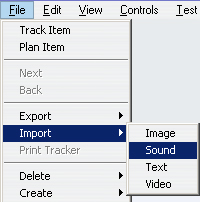
To import an existing sound file directly into CAN-8 select Import --> Sound from the File option in the menu bar. A file selection dialog will allow you to browse to the location of the sound file you wish to import.
The imported sound file will be appended to the end of any currently recorded sound shown in the volume graph.
Drag/Drop Audio Files
Sound files in WAV, MP3, WMA and other formats can be also be dragged and dropped into the CAN-8 system.
You may use any of the 3 methods below:
Copy/Paste or Cut/Paste sound
The copy/paste and cut/paste functions can also be used to add audio in a Planner item.
- From an existing disk file:
- Locate a file on your drive, then right click on it to get the contextual menu, or click once on it and select the EDIT option in the menu bar.
- Select Copy or Cut
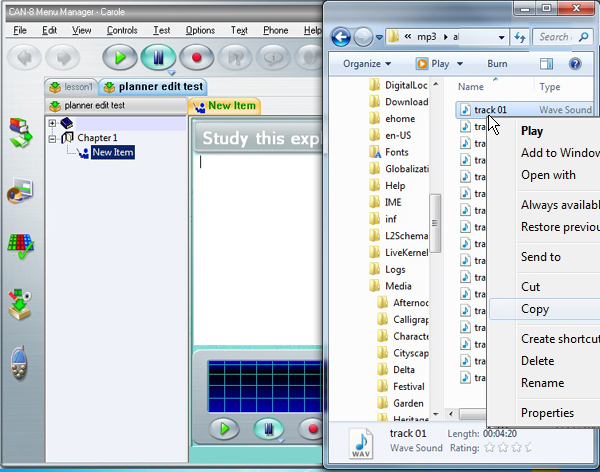

- Place your mouse over the volume graph window in CAN-8.
- Right click and select PASTE in the popup menu, or select EDIT > PASTE in the menu bar of the CAN-8 interface.
- You can also copy or cut a portion or all of the audio located in another CAN-8 item:
- Open the item you want to copy or cut the audio from.
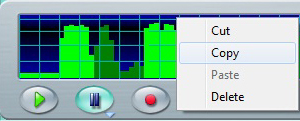
- In the volume graph, click at the beginning of the sound you wish to copy, hold the mouse button down while dragging the mouse cursor to the end of the audio section you want.
- The section selected will be displayed in a darker green.
- Right click on the selected section and choose COPY or CUT from the popup menu. Alternatively you can select EDIT > COPY (CUT) from the CAN-8 interface menu bar.

- Open the item you wish to paste the sound in.
- Right click on the volume graph at the location you wish to place the sound and select PASTE in the popup menu. If you do not care where in the volume graph the audio is placed, you may also chose EDIT > PASTE from the CAN-8 interface menu bar.
Playing Sound
To play the recorded or imported audio:
- Press the Play button
 located in the button bar or on the volume graph .
- You can select one of the Play option under the Controls option in the menu bar.
- You can also press the F2 key of the keyboard.
- And finally, you can play the audio by double clicking on the volume graph
As the sound is played, the play cursor line (red and yellow) moves across the sound volume display.
To pause the sound at a specific place:
- Press the Pause button.
- Select the Pause option under Controls in the menu bar.
- Press the F4 key on your keyboard.
Playing can be resumed by
- Pressing the Pause button or the Play button again.
- Selecting the Play option under Controls in the menu bar.
- Pressing the F2 or F4 key on the keyboard.
Editing Sound
There are several reasons for editing sound. When recording speech or individual words it may be necessary to record several times in order to create the best possible sample.
In many cases the microphone used for recording picks up the sound of keys on the keyboard or the sound of taking a breath before speaking.
Finally, there might also be a need to remove part of an audio file, or create several items by splitting up one existing audio file.
In almost all cases it will be necessary to edit the audio that has been recorded or import in order to create a good quality lesson.
The audio is edited using the volume display and the mouse. The primary
method of editing audio is to remove unwanted parts, or to move sections
of audio from the current item to another item. How to move sound from
one item to another was covered in the Drag/Drop Audio Files above.
This section covers how to remove unwanted sound as follows:
- Locate in the volume graph the part of the sound you wish to remove. You can locate it visually, or you can use the counter situated at the bottom right of the volume graph.
 Click at the beginning of the section to be removed, hold down the mouse button on the volume display, then drag the mouse across the volume graph till the end of the section, leaving behind a darkened area. This area marks the sound to be removed. The sound to keep remains in bright green.
- Delete that section using the DEL key of the keyboard, or the Snip option under EDIT in the menu bar. The dark green section of the sound will be removed.
 Sometimes it is desirable to remove some sound that occurs between two sounds that are wanted. A pause may be too long, a noise may occur, or a word may be repeated.
To remove a section of sound from the middle of the recording simply mouse and drag across the area you wish to remove in the middle of the volume display. Then press the DEL key or choose Snip from the menu bar as above.
 When possible the sound should be cut at quiet parts indicated by an area in the graph whith the lowest possible green bar height. If the sound is cut during loud sections, clicking sounds may result in the final sound where the remaining parts joined.
In some cases, the changes made to the sound are incorrect. To remove the last change, the Undo option in the Edit menu may be used.
Synchronizing Text and Sound
Synchronizing the text and the sound builds links between the words on the text window and the sound in the volume display.
As the sound plays, the corresponding synchronized words in the text window are highlighted in turn.
When the audio graph is clicked on, the sound starts playing from that
point and the synchronized words display from that location in the sound.
Likewise, clicking on the highlighted text plays the corresponding sound
from that point in the passage.

Any text can be synchronized, from single letters and spaces through syllables and words to a whole line of text.
NOTE:
Synchronization establishes a one to one correspondence between the text and the sound. The chronological order of the sound must be maintained in the text:
It is not possible to synchronize the text from beginning to end with the sound from end to beginning.
It is also not possible to synchronize a word in the text to more than one different place in the sound display. The word must be repeated twice in the text to be synchronized to two occurrences in the sound.
Procedure
To synchronize text:
- Locate in the audio graph the sound you wish to synchronize possibly by re-playing the audio until you can see where in the graph the word you want to
synchronize is located. The graph counter may be helpful to remember the exact part of the audio.
- Move the cursor to the front of the word or text to be synchronized
- Click on the volume graph at the point you want to synchronize the text.
- Select TEXT > SYNC TO SOUND from the menu bar. The text will turn blue to the end of the line.
- Synchronizing the next word or letter in the line will move the blue highlight along the line.
Repeat steps 2 to 5 as many times as you need while proceeding
in a forward direction through the text and audio. Synchronizing is done a line at a time. It is not possible to go backwards and synchronize words that appear before the current word to sound that occurs after the current word.
If the most recent synchronization mark would conflict with the order of previous marks, the previous synchronization marks are overridden.
Emphasized text
The TEXT > EMPHASIS option is similar to the SYNC TO SOUND option. It also establishes a one to one correspondence between the text and the sound in a chronological order
As in the Synchronize to sound option, the user can click on the text to hear the corresponding sound, or click on the audio graph to view the corresponding word.
The procedure to link the audio and corresponding text is identical to the procedure used to synchronize them, and the conditions are the same.
When the text is emphasized and the corresponding audio playing, the text is displayed in red font and highlighted yellow. However, whereas the synchronized text returns to its original colour when the synchronization has moved over, in the case of the emphasis highlight, once it has moved on to another part of the text, the emphasized text remains displayed in red font. 
Adding Graphics
A graphic can be imported and displayed as part of the content of an item or as a background for a lesson.
The graphic must be a JPG, BMP or a GIF (stored in the GIF 87 format).
GIF files must not be of the interlaced type. If the graphic is in some other format, it must be converted to a supported format using a conversion utility or a drawing package that can do so.
The graphic is restricted to a maximum size of 320 pixels horizontally and 240 vertically. Images sized 320X240 will display entirely, larger sizes will loose some pixels at the places where it exceeds these dimensions. Only the top left corner of larger images is kept and the rest is discarded.
There are different options to import graphics:
- Use the Import function from the menu.
- Drag and drop a file from a disk or a browser.
- Copy/paste the image from a browser, a file or another CAN-8 item.
Importing Graphics
 To import an image, access the File option from the menu bar, select Import and then Image
Note that the item where you wish to place th eimage has to be displayed. If the Planner is open, but no item is open for editing, the option Import is greyed out.
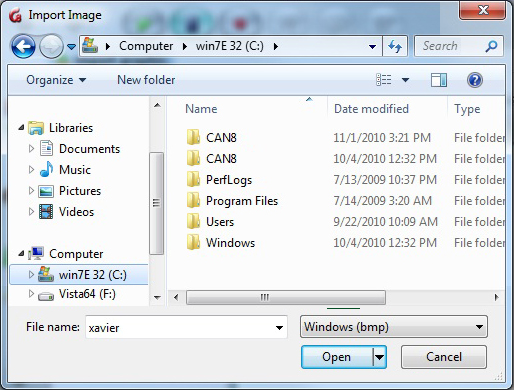 The import image window allows you to browse for the file of your choice.
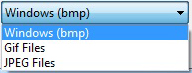
It may be necessary to use the drop down menu to select the appropriate file type.
Once selected, the screen will be redrawn to accommodate the graphic image.
When imported in a CAN-8 item, the image is converted into the CAN-8 format and copied into the item file. Once it is included to the Planner, the original file is no longer required.
Drag/drop Image
An image can be placed in a CAN-8 item using the drag/drop function.
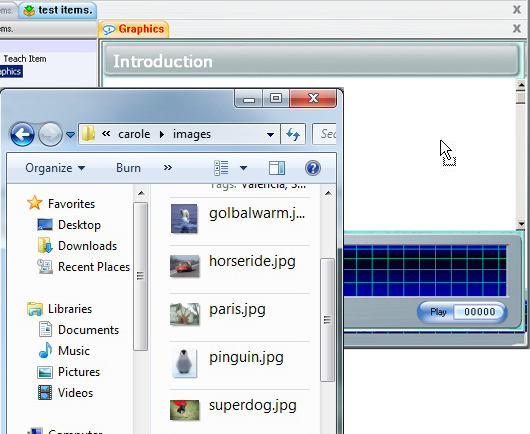 Locate the image file on the disk or removable storage device, click once on the image to select it, and while holding the mouse button down, move the mouse cursor over the CAN-8 interface as illustrated.
Release the mouse button to drop the image in the item.
The same steps are used to drag/drop an image from a browser. Simply select the image by clicking once on it, then while holding the button down, move the mouse cursor over to the CAN-8 interface, then release the mouse button. The image will appear.
NOTE:
Depending on the item type, the image is always pasted in the graphic area, independently of where the cursor is placed.
When dragging a file from an internet browser, the file has to fit the size and format requirements.
As mentioned in the Graphic Import section above, once the image is dropped into a CAN-8 item, it is then converted into CAN-8 format and saved in the item file. The original is no longer required.
Copy/paste Image
Finally, an image can be copied then pasted from either a file on the hard drive or removable data storage device, or from a browser.
- Locate the graphic you would like to place in your item.
- Right click on it and select copy in the contextual menu.
- In the CAN-8 interface, select the item you wish to paste the image in by having it displayed on the screen
- Right click on the displayed item and select Paste from the popup menu.
Alternative methods can be used, such as:
- EDIT > COPY in your browser, or your explorer menu bar, then EDIT> PASTE in CAN-8.
- CTRL + C on your keyboard to select the image and CTRL + V to paste it in your other item.
NOTE:
Depending on the item type, the image is always pasted in the graphic area, independently of where the cursor is placed.
When copy/pasting a file from an Internet browser, the file has to be of the required size and format.
Once the image is dropped into a CAN-8 item, it is then converted into CAN-8 format and saved in the item file. The original is no longer required.
Link a video file to an item
This section describes how to play video as a part of CAN-8 lesson item, the requirements, and file formats.
Video File Types
Video files can be created using different methods of compression. As a result, the proper codecs must be installed on the workstation in order to play the video. This is the most common problem encountered when playing video on computers, no matter what the application is.
Both MPEG and AVI files can be linked in a CAN-8 lesson item, each with their own points of merit.
AVI Files
AVI files tend to have a wider range of codecs that are used in their compression. This means that it is sometimes a challenge to ensure that all workstations are equipped with the proper codecs for playing the lesson.
MPEG files
Most machines will have the needed MPEG codecs already installed. MPEG files tend to be compressed more efficiently and therefore may have a more consistent delivery when being played by large groups of students simultaneously.
Variants of MPEG (specifically MPEG-4, but others as well) may also be stored in an AVI file using the correct codecs.
Linking video files
Unlike sound or picture files, video files are not converted in CAN-8 format. Instead, they remain in their original format and in their original location when linked into a lesson. It is therefore necessary to place video files in a location available to all users and ensure that the file path is common to all client workstations.
The tools available to link a video are:
- File > Import > Video from the CAN-8 menu bar.
- File > Import > Video via URL from the CAN-8 menu bar.
- Drag and drop from a shared folder.
- Copy/Paste from a shared folder.
From the File > Import > Video Menu
If the video is located on the client station or on a shared network folder:
- Access the File option from the menu bar in the Recorder and select Import > video.
- In the Video Import box, select the file type (avi, mpeg or wmv).
- Browse and select the file to link to.
NOTE:
The video will only play if the student connects from within the school's network.
If the source file for the video is not available to the student through the same file path as it was to the person who linked it, the student will not be able to see the video, regardless if they have rights to it.
If the path from the instructor station is:
D:\video\file.avi
Where D:\ is a network share, and Video a shared folder, this path, including the drive letter, has to be existing on ALL client machines that will be accessing that lesson.
From the File > Import > Video from URL Menu
The file will be played from a webserver instead of a local server and is accessible to all remote users.
- Access the File option from the menu bar in the Recorder and select Import > video from URL

- In the Video Import from URL box, type the URL where the file is located. (i.e.: http://www.mywebpage.com/video/myvideo.mpg)

- Select OK.
NOTE:
The video will only play on the remote users' stations if the proper CODECs are installed.
In this case, the video is played via an http communication port. In a LAN setting, there may be firewall rules or load shaping software preventing video downloads. The video may appear to load fast at first, then increasingly slower. If such is the case, playing the video locally is preferable for a better experience.
Drag and drop from a shared folder
- Browse through the folder and locate the file. Make sure the file is of the correct format.
- Click on the file, and while holding the mouse button down, drag the file either directly into the CAN-8 item if the software is tiled, or on top of the CAN-8 icon in the task bar to open the CAN-8 interface.
- When the mouse cursor is over the item's text area, release the mouse button to drop the file.
NOTE:
If the source file for the video is not available to the student through the same file path as it was to the person who linked it, the student will not be able to see the video, regardless if they have rights to it.
If the path from the instructor station is:
D:\video\file.avi
Where D:\ is a network share, and Video a shared folder, this path, including the drive letter, has to be existing on ALL client machines that will be accessing that lesson.
Copy/Paste from a shared folder
- Browse through the folder and locate the file. Make sure the file is of the correct format.
- Right click on the file and select Copy or select EDIT > COPY from your menu.
- Open the CAN-8 interface.
- Place the cursor in the text area of the item, right click and select Paste or select EDIT > PASTE from the menu bar.
NOTE:
If the source file for the video is not available to the student through the same file path as it was to the person who linked it, the student will not be able to see the video, regardless if they have rights to it.
If the path from the instructor station is:
D:\video\file.avi
Where D:\ is a network share, and Video a shared folder, this path, including the drive letter, has to be existing on ALL client machines that will be accessing that lesson.
Delete Item Content
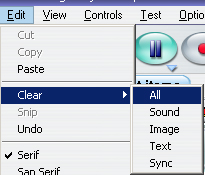 The content of an item can be deleted using the Clear option in the Edit menu.
The options are:
The content of an item can be deleted using the Clear option in the Edit menu.
The options are:
- Clear > All - Will clear all components of the item: audio, text, image, and video.
- Clear > Sound - All audio components are removed from the item. If the item includes an AVI, the audio component of the video will be deleted, the graphic part will remain.
- Clear > Image - Will delete any graphic the item has. If the item includes a video, this option will remove the graphic component, but the audio part will remain.
- Clear > Text - The text is removed from the item.
- Clear > SYNC - Deletes the link between the text and the audio when it has been synchronized. The text and the audio remain untouched.
Alternatively, text and audio components can be deleted by dragging the mouse over to select it, then pressing the Delete key.
Graphics and Synchronization however can only be deleted using the Clear menu option.
Note:
If a video has been imported in the item, it is possible to delete the "audio part" of the video, and keep only the graphic part, or vice versa.
If the audio of a video is deleted, then replaced by another recording, the graphic part of the video will play while playing the new audio.
Editing Planner Items
All items in a Planner can be edited or deleted at any time. All components (audio, graphic, text, video) can be deleted then re-imported, or just changed. This can be done while the students are currently using the lesson. Any changes made are available to them as soon as the Planner is exited.
Care should be taken when editing a lesson Planner where students have already recorded answers in the lesson. Deleting items, or replacing items in the
plan for which students have already recorded an answer will result in the system
discarding the previous answers that went along with the deleted items.
Note that once the changes to the Planner are saved, there is NO POSSIBILITY to undo the changes.
Deleting Items
It may be necessary at some point to remove an item from a Planner, either temporarily, or permanently.
Any of the two following options can be used for that effect:
-
An unwanted item can be permanently deleted from a Planner at any time.
To delete an item, simply right click on it in the menu and select Delete.
This can be done while the students are in a lesson, and the item will be removed from their lesson menu as soon as they select the Next button.
However, deleting an item where students have already recorded answers will result in the answers to that deleted item being lost.
Note that once the item is deleted and the Planner exited, the deletion is permanent and non-reversible.
- Items can also be disabled which will temporarily remove it from the student's lesson menu.
To disable it, right click on the item, select Properties. In the properties dialog box, click the radio button for Disabled.
Note that an item that is disabled remains in the Planner and can be re-activated at any time. Any student answers associated with the disabled item will still be accessible when the item is re-enabled.
Saving Changes
New or edited Planners, as well as new or edited items must be saved before the changes are made accessible to the students. Saving may be done at any time
even if students are currently using the lesson. The changes in this case
will be presented to the students when they proceed to the next item in the
lesson.
Saving the items
Any changes related to the content of an item must be saved or abandoned when exiting the item. These changes include only changes done to the content of the item.
By default, when exiting the tab of an item that has been edited, a Save / Abandon Change option is presented:
 The options are:
- YES: will save the changes to the item. You can reopen the item during the same session. The content is saved.
- NO will remove all changes that were done to the item since it was last saved. It does not delete the item from the tree menu. It only affects the content.
- CANCEL or EXIT will simply abort the EXIT request. The item remains open; the content is kept the way it was on the screen now.
This default setting can be changed to skip these prompts. Items and Planner will then automatically be saved when the user closes the tab. The steps to change these defaults are detailed in the user's preferences section of this chapter.
Changes to an item are not made available to the students until the entire Planner is saved and exited.
Note:
This prompt is not shown if the item has not been changed prior to exiting the item.
The new content of the item, although saved is not yet available to the students until the entire Planner is saved.
Saving the Planner
Planner changes include:
- New added items to the tree menu.
- Deleted items from the tree menu.
- Moved items around in the menu layout.
- Changing existing item types, names, and assigned marks.
- Changed presentation item sequence, or feedback mode.
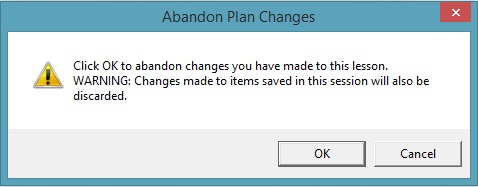
 If the planner was new and just populated, or if any of the changes listed above were made to an existing planner, a prompt to save or abandon the changes will show upon exiting the Planner. Select one of the options available.
Alternatively, if the changes made are not desired, or items were deleted/moved by error, you can select the option Abandon Changes from the FILE menubar.

Since this option is also available for edited items, you must therefore close all item tabs in the planner before selecting this option at the Planner level.
Note:
When selecting Abandon changes at the Planner level, all items that were edited or created and then saved during the current Planner session are abandoned as well.
Changes are available to the students as soon as the Planner is saved.
Students who were using the lesson while the Planner was edited do not have to exit the lesson for the changes to take effect. The changes done to the Planner will be applied as soon as they select the Next button.
When the changes are abandoned, the Planner is restored to its previous state.
Item Types
An instructor can create up to 11 different types of items, although two of these item types do not display anything to the student but modify the behaviour of the item that follows it in the plan (Introduction and Conversation item). For more information about these items, see table below.
The format of each item is pre-defined and can include different components, like audio, text, graphics, and video. We will address the components of each of these items all throughout this chapter as we go through the creation process and details of each item type.
Each item type has been assigned a unique icon to make navigation through the lesson clearer.
The table below shows the icons, their corresponding item types, the available components for each item and a brief description. To view a sample of the item, and for more detailed information about the item type, click on the corresponding link in the Item Type column.
| Icon |
Item Type |
Components |
Item Description |
 |
Introduction |
audio and graphic only
Requires no input from student |
This item is used to give brief information about the lesson, or to introduce a new chapter or section of the lesson. It is usually used to divide a lesson by theme or exercise type.
Any text in this item is not displayed on the student screen. If a graphic is imported in that item,(.gif .jpg or .bmp 320x240 pixels in size) it will show as background for the following items until the next I item.
Since no input is provided by the student, this item is not visible in the Tracker |
 |
Teach |
audio, text, graphic, video
Requires no input from student
|
A teach item explains a concept.
The student is asked to study the item and press the Next key when they are ready.
Since no input is provided by the student, this item is not visible on the Tracker screen.
|
 |
Example |
audio, text, graphic, video
The Student is required to record an oral response
|
The example item requires a student to listen to an example and record the student's own version of the example. The instructor's and the student's volume displays are present on the screen. Text and graphics can be added to enhance the exercise or for additional help.
The response to this item is accessible from the Tracker screen and can be marked.
|
 |
Verify |
text, audio, graphic, video
The Student is required to record an oral response |
The Verify item requires the student to make their recording before they are able to hear the example. Once the recording done, the student listens to the example. The students recording and example may be compared at this time.
The response to this item is accessible from the Tracker screen and can be marked.
|
 |
Simultaneous |
text, audio, graphic, video
The Student is required to record an oral response |
In the Simultaneous item, the students record their voice at the same time the item is played. After the recording is made, the students can listen to it. In order for the student to listen to the example again, they must re-record their speech. There is no option to listen to the audio sample only.
The response to this item is accessible from the Tracker screen and can be marked. |
Tip to recognize the icon:
The arrows in the 3 above icons represent the instructor's audio and the student recordings.
The top blue one is for the instructor, the bottom red one for the student.
The length of the arrow on the icon represents whose audio will be first: the longest plays first, the smallest second.
In the Example, the longer blue arrow indicates the instructor's audio plays firstwhile the student's shorter red one shows that the student's recording will come after. For the verify item however, the longer red arrow indicates the student will record first, then the instructor's audio will play. In the simultaneous item, both arrows of the same length indicate that the recording and the instructor's audio will be done at the same time.
|
 |
Ask/Answer |
audio, text, graphic, video
The Student is required to record an oral response
|
The student is asked to record an answer to the question they have heard. No volume graph of the instructors' audio is provided.
The response to this item is accessible from the Tracker screen and can be marked. |
 |
Read/Record |
text, graphic, video
The Student is required to record an oral response |
A Reading item presents text, possibly with graphics, and asks the student to read the text. No recorded sound sample is played therefore although video can be added to a Reading item, only the visual part of the video will be played for the student.
The response to this item is accessible from the Tracker screen and can be marked. |
 |
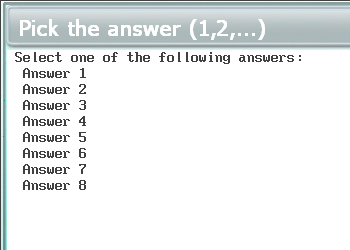
Multiple Choice |
audio, text, graphic, video
The Student is required to select an answer |
The student is required to select one of a number of answers to an oral or written question. Graphic can be included as part of the question.
The computer corrects and marks the student's answer.
The response to this item is accessible from the Tracker screen and can be re-marked. |
 |
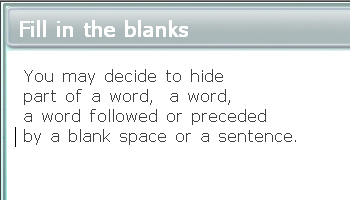
Fill in the blanks |
audio, text, graphic, video
The Student is required to type a written response |
The student is presented with a paragraph, or some sentences that have been partially blanked out. The student is required to fill in the blanks with the correct text. The computer corrects and marks the student's answer.
This item is visible from the Tracker screen and can be marked |
 |
Write/Dictation |
audio, graphic, video
The Student is required to type a written response |
The Writing item is used to require a written response to either a dictation or a question. It may contain sound and graphics but no text is displayed.
The answer typed by the student is available from the Tracker and may be marked. |
 |
Conversation
| audio only
This item requires no input from the student |
The Conversation item is combined with an Example or a Verify item to form a dialogue. The Conversation item is used by the instructor to play the first part of a conversation, the following item (Example or Verify only) to record a response and listen to the suggested answer.
The Conversation item itself has no interface and does not appear on a student menu. It plays automatically when the student selects the item that follows it.
The Conversation item must have sound, and only sound. Graphics and text are ignored. This item is not visible on the Tracker screen though the following example or verify item is.
|
Detailed Items Descriptions:
The Introduction Item (I) 

May include: audio, graphic
Does not display an interface to the student.
Requires no recordable or written input from student.
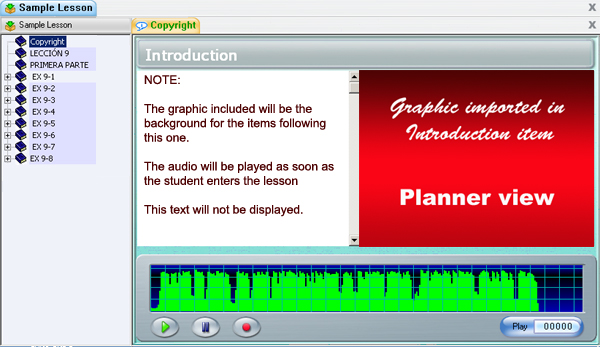
In the Introduction item, an oral introduction may be recorded. This recording is then played first whenever the lesson is started or a new section of the lesson plan entered.
 Introduction items can be used to divide the lesson into sections, and are represented in the treeview as submenus. They can be created without content.
Depending on what type content is added to this item, it will behave differently.
- If no content is added, this item is used to divide the lesson into sections or chapters.
- If only audio is added, the audio plays when the student enters the lesson or new section in the plan, but no interface is presented.
- Since this Item is transparent to the student and has no displayed interface, any text entered in that item is ignored in the student program.
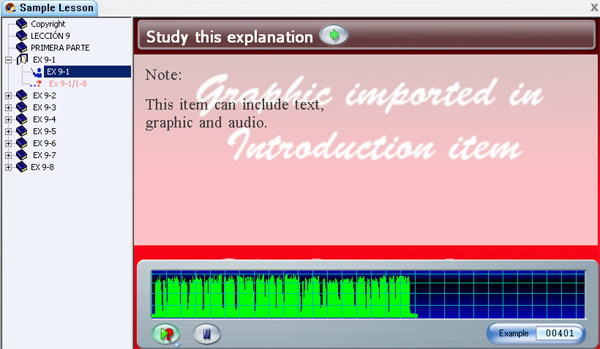
- If a graphic is imported into this item (.gif .jpg or .bmp 320x240 pixels in size) it will become the background image for the all the following items, until either the end of the lesson, or until another Introduction item is encountered unless an image is imported in those items.
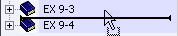
Using the example shown above,
- if an image is imported in the Introduction item titled 9-1, that image will be the background EX 9-1 (Teach Item) and EX 9-1/1-8.
If a different image is imported in the Introduction item named EX 9-2, this image will be the background for the items following, etc...
- If on the other hand, only the first Introduction item includes an image, this image will become the background for the entire lesson.
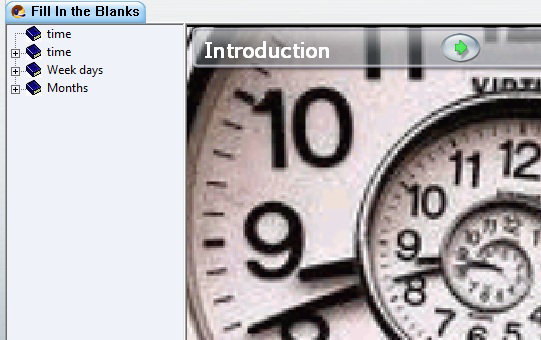
The screenshot below shows an introduction item with a graphic, taken from the Planner. Place your mouse cursor over the image to view the same item in student mode:
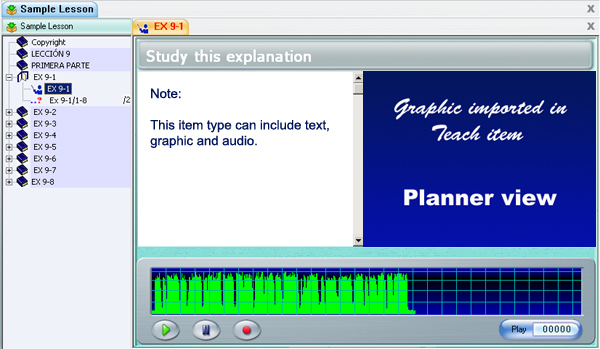
 Note that if one of the items following the above introduction includes an image as well, the item's background becomes white or black, depending on the user's Preferences settings. The background image from the introduction item is hidden in the displayed item to allow the item's image to stand out. Below is an example of a Teach item, following an Introduction item with graphic. Place your mouse cursor over the image to view the same item with and without graphic.
Note:
The text is not shown in the student screen.
There is no volume graph shown during the presentation of the audio from the introduction item.
Because this item is not a recordable item, it is not displayed in the tracker.
The Teach Item
May include: audio, text, graphic or video
Requires no recordable input from student
A teach item explains a concept. The recording screen for a teach item has a large text area and can display a graphic or video.
The screenshot below shows the Planner view of a Teach item with text audio and graphic. Place your mouse cursor over the image to view the same item in student mode:
Note:
Because this item is not a recordable item, there is no corresponding cell in the TRACKER.
The Example Item
Must include: audio
May include: text, graphic or video
Requires student to: Record an oral answer
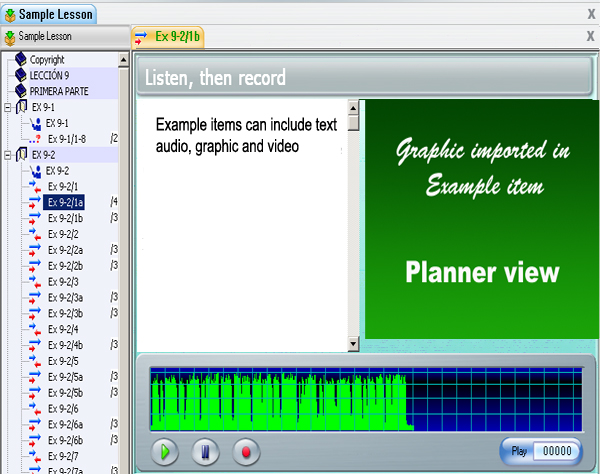
The Example item requires students to listen to an example then record their own version of the example.
As sound graphs are required for both the example and the student's own recording, the text and graphic area is limited.
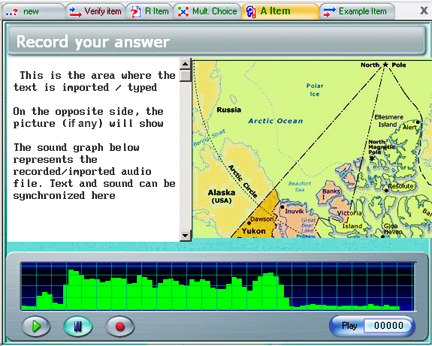
The screenshot below shows the Planner view of an Example item with text audio and graphic.
Place your mouse cursor over the image to view the same item in student mode:
Note:
The student screen displays the two volume graphs. The Planner screen only displays one, as the other is meant only for the students' recording.
When an image is imported in this item type,
a three-lines window is available for text display. A scroll bar located on the right of the text area allows navigating through the remainder of the text.
If no graphic is included, the text area expends to the regular text area size.
The Simultaneous Item
Must include: audio
May include: text, graphic or video
Requires student to: Record an oral answer
The layout of the simultaneous item is exactly the same as the layout of the example item. It can include the same components, and also presents two volume graphs.
The students must record their answer while the example is played. They cannot listen to the instructor recording prior to their own recording time. As soon as the Record button is pressed, the instructor's pre-recorded audio is played and the student's recording begins.
The screenshot below shows the Planner view of a Simultaneous item with text audio and graphic.
Place your mouse cursor over the image below to view it in student mode.
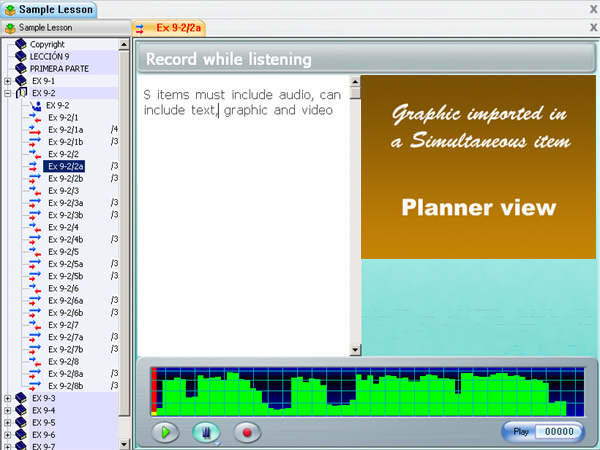
The Verify Item
Must include: audio
May include: text, graphic or video
Requires student to: Record an oral answer
The screen for the Verify item is identical to the screen for the Example item.
As opposed to the Example item, students must record their answer first, before being able to check it against the example.
The screenshot below shows the Planner view of a Verify item with text audio and graphic.
Place your mouse cursor over the image to toggle between this view and the same item in student mode.
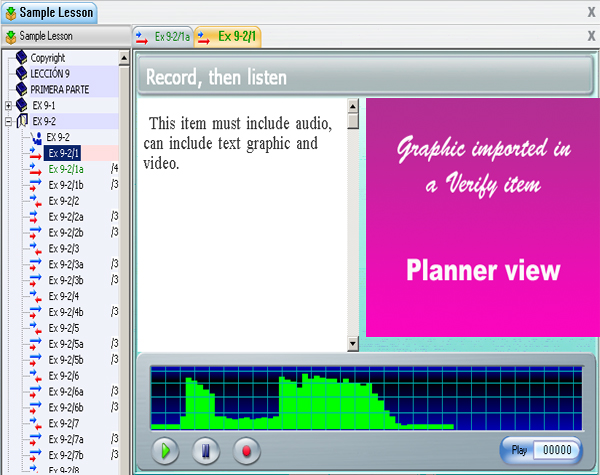
The Read and Record Item
May include: text, graphic, video
The Read and Record item does not include audio, therefore no audio example or prompt is given to the students.
Although video can be added to a Read item only the visual part of the video will be played, the audio will be ignored.
The screenshot below shows the Planner view of a Read item with text and graphic.
Move the mouse cursor over the illustration to toggle between this view and the same item in student mode.
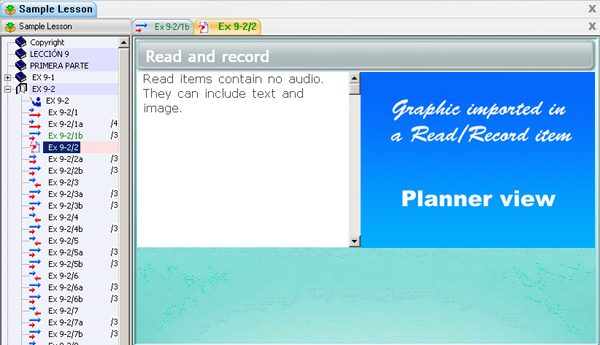
The Ask Item
Must include: audio
May include: text, graphic, video
Requires student to: Record an oral answer
The Answer item requires the student to record an oral response to an oral question.
 Unlike the Teach, Simultaneous, Example, and Verify items, the instructor's volume graph is not displayed to the student. The student can listen to the question again by selecting the example button as shown to the left.
The screenshot below shows the Planner view of an Answer item with text, audio and graphic.
Place the mouse cursor over the image to toggle between this view and the same item in student mode.
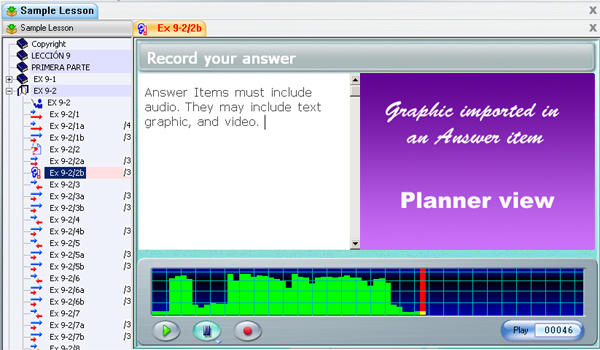
The Multiple Choice Item
Must include : text
May include: audio, graphic, video
Requires student to: Select an answer
in a Multiple Choice item, students are required to select one of a number of written answers.
The text in a Multiple Choice item consists of a question followed by a number of possible answers. There may be up to eight choices for answers and one or more may be tagged as correct.
The audio can be used to either repeat the question orally, or present a recording or dialog that includes the correct answer that the students are supposed to select from the available answers.
To view the steps to create a Multiple Choice item, follow the tutorial below. Click on the Next and Back buttons to navigate.

|
|

|
|
|
|
|
Step 1 -
Type the question on the first line, then the answers on the following lines. Each answer should start on a separate line and can be more than one line
The maximum choices possible per item is 8, the minimum is 2. |
|
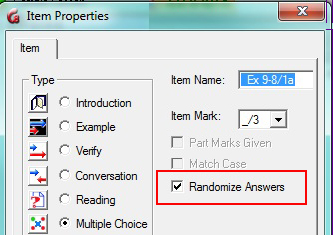
The available choices can be displayed to the student either in the order they were typed in or in a random order to prevent students from all having the same potential answers displayed.
By default, they are randomized.
To remove the randomize option, open the item's properties box and remove the check mark in front of the Randomize Answers option.
Note:
If you select to keep the Random option, do not add extra text under the last selected answer. Any line of text included below that last answers will also be randomized as part of the answers and may be shown out of context.
For this type of item, the computer is capable of deciding the correctness of the student's answer. This item is visible from the Tracker screen and can be marked. If a correct answer is selected, the computer awards the full mark. If incorrect, a mark of zero is awarded.
During a test, if a Multiple Choice item has no mark it is treated as a practice question. In this case, the prescribed type of feedback is given to the student.
Feedback is disabled for a Multiple Choice item if it has been assigned a mark in the Tracker.
The screenshot below shows the Planner view of a Multiple Choice item with text, audio and graphic.
Move your mouse over the image to toggle between this view and the same item in student mode.
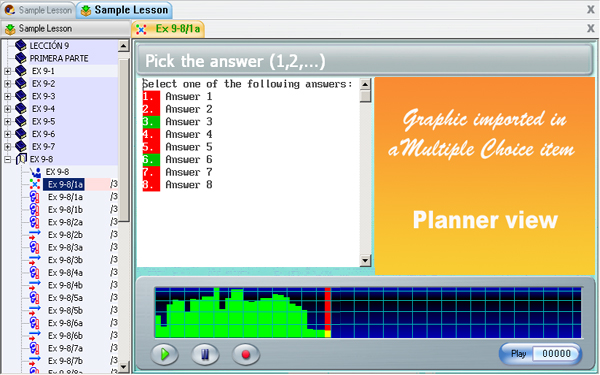
The Fill in the Blanks Item
Must include: text
May include: audio, graphic, video
Requires student to: Write an answer in the blanks provided.
This type of item must contain text. Part of the text is blanked out when it is displayed to the student. The student is required to fill in one or more highlighted blanks with the correct answer(s).
|
|
|
|
|
|
|
Step 1 -
To create this type of item, first type in the text, including the hidden text that specifies the correct answer. |
|
This item it is visible from the Tracker screen and can be marked. The computer is capable of deciding the correctness of the student's answer. If a correct answer is entered, the computer awards the full mark. If incorrect, a mark of zero is awarded.
The instructor can at any time change the mark assigned by the system.
It might be necessary that the case (upper or lower) of the text be respected as part of the answer. If in that item the upper case and lower case is considered important to the answer, select Match Case in the properties dialog of the item. When that option is checked, answers will be case sensitive. This option is off by default.
When marking a fill in the blank question that includes more than one blank, the computer can assign partial marks if the Part Marks option is checked in the properties dialog of the item.
Note:
Part Marks and Match Case are set for each item, not for the entire Planner. If all Fill in items in a Planner need to be case sensitive, this option will have to be checked in each of these items as they are created.
The screenshot below shows the Planner view of a Fill in item with text audio and graphic.
Place the mouse cursor over the image to toggle between this view and the same item in student mode.
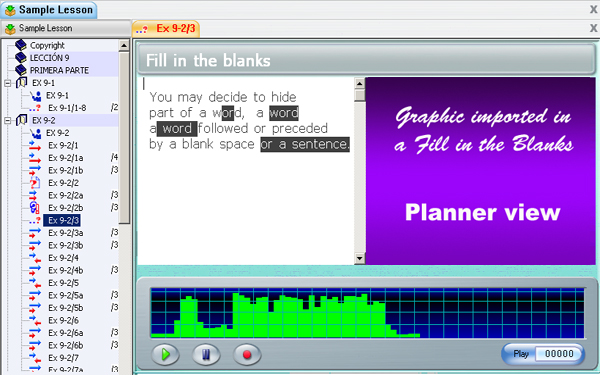
The Writing Item
May include: audio, graphic, video
Requires student to: Type a written answer
This item does not display text. Any text that is entered by the instructor in the Planner will be discarded in the student's interface.
The Writing item requires a written response from the student, either in the form of a dictation or a question. The recording button is deactivated since no recording can be done. The audio graph is present with the instructor's recording, thus allowing the student to listen to the instructions or the dictation over again.
The student is asked to type an answer to the question. The text is available to the instructor through the Tracker and may be marked.
The screenshot below shows the Planner view of a Write item with text audio and graphic.
Place the mouse cursor over the image to toggle between this view and the same item in student mode.
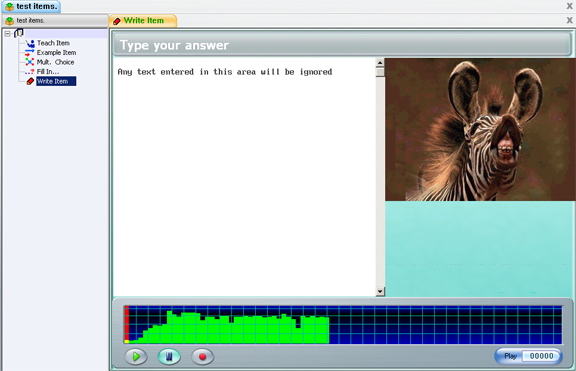
The Conversation Item (C)
Must include: audio only
Requires to be paired with an 'E' or a "V" item
Does not present an interface to the students.
The Conversation item can only contain sound and is not visible to the student. (It has no interface). This item must be used in conjunction with Example or Verify items to form a dialog, and can only be paired with either one of these 2 items types. The Conversation item is used to play the first part of a conversation, the Example/Verify item to play a suggested response. The students record their response, and then can play the complete conversation.
The Conversation item must therefore have sound. Graphics and text are ignored. However, the Conversation item does not appear in the student menu, thus is totally transparent to the student. Only the name of the following Example or Verify item is listed on the student's menu as illustrated below:
| Conversation Items in Planner Menu |
Same Conversation items in student menu |
Note |
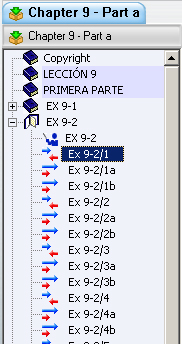 |
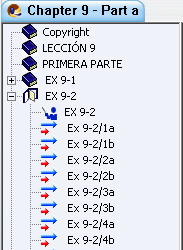 |
Items titled 9.2/1, 9.2/2, 9.2/3 9.2/4 are Conversation items. They are paired with the items that follow directly (9.2/1a, 9.2/2a, ..., etc) and will be played when these items are selected |
Since the student cannot record an answer in a Conversation item, this item is not visible on the Tracker screen, though the corresponding Example item is. It is only the corresponding Example item that can be marked.
Assigning Marks to Lesson Items
When a lesson is used for test purpose, it might be a requirement to score the tests. Although the correction of the item and the marking is done from the tracker, the mark the item will be scored out of is assigned in the Planner, on a per item basis.
These settings can be added or changed at item creation or any other time by instructors.
The mark that the item will be scored out of is assigned from the Item's Properties window.
Right click on the item to access the contextual menu, and then select Properties to access the settings.

In the Item Mark field, in the right corner of the Properties box, select the mark the
item will be scored out of. These marks are pre-defined by the system.
_/8 means that this item will be scored out of 8 points.
Part Mark Option
When the student answers a Fill in the blank item incorrectly, the computer assigns the mark of 0 to the student. If this Fill in the Blank includes more than one blank, and only one of these blanks is incorrect, the mark assigned is also 0 ignoring how many blanks were answered correctly.
The Part Mark option allows the system to assign to the student part of the mark if the answer given is partially correct.
For example, consider a Fill in the Blank item that includes 3 blank fields and has an assigned mark of 3. The student answers correctly 2 out of these 3 fields, selecting Part Mark would result in a 2/3 score for the item.
If the Part Mark option had not been set for the same item, the student score would otherwise be 0/3.
Since Can-8 scores the answers rounded to an integer number, the results are more accurate if the instructor assigns a score for the item that is dividable by the number of blanks. For example on an item with 3 blanks, assign _/3, _/6 or _/9 to have a more accurate score.
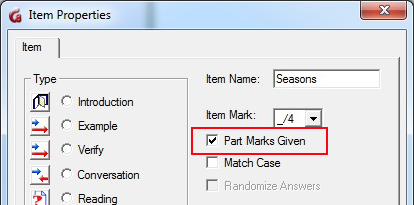
The Part Mark option is defined per item, not by Planner, which means that in the same lesson, you may chose to have some items set with a part mark, and some without.
The Part Mark option is set in the item's Properties window. Click on the check box to select it.
Note:
By default, the part mark option is off when items are created.
This option is only available for Fill in the blank items.
Although Fill in the Blank and Multiple Choice items are corrected by the system, instructors can overwrite the system mark and assign a mark of their choice instead accepting the mark by the system.
CAN-8 Virtual Keyboards
For some languages, the characters required to type in that language are not available on the standard keyboard. In other languages, such as Chinese or Japanese, there are more characters than may fit on a regular keyboard. In such cases, there are additional programs or interfaces that may run on the system known as Input Method Managers.
Alternatively, in some languages where all the characters needed can fit on a keyboard layout a virtual keyboard might be simpler to use; they can be edited to suit the needs of one specific lesson or language.
CAN-8 provides 20 pre-defined Virtual keyboards that can be used in any Planner
and by students who use that lesson.
These keyboards can be used as is or can be edited by the lesson author, and more can be created if needed.
Virtual keyboards that are created or edited can be saved for a one-time use in a lesson, or saved globally so they remain in the CAN-8 system and are added to the list of existing keyboards to be used with other lessons.
The following sections will describe the steps to select, edit and use virtual keyboards as an instructor in a Planner. Details regarding using virtual keyboards in the student program are located in the Virtual Keyboard section of the Student Interface chapter.
Selecting Keyboards
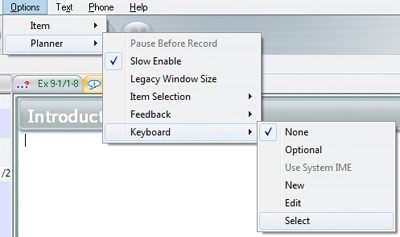 |
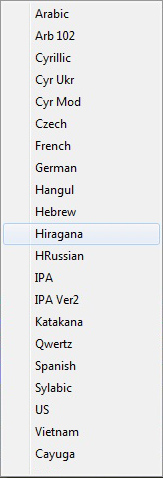 |
From the menu bar, go to Options > Planner > Keyboards, and then Select.
This will display the list of the pre-defined virtual keyboards as well as any extra keyboards that have been created by course authors and saved for global use.
Click on the one that you wish to include to the lesson.
As soon as the Keyboard is selected, it can be used in the Planner. When the Planner is exited, this keyboard is saved with the lesson and will show in the student program for items in that lesson that require typed input. |
Using Keyboards
Unlike the student program, virtual keyboards in a Planner are always optional. The instructor can toggle at anytime between using the virtual keyboard and the system's keyboard.
The virtual Keyboard has two states:
When the keyboard is deactivated, its interface is semi-transparent.
| Active state |
Deactivated state |
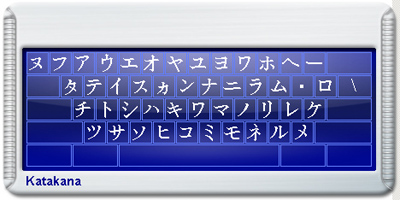 |
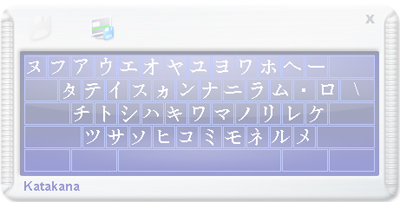
|
- When the virtual keyboard is deactivated, keystrokes from the computer's keyboard display in the language defined by the operating system.
- When the Virtual Keyboard is activated, keystrokes from the computer's keyboard show as the corresponding characters in the virtual Keyboard.
To use the virtual keyboard, the instructor types on the regular
physical keyboard and the characters shown in those key locations
will be displayed as the entered text.
Alternatively, the instructor can also click directly on each key of the on-screen keyboard with the mouse to enter the character displayed.
To activate the virtual keyboard, simply place the mouse cursor in the text area to define where the text should be placed, then click on the Virtual Keyboard's interface. As the keys are being pressed on the physical keyboard, they appear highlighted blue on the onscreen keyboard.
To deactivate the keyboard, simply click on the text anywhere but on the virtual keyboard, and the keyboard will return to its semi-transparent (deactivated) state.
Combinations of the Shift, Alt, and Ctrl keys can be used to select from up to eight different levels of layout in one keyboard.
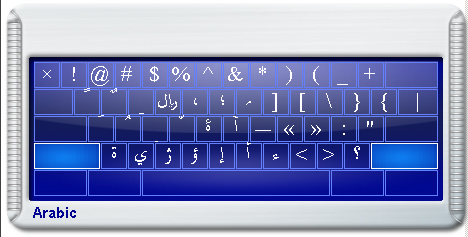
A mouse click on one of these three keys locks the key down so that the mouse can be used to select another key. The Caps Lock key is used to lock whatever combination of shift keys is currently selected. Pressing Caps Lock again will unlock the shift keys.
Right clicking on a key of the virtual keyboard will display a window with the available character variants. The Instructor can then select the appropriate variant by clicking on it. It is also possible to type the basic character in the text area, then right click on the typed character, and then select one of the variants presented.
Creating/Editing Keyboards
In other languages than the ones provided, it is sometimes necessary to define some or all of the keys of a keyboard with different characters.
NOTE:
If this new Keyboard is intended to be accessible in all lessons by all instructors and be added to the existing list of available keyboards, you MUST sign in as MASTER before proceeding with the steps below. (see the Saving Keyboards section for more details)
The procedures to create a new keyboard or edit an existing one are similar.
- To create a completely new keyboard, from the menu bar, go to Options > Planner > Keyboards, and then New.
A regular QUERTY layout keyboard will be displayed in the Planner.
- To change an existing keyboard, from the menu bar, go to Options > Planner > Keyboards > Select and then chose one of the existing keyboards.
Once displayed the keyboard characters may be changed by:
- Right click on the key that is to be changed.
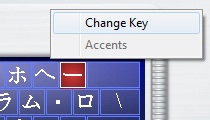 Select Change Key from the pop up menu. Note that while the key is being edited, the key displays on the virtual keyboard as red.
-
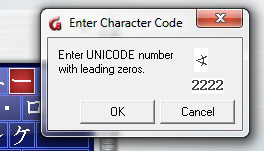 In the Character Code window that appears, enter the hexadecimal, 4-digit Unicode number corresponding to the character desired to be on that key.
(Unicode character maps and information may be found at www.unicode.org)
- Select OK and the new character replaces the previous one on the keyboard. The key background becomes blue again.
Repeat these steps for every key that needs to be changed.
There are 8 levels to a CAN-8 keyboard:
- The main one - Unshifted - Typically used for lower case characters
- The SHIFT - Typically used for upper case characters
- The ALT
- The CTRL
- The SHIFT + ALT
- The SHIFT + CTRL
- The ATLT + CTRL
- THE SHIFT + ALT + CTRL
You can change or add characters in any of these 8 levels.
Once the new keyboard has been created or edited, the changes have to be saved for the new keyboard. Otherwise, when the Planner is exited, the changes will be discarded.
Saving Keyboards
By default, when the instructor adds a keyboard in the Planner, it is saved in the lesson and will be displayed on the student's screen in any item requiring typed input.
However, if changes have been made to the Virtual Keyboard's layout, these changes will have to be saved to be displayed to the student or to be available to the instructor on subsequent access to the Planner.
There are 2 options to save the changes:
- The first one is to save a keyboard that has been customized for a specific lesson in that Planner only. In CAN-8 terms, that Keyboard is saved Locally.
- The second option is to save this keyboard Globally.
This assigns a name to the keyboard and it may then be selected by other
instructors, as part of other lessons from the list of keyboards using
its new name.
Saving Locally
When saved locally, the keyboard is saved in the lesson it was customized for. This implies that this keyboard will not be accessible in any other Planner.
 To save locally, select the icon located on the top left corner of the keyboard. This icon is only active once a change has been made to the keyboard. The changes are saved as soon as the icon is pressed.
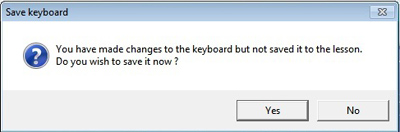 If you have changed the keyboard but not saved the changes a reminder
box will show when exiting the Planner.
If the changes to the keyboard have not been previously saved, a prompt will window will offer to save or discard the changes.
If you have changed the keyboard but not saved the changes a reminder
box will show when exiting the Planner.
If the changes to the keyboard have not been previously saved, a prompt will window will offer to save or discard the changes.
Note:
This option is available to users with an instructor ID and to the system supervisor (MASTER ID).
Saving Globally
If the keyboard that has been customized or designed is intended to be used in several lessons, then it has to be saved globally.
Saving the Keyboard globally will append it to the list of CAN-8 pre-defined keyboards so that it can be included in any lesson.
This option is available ONLY to users signed in with the MASTER ID.
 Select the global icon
- In order to be appended to the list this keyboard must have a name.
At the prompt, type a name for that new keyboard in the Title dialog, then select OK.
- The keyboard can now be retrieved from the keyboard list in any lesson using that name.
Note:
The global save is only available to the system supervisor. It is not displayed on the keyboard if the user signed in with an instructor's ID.
If a keyboard was selected and then saved globally without making changes, the keyboard name will show in the Title field. If you select OK without changing the title field, you will overwrite the original keyboard the CAN-8 system came with. A warning will be issued before the changes are accepted.
If you name a keyboard the same as one of the existing keyboards you will overwrite the existing keyboard with the changed one. Care should be taken not to overwrite keyboards indiscriminately.
If a keyboard was previously edited by a user with instructor privileges only and then saved as part of a lesson, the system supervisor can sign in later and access the lesson to save the keyboard globally.
Deleting a Keyboard from a lesson
By default, if an instructor opens a keyboard in a lesson, that keyboard will be saved in that lesson and presented to the students entering any item requiring text input in that lesson.
If the instructor only needs a keyboard to create the content of the lesson, but does not want the students to see or use that virtual keyboard simply select the X or exit button on the upper right corner of the keyboard before exiting the Planner.
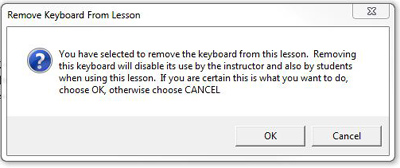
At the warning dialog, select OK to confirm the Keyboard's deletion.
Note:
If the keyboard was changed and the changes were not save globally and the keyboard is deleted, the changes made will be lost.
Optional Keyboard
By default, the Virtual Keyboard that is selected in a Planner is the only one the student can use.
If it is intended that the students use both keyboards, the system keyboard in the language defined in the system, and the virtual keyboard, with a different set of characters, the virtual keyboard must be set as optional.
The students can then toggle between both keyboards by simply activating and deactivating the onscreen keyboard by clicking on it to select it, or clicking elsewhere to deactivate it in the same manner as it is used in the Planner.
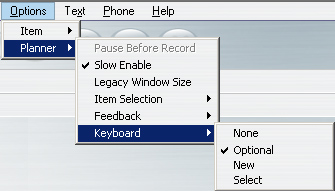
Once a keyboard is selected in the Planner, select Options > Planner > Keyboard from the menu bar and then click on Optional. A check mark will show in front of the word Optional to indicate this has been set.
Planner Options
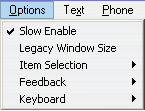 The Options menu is accessed from the menu bar. Planner options are only active when a Planner is open on the screen and greyed out otherwise.
As opposed to item options, which only affect the behaviour of the one item they are set for, Planner options apply to the entire Planner therefore they affect every item belonging to that Planner,
These options control:
Slow Enable
This option is selected by default.
 It allows the students to see the Speed Control Slider on the volume grah. The student can then listen to the audio at a slower or faster speed. The pitch of the audio is not affected by this option.
To remove this option, click on the Slow Enabled menu entry to uncheck it.
Legacy Window Size
This option provides screen size compatibility with lesson created in previous versions of CAN-8.
It reduces the item display area to the size that the lesson was originally designed for, thus keeping the text format as originally planned if hard returns were not used to create the item.
To add this option, click on legacy Window Size in the Planner Options menu. A check mark will confirm its On state. This option should never be used on new lessons.
Item Selection
Determines the display format and the order in which the items are presented to the student.
There are 4 possible settings:
These settings will apply to a lesson set to either Practice or Test mode.
The illustration below shows how these options affect the display of the items:
| Click on one of the button below to view the same lesson in the different modes:
|
|
|
Menu
This is the default mode when a lesson in the Planner is created.
In this mode, the tree menu is displayed when the students enter the lesson (see illustration). The students can view and select items in the order they chose, as many times as they need.
In this mode, when the lesson is set to Test, students can re-start the test and re-do the items as many times as they want to.
Sequence
If Sequence is checked, the treeview menu is hidden. The lesson is displayed on the entire interface.
The items in the lesson are presented to the students in sequence and in the order they are in the Planner, until the end of the lesson is reached.
Note
Students do not have the option to choose the items they want to do first.
When the lesson is set to Sequence and Test mode, once the students have answered all the questions, they can no longer re-access the lesson, nor re-do the items.
In practice or test mode, if the student does not answer the first few questions, then records an answer, and exits before the end of the lesson is reached, only the items that follow the last answer recorded will be presented to the student. However, while in practice mode the student who then reaches the end of the lesson can start again from the beginning. In test mode the student can no longer access that lesson until the instructor deletes that user's data from the tracker or places the lesson in Practice or Review Results mode.
Random
As in Sequence mode, the tree menu is hidden when the lesson is set to random mode.
Random mode changes the order of questions when they are presented to the students. This prevents students who are doing a test in a group setting from easily copying work from other students nearby that may happen to be on the same question. It is also useful for tests that students might be taking several times and who may remember the order of the answers.
Note:
If the lesson is divided into groups of items (or sections), each separated by an Introduction item, the exercises within that group will be presented randomly until they are all answered.
A student must answer all the items in a section before moving to the next section. Pressing Next without answering a question results in the item still being available for random selection and the student will be returned to that item after other have been answered. The student will not be presented with another section of items until all items in the current section are answered.
Once all the all the items in a pool have been answered, the system proceeds to the pool of items found after the next Instruction item. In this manner, progress is sequential from pool to pool until the lesson is completed.
Conversation and Teaching items always will appear before the randomly selected item they are paired with.
Enable Back Button
This option enables students to return to a previous item they have seen.
By default, this option is on.
Deselecting this option prevents the student from returning to the previous item unless the lesson is set to Menu mode since disabling the back button does not prevent the user from accessing a previous item by selecting it from the menu.
Feedback
Three options are also available from the Feedback menu:

These options apply to Fill in the Blanks and Multiple Choice items only.
The feedback options usually apply when the lesson is in practice mode.
Feedback is not offered in a lesson placed in test mode unless the questions have no mark assigned.
No Feedback
Does not provide students with any indication if their answer is correct or incorrect. Once the answer is entered, the students are prompted to click next.

Incorrect Answer Feedback
Indicates if the answer was correct or incorrect only. Does not provide the correct answer.
The information is displayed beside the next button:

Full FeedBack
It is the default option. It indicates if the question was correct or not and displays the correct answer if the question was answered incorrectly.

Corrected items are shown on a green background, under the student's answers.
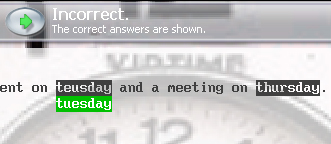 In this example, the student typed two answers.
- The first one is wrong, and the green box under the student's answer shows the correct answer.
- The second answer is correct. There is therefore no correction offered.
Keyboards
CAN-8 Virtual Keyboards are defined per Planner and, if selected, will appear in all items in the same lesson that require typed input.
Only one Keyboard can be defined per Planner.
The 4 available entries for the Keyboard option are:
- None (default option)- No virtual keyboard is selected in the lesson.
- Optional- allows the student to toggle between a Virtual Keyboard and the system's keyboard.- This option is only selectable if a Virtual Keyboard is present in a lesson.
- New- If selected, provides a template that will be used to design a new keyboard.
- Select- Displays the list of all existing Virtual Keyboard in the system available to the instructors.
The procedures to create, edit, use and save keyboards are available in the Virtual Keyboard section of this manual.
Item Options
Item options are set on a per-item basis, therefore only affect the item they have been set for. While most are located in the Properties box of the item, the timers are found under Options > Item in the menu bar.
To access the item's Properties, in the Planner's menu:
- Select the item by clicking on it with the mouse.
- Right click on the item.
- In the pop up menu, select Properties.
- The dialog as seen on the left will be displayed.
Some item options are specific to particular types, and are not available to all item types.
Item Marks
As seen in the Assigning marks section, it selects the mark the item will be scored out of.
This option is only available for items requiring a student answer, therefore is greyed out for Introduction, Teaching and Conversation Items.
Part marks Given
As discussed in the Assigning Marks section this option is only available for Fill-in items. It is therefore greyed out for all other items.
This option divides the final score for the item by the number of blanks in the question.
When this option is not checked the score for this item type is assigned for all blanks. If one of the blanks is incorrect, the entire item is considered incorrect. The score assigned is 0.
If however, that option is checked, and there are 2 blanks in the question, each blank is scored on 1/2 the mark assigned. (if there are 3 blanks, on 1/3 of the mark assigned, etc,..)
See the Fill-in section for more details.
Match case
This option is only available for Fill-in items.
At certain times it may be important that the exact upper and lower case
characters be used to complete the answers in a fill-in question.
Normally, upper and lower case are considered the same and will be
marked correct if either case is used.
While this option is checked, correct answers will be case sensitive and
must match exactly.
This option is off by default.
Randomize answers
This option is only available for Multiple Choice items.
To prevent memorization or copying of answers the available choices for
multiple choice questions are normally randomized. This means
that each time the user enters the exercise, the same choices are displayed, but they will not always be displayed in the same order.
This option is on by default. To remove the option, uncheck it in the item's Properties Box. The item's choices will then always be given in the same order as shown in the item in the Planner, each time the student encounters this question.
Note:
This is a per item option. It will only apply to the item the option is set in.
This is a per item option. It will only apply to the item the option is set in.
This is a per item option. It will only apply to the item the option is set in.
There should not be any additional text or characters placed below the last choice of the multiple choice question in the Planner when using the Randomize Answer option, or the extra lines of text will also be randomized along with the last choice shown in the question.
Play limit
This option limits the number of times the student can listen to the audio included in the item during a test.
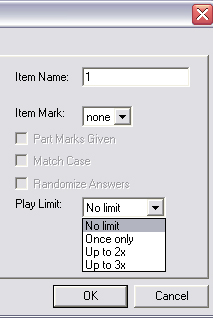 There are 4 options available.
- No limit is the default one. The student can listen to the audio in the item as many time as necessary
- Once only limits the audio to one playback.
- Up to 2X and up to 3X limits the pay back of the audio to 2 or 3 times (respectively) or less.
Notes:
This option only applies when the lesson is placed in TEST mode. In Practice and Review results mode, the student will be able to listen to the audio as many time as needed even if this option is set.
During playback, the student cannot pause the audio, or go back to a part of the audio already played.
If the Slow enabled planner option is on, the students will be able to either slow down or accelerate the audio playback.
If the text and sound are synchronized, the text will highlight when the sound is played, but clicking on the highlighted text will not play the audio.
Once the limit of playback times has been reached, the student can no longer listen to that audio for the remainer of test, even if the Back option is available and the student can open that item again.
This option is reset everytime the student starts the test again.
This option is available in all item types, including Instruction items.
The Timers
The system has the capability to impose time limits on individual questions or parts of lessons. This is useful for timed tests.
Timers are set as per item options, and are accessed via the Options > Item > Timer menu in the menu bar. The timer option is only accessible when a planner is opened and the item displayed. It is otherwise greyed out.
Timers are capable of:
- Limiting the maximum length of a student recording.
- Limiting the time a student spends on the item.
- Enforcing automatic sequencing through the items.
- Preventing the student from selecting other items.
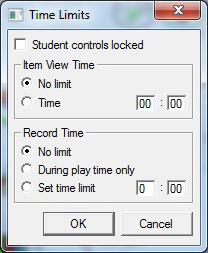 The timer's settings dialog box is divided in two sections:
- The Item View time section - Defines how long the item is displayed on the student screen.
- The Record time section. Specifies the length of the recording allowed.
The content of these 2 sections will vary depending on the item that is currently opened, as some options are not relevant to all item types.
Only one option per section can be selected at a time, however, the pairing of different options will result in a different behaviour of the system.
The option students Controls Locked is a separate option that affects the controls only.
Some options are present in both sections. They however have to be defined in both sections, as they only impact the display or the Record time, depending where they are located.
The timer's options vary depending of the item type. Some option may be greyed out or absent if they do not apply to the item type being created.
Timers cannot be added to Introduction and Conversation items.
Depending on the type of item, the timer's Item View Time options are:
- No limit.
- Sound playtime.
- Time.
And the timer's Record time options are:
- No limit
- During play time only
- set limit time
- Recording Time Limit.
The timer's options vary depending of the item type. Some option may be greyed out or absent if they do not apply to the item type being created.
Before proceeding to add a timer to an item, reading through the Timers section in the student chapter is advised.
Student Controls Locked
Applies to: All items that include audio or text except Instruction and Conversation items.
By default this option is off. When a timer is present in an item, the student is allowed to take the item normally. The buttons will function as usually. Recordings and written answers can be redone. The item can be ended with the Next button.
When the Student Controls Locked option is checked, the Control buttons (record, play, next, ...) are de-activated. The student must view the item for the prescribed time at which point the recording begins automatically and proceeds for exactly the time specified. As the timer reaches the end, the item is replaced by the next item if there are any, otherwise the lesson is ended.
NOTE:
Selecting Student Controls Locked alters the behaviour of the items and also of the other timer settings:
If an item includes a Time or Sound Play Time limit and also includes a Record Time Limit with Student Controls Locked, the total time for the item becomes the sum of the selected time limits.
For items that require recorded input, the recording time limit MUST be set to a non-zero value.
Item View Time options
No Limit
Apply to: All items except Instruction and Conversation
This option disables the timer and is the default mode. The student can spend as much time in the item prior to making a recording as desired.
Sound Play time
Applies to: All items that include audio except Instruction and Conversation items
The Sound Play Time option limits the display of the item to the time required to play the item sound. That is, when the sound ends, the item limit expires and the item is repklaced by the next one.
By default the student is allowed to take the item normally. The buttons will function as normal. Recordings and written answers can be redone. The item can be ended with the Next button or other items can be selected.
However, when the Student controls locked option is checked the controls are disabled. The buttons will not work. The student must listen to the item until the complete recording has ended.
Note:
This option limits the time spent in the item to the time that the instructor audio would play. On it's own this option is well suited to automate an item that does not require a recorded answer (teach, Multiple choice, Fill in the blancs, Dictation items). The student will be required to listen to the instructions or type an answer while listening to the instructor's audio.
If located in an item that requires a recorded answer, it should be paired with one of the options from the Recording Time section.
When Student Controls Locked is checked, and a Record Time Limit is set, the total time for the item is increased to the sum of the two limits to allow the student to make a reasonable recording.
Time
Applies to: All items except Instruction and Conversation
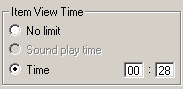 If Time is selected, the total time spent by the student on the item is limited. The limit is explicitly set by filling in the minutes and seconds in the dialogue box.
In this illustration, the student can only spend a maximum of 28 seconds in this item.
NOTE:
If the time counter is not paired with any other option, the student is allowed to take the item normally. The buttons will function as normal. Recordings can be redone as long as it is within the time limit set. The item can be ended with the Next button before the time limit set.
If paired with the Student Controls Locked option the following applies:
The student
will be locked in the item until the time set is expired after which the item will be replaced on screen by the next one.
If a Time value is set for a shorter duration than the length of the audio to be played in the item, the item timeout will be extended until all the sound can be played. (In other words, the timer will act as if Sound Play Time was selected.)
For items that require recorded input, the Record time limit in the Recording Time section MUST be set to a non-zero value.
Recording time options
No Limit
Default setting.
When this option is checked, there is no time limit set for the student's recording other than the system's limit.
Recording Time Limit
Applies to: All items requiring a recorded audio answer.
Does not apply to: Multiple Choice, Write, Fill-in, Instruction and Conversation items
Checking Record Time Limit limits the length of the student's recording to the time specified
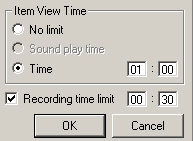 The limit is explicitly set by filling in the minutes and seconds in the dialogue box.
Used alone, this option allows the student to record as often as desired, but will limit the recording length to the time specified.
NOTE:
When the Record Time Limit and a Time Item view counters are used together in an item, the behaviour of the item will be different if the Student Controls locked option is checked or not as follows:
If the Record Time Limit and Time counters are set without the Student Controls Locked, the Item Viewtime limit must be greater than the recording limit. If the time allowed is less then the recording time limit, the recording time will be cut off.
If the Record Time Limit and Item ViewTime counters are set with the Student Controls Locked, the total time for the item is the sum of the two limits.
During Play Time Only and Set Time Limit
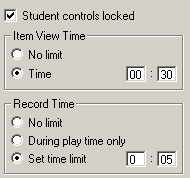
-
These options are only applicable in a Simultaneous items as it is the only item that permits the student to record while the instructor audio is playing.
- If during Play Time is checked, the recording time allowed in this item is equal to the length of the audio sample recorded by the instructor. As soon as the instructor audio stops, the recording time for the student also ends.
- if a Set time limit is defined, the recording time is equal to the limit defined in minutes in seconds.
Note:
If used with Student Controls Locked any amount of extra time set in the Item ViewTime field is added to the time given for recording
Care should be taken in cases where the student controls are not locked and a value is set in the Item ViewTime field. If the time is shorter than the recording time there will be no opportunity for the student to complete a recording.
Changing User's Preferences
The Planner's default settings are:
- Users are prompted to save or abandon changes made to items every time they exit the items.
- When items are added in the tree menu, they remain closed until the user double click on it.
These settings can be changed by the user during or outside a Planner session and take effect immediately.
To change the default, select Edit > Preferences in the menu bar and click on the Planner tab in the dialog box
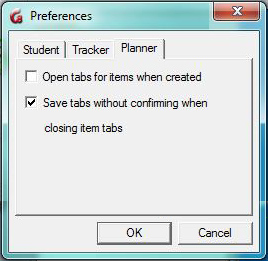
- Open Tabs For Items When Created:
- If this option is unchecked, when items are created in the tree menu, the user must then double click on the newly created item to open it so that content may be added.
- If checked, the item opens automatically at creation.
- Save Tabs Without Confirming When Closing Tabs:
- If left unchecked, the user must confirm each time to save the changes made to items after each tab is closed.
- If checked, the Save prompt does not appear when exiting an edited item and the item is saved automatically.
Once the preferences have been adjusted
select OK to confirm the new settings.
Back to top of page