Introduction
This chapter describes the tools available to administer and manage the CAN-8 system. Some of these tools are provided exclusively for the System Supervisor, the rest is available to the System Supervisor and the instructors:
| Tool: |
Description: |
Available to: |
| System Admin ID |
Instructor ID |
| Menu management |
Allows to create new menu items, change existing items and re-arrange the content of the menus seen by all users. |
Yes |
No |
| System Administration:
|
These tools tailor CAN-8 . system |
Yes |
No |
| Specifies how information is displayed on CAN-8 menus and control menu access |
Yes |
No |
Allows the System Supervisor to create, change or delete a list of users (students and instructors) and classes using a tab separated text file.
Also used to refresh the system of all users and data at term end or when desired |
Yes |
No |
| Class Functions |
Organizes students in groups for easier management. |
Yes |
Yes |
| Registration Functions |
Used to create, edit or delete users. |
Yes |
Yes |
| Note that the System Supervisor can ONLY create instructors using that tool, while instructors can only register/edit/delete students. |
| Reports |
Display a log of the activities recorded in CAN-8 per user, date, or class group. |
Yes |
Yes |
System Attributes
About Attributes
The System Attributes tool defines how the users of the system get to see their choices in the menu. System Attributes define how the information is structured in CAN-8 menus and restrict/allow menu access on a per user or per class basis.
System Attributes give the System Supervisor and instructors control over which menus are displayed to the students, and therefore make the menu navigation simpler for all users.
For example, they can be used to hide a submenu that includes tests and thereby
prevent students accessing them prior to the examination day.
They can also change the layout of the menu a user can see depending on which class that user belongs to.
Although other tools are available in CAN-8 to show/hide specific menus to the users, the attributes allow a much more flexible menu display.
NOTE:
 Because menu items, classes, and users are created with all of the attribute positions preset, when a new attribute entry in the Attribute column is created in a formerly blank space, this entry will be added to all existing menu items, classes and users. It is therefore best to have a well-developed plan of attributes before creating menu items, classes and users.
Although it is possible to design a menu structure at a later date, when the menus have already been populated, it will require much more time since each menu will then have to be edited to reflect the new design.
System Attributes Assignment Sample
The first step when defining system attributes is to create a layout of the system's organization.
This layout is unique to the need of each site, and therefore can only be created by the site administrator in consultation with the instructors.
The following sample is only meant to illustrate how attributes are used.
Site A offers several language courses, each language divided by fluency level. Users progress over the sessions from Level 1 to 4:
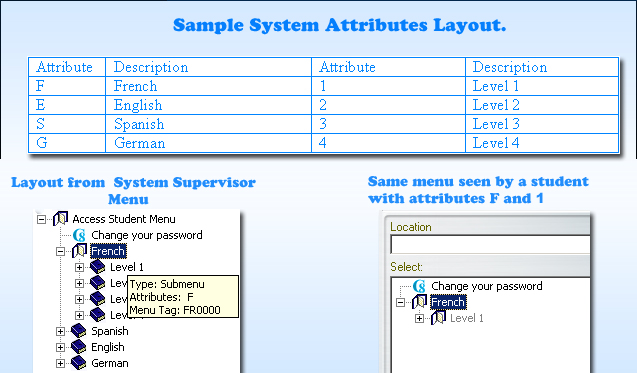
When each menu is created, it is assigned an attribute. All submenus and lessons associated with that menu inherit the attribute(s) for that menu. For example, in the sample above, the English menu is assigned attribute E and the French menu is assigned F. The Introductory level submenus for both languages are assigned the attribute 1, while attribute 2 is assigned to LEVEL 2, and 3 to LEVEL 3. When students are registered, they are assigned the attributes for the menus that they will use. For example, a student with the attributes E, 1 will see only the English menu and the LEVEL 1 submenu, while a student with the attributes E, 1, 2 will see both the LEVEL 1 and LEVEL 2 English submenus.
Similarly, attributes can be changed via classes. When a class is created, it is assigned the attributes for the menus that will be used by that class. All students in that class will see whatever menus are associated with the attributes assigned to that class independently of the attributes assigned in their profiles. When users are registered, they are assigned a code for one or more classes. This makes it easy to define which menus a group of users will have. Simply changing the attributes for a class will change the attributes for all students (and instructors) who are members of that class
Defining System Attributes
Although instructors can assign attributes to students and classes, only the System Supervisor can define them or assign them to menus.
Up to 16 system attributes can be defined. Each one consist of a single letter or digit, and of a brief description of the attribute use. The selection of the letter and the description is left to the System Supervisor.
The letters or numbers in the Attribute column are selected as mnemonic aliases for the attribute numbers. A simple system that uses E for English, F for French, and S for Spanish for example is recommended. However, the selection of letters is arbitrary. Any letters or digit can be used to classify the menu items.
Note:
By default, the CAN-8 system comes with one pre-defined attribute (attribute D). It is automatically assigned to all menu items created.
This attribute can be edited/removed at the user's discretion.
To define the system attributes:
- From the Master Menu, choose System Administration then Edit System Wide Attributes.
On a new system, only the D - Default attribute - shows in the list.
- In the Attribute field, type a single letter or digit (1-9) for the first attribute you want to define.
- In the Description field, type a description.
The Attributes appear only on the System Supervisor's screens and the Descriptions appear only in this window.
Note:
It is important to specify all 16 system attributes before you create any course menus, even if the attributes are temporary ones. The reason for this is that attributes added later will automatically be associated with all previously created menus. In other words, it is best to create dummy attributes right at the start and then change them when you need them, e.g., when a new language is added to the system, rather than having to remove the new attribute(s) from the existing menus if you add additional attributes later.
Using System Attributes to hide menus
If all system attributes are removed from a menu entry, (or if no attribute is assigned to the menu at its creation), no CAN-8 user will be able to see this menu EXCEPT the System Supervisor. This can be used as a tool to hide tests or courseware the users are not meant to access.
Removing all attributes from a user's profile (except the System Supervisor) will hide all menus from the user and is not recommended.
Attributes assigned to users can be added, removed or edited via classes.
Managing Menus
About the CAN-8 Menus and Menu Items
User menus are the top-level menus defined for each user role and are pre-defined in the system., i.e., Master is assigned the System Supervisor (MASTER) menu, instructors are assigned the Instructor (INST) menu and students the Student (STUD) menu.
The associated user menu appears when the user logs in to CAN-8. For example, when a Student logs in, the Student (STUD) menu appears.
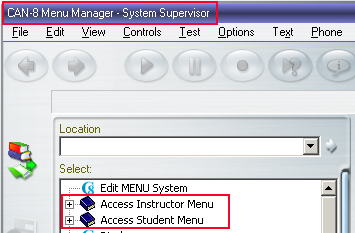
Because of the hierarchy in the privileges, the System Supervisor has access to menu entries located in the System Supervisor's main menu, in the instructors' menu and in the students menu.
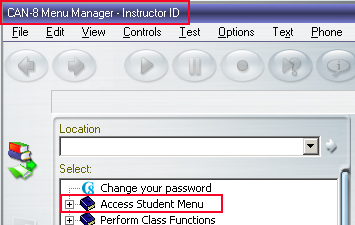
The menu presented to the instructors give them access to all instructors functions and menu entries, as well as access to the student menu. Instructors, unless specified otherwise in their profile, do not have access to the System Supervisor menu.
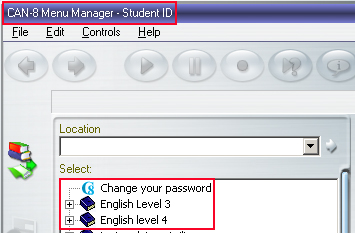
By default, students can only access the menu entries placed in the student menu.
In some cases the user's profile may be changed to only give access to a specific submenu
available on the system. The user's profile can also be edited to give the user access to a higher level menu (Instructors can be for example given access to the supervisor menu), although this is not recommended since the instructor will
be able to see the supervisor functions in the menu, they will not be
allowed to use them. This feature is more often used to restrict access to a specific submenu (students registered for ENGLISH LEVEL 3 in the example above can be restricted to view only this menu entry.)
Users' privileges do not change because of the different menu assignment. A student assigned the Instructor menu can see and access the instructor's menu links, but cannot access any of the functions that come with instructor privileges.
These pre-defined system menus already include certain entries. On a new system, they are the functions such as Register Users or Change your Password.
These entries types are called Internal Command: they link to a system function.
Several other menu types can be created, including submenus, lessons, links to other applications, to a browser accessing a specific URL, or a player for a media file such as a video.
The different types of menu entries are further detailed below.
Editing the Menu
The System Supervisor (signed in as Master) is the only user who can create and edit menus.
No other user on the system is permitted to edit the menu. Although Instructors can create the content of a lesson, the menu entry that linking the lesson to a folder on the server must be created by the System Supervisor.
To add an entry in the menu, the System Supervisor can either:
-
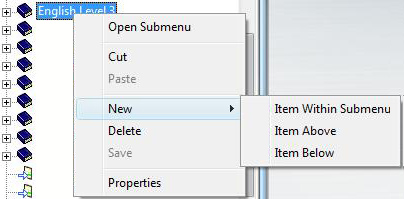
- Right click on the menu area where the new entry should be placed, then in the popup menu, select one of the 3 options available.

- Drag an existing entry from a menu and drop it in another location. The name and type of item being dragged is greyed out and an arrow shows where the item will be dropped when the mouse button is released.
The modified menu entries are displayed in red instead of white.
While in menu edit mode, the menus may be navigated in the normal way. However, the changes will take effect and the modified entries will be functional only once the changes have been saved using FILE > SAVE from the menu bar or Right click > Save. The option to ABANDON CHANGES is also available from the FILE menu if the changes were not satisfactory.
Inserting New Menu Items
As seen above, the menu insert option list may be requested by clicking the right mouse button at the point the user wishes to insert the item.
The new item may be inserted either above or below the currently selected item showing in the menu or placed within the submenu.
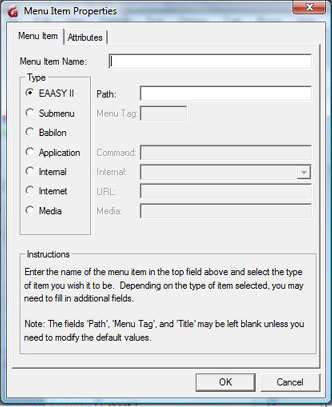
Once the location is selected, the Menu Item Property form will be presented. This is where the item details need to be filled in.
In the Menu Item tab, the fields are as follows:
Menu Item Name
This is the name of the item that the user sees displayed in the menu. This field can include a maximum of 69 alphanumeric characters as well as symbols.
Every menu item must have a name consisting of at least one character.
Type
This selects the type of item that will be inserted. Changing the type also changes the selection of active fields shown to the right of the Type box.
Each menu entry type has a unique function and can be recognized by the icon located in the menu before the title. They are:
| Icon |
Type |
Description |
Corresponding field(s) activated |
 |
EAASy II |
Used for all lessons. |
PATH:
This field indicates the path on the file server that the selected item is to reside in.
This field can be left blank at item creation time, the system will automatically create a path based on some of the letters in the menu item name:
SVI\ABCxxx
Care should be taken when composing paths manually. Be sure that the path points to a valid directory name on the server that you have rights to access. The default path for CAN-8 lesson folder is
SVI\FOLDER_NAME
and should be preferably kept so when entered manually to keep an organized structure.
FOLDER_NAME should be composed of a maximum of 8 characters.
|
 |
Submenu - closed |
For adding customized menus.
Although there is no limit to the number of submenus that can be created, a maximum depth of 10 linked submenus can be displayed at once.
The maximum number of items that can be created per submenu is 255.
Any type of menu entry can be added in a submenu.
|
MENU TAG:
This field can be left blank during item creation. The system will assign a non-conflicting tag for the submenu you are creating.
Tags are composed of 6 alphanumeric characters. They can be entered manually at creation, but cannot be edited after.
If entered manually, a descriptive tag will be easier to remember for future use:
ENGL01 for English Level 1 for example.
This menu Tag can be selected in the user's profile as the INITIAL MENU. In that case, the user, when starting a CAN-8 session, will only be able to view and access this submenu and the menu items it includes. |
 |
Submenu - expanded |
 |
Application link |
Provides a link to external applications. When the path to an application is provided in the path field, and the application executable placed in the Application field, clicking on this menu link will start the application in a different window. |
The PATH and COMMAND fields MUST be manually filled.
PATH: Type in the path to the folder where the Application's main executable can be found.
COMMAND: Type in the name and extension of the executable that you wish to run.(i.e.: notepad.exe)
|
 |
INTERNAL |
Link to one of the CAN-8 functions. |
Internal
Select the command name associated to the CAN-8 function you wish to create a menu item for.
The complete list of all available internal commands can be accessed via the dropdown selector. Click on the command to select it.
|
 |
Internet link |
Opens the default browser and links to listed site |
URL
Type in the URL of the website you want the user to reach. |
 |
Media link |
Provides a link to the default media player on the workstation. When selected in CAN-8, this entry will open via the default media player any file the media player supports. (Audio and/or videos) external applications. |
MEDIA
Type in the path to the media.
This path must be valid on all workstations.
If this path points to C:\AUDIO, all workstations have to have an AUDIO folder on the C drive, and if it points to F:\AUDIO where F is a network share, all stations must have a mapped drive named F pointing to the drive where the shared AUDIO folder is located. |
In the Attributes tab:
You will find a list of all the system attributes. By default all available attributes are selected. This tab is where the access attributes that are used to determine if students are able to see the item are defined. Deselect the one you wish to remove from the new menu entry.
Linking to an Existing Menu entry
Linking to an Existing Submenu
When a submenu item is created, it is given a unique tag that the system uses when referring to that submenu.
This tag can be used to refer to a menu
- From another menu
- From a user profile
It is therefore possible to refer to an existing submenu and its content from several places in the menu system by using the same Submenu Tag. The Class Functions submenu is an example of that. It is present both in the System supervisor's menu, and in the instructors menu.
To place a copy of a submenu in another area of the menu system (for example, a submenu in the instructor's menu and a copy of this menu in the students' menu), you must first create the initial submenu, note its menu tag, then create a second submenu elsewhere in the menu system and assign it the same menu tag as the first one. The system will recognize the menu tag as not being unique and warn you that the tag you wish to use already exists, then offer you the choice to either enter another unique tag, or keep this tag and be linked to the existing submenu. If you choose to link the submenus, then the new submenu will reference the content of the first one: Every item included in the original submenu, no matter its type, will be present in the linked submenu.
Note:
When a submenu that includes lessons is copied to another part of the menu system, the lessons' path still points at the original lesson folder. It is only the link to the lessons that has been moved.
Therefore any change made to the lesson's Planner or state in the linked submenu will show as well in the original lesson.
To make a copy of a lesson that can be edited without changing the content of the original lesson, you must first identify its folder's path on the server, make a copy and rename that lesson folder on the server machine and then link to this new folder.
Some submenus have been previously created and come with the CAN-8 system. They group the available Internal Command type items by function and by hierarchic rights so that the links don't have to be manually recreated every time.
Submenu Tags that are already in the system include:
- MASTER
The Master Id is started in this menu. It includes Class Functions, Register Users (instructors), Access Instructor Menu, Reports, and System administration.
- INST
Instructors are normally started in this menu. This menu includes Register Users (students), Class Functions, Change Password, Reports, and Access Student Menu.
- STUD
Students are normally started in this menu. It only includes Change password by default. This menu is later populated with lessons.
- REG
This is a submenu used by the System Supervisor to register instructors and by instructors to register students. It appears both in the System Supervisor's menu and in the instructors' menu.
- CLASS
This submenu is used to edit class information. It appears in both the System Supervisor and instructors' menus.
- REPORT
The REPORT submenu appears in both the System Supervisor and the instructors' menu and accesses information about the progress of students. It includes both the Detailed and Summary report commands.
- ADMIN
This submenu contains entries that have a global effect on the operation of the entire system. It only appears in the System Supervisor menu and the commands it includes can only be used by the System Supervisor.
Linking to an Existing Lesson
As with the submenu, it may be necessary to add a menu item that links to an existing lesson. For example, while a lesson is being developed, it can be placed on the instructor's treeview so that the students do not access it. Once completed and ready to be used, a link can be added to the student's menu to make it visible to them.
For a lesson, the menu item link is made by creating a new EAASy II item and copy/pasting the path from the original lesson properties form into the Path field of this new item.
Note:
When a lesson is copied to another part of the menu system, the lesson's PATH still points at the original lesson folder. It is only the link to the lessons that has been moved. Therefore any change made to the lesson's Planner or lesson's state in the copied link will show as well in the original lesson link.
To recreate a true copy of a lesson that is not linked to the original, the lesson folder must be first copied and renamed on the server machine, then the path to the new lesson edited to point at the new folder name. This results in an exact copy of the lesson, AND changes done to this new lesson will not be reflected in the original lesson.
Class Functions
About Classes
Classes are virtual grouping of students provided to ease their management.
Using classes, an instructor can:
- start a test for a group of students as opposed to one student at a time.
- limit the display of all answers in a Tracker to only the display of the users belonging to a defined group
- control the attributes assigned to a group of user profiles, thus limiting the menu access for that group of users.
Important points to remember about classes are:
- The System Supervisor and the instructors can create classes.
- Students can belong to several classes.
- Classes can ADD or REMOVE attributes from a user's profile.
- When students belong to several classes, students attributes are managed by the first class listed in their profile.
- Instructors can belong to classes as well.
- Instructors who do not belong to any class can use the VIEW > BY CLASS option in the Tracker. They will have the choice to view any of the existing classes and can view all the users registered in the system, even those who do not belong to any class at all.
- Instructors who belong to one class will only see the users in that one class in the Tracker. They will not be able to see any of the other students registered in the system.
- Instructors who belong to several classes can use the VIEW > BY CLASS option, but only have the choice of viewing one of the classes they belong to. They will not be able to see any of the students who do not belong to any class.
- Placing MASTER in a class will have no effect on the MASTER user.
- Classes can be created via an import file, but must be deleted manually.
- When a class that includes users is deleted, these users profiles are not deleted from the system. All attributes restrictions that were applied via the class are removed upon its deletion and the users regain their regular attributes and access to all menu entries.
- During a SYSTEM REFRESH, classes are NOT deleted from the system.
- A simple schedule can be entered in each class. During the scheduled period, the users belonging to that class who sign in the system will have the class's attributes applied to their profile. After the schedules time, the same users signing in the system will no longer have the class attributes, but will instead have their own attributes applied.
Creating Classes
 The Create Class command is located in the Class Functions submenu. This submenu comes by default with the system, but may have been moved to another place by the site's System Supervisor.
Since the instructors also have access that function, this menu entry is usually present in the instructors' menu as well.
To create a class, click on the Create/Modify Class link.
 The form that is presented is common to both the Create Class function and the modify Class function.
Class codes are composed of a maximum of 8 alphanumeric characters.
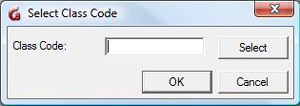
In the Class Code field, type the code you have previously chosen to assign to the new class and select OK.
Note that class codes can be deleted, but cannot be edited and that they must be unique.
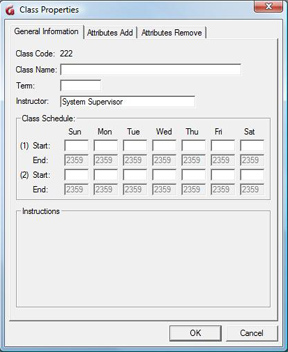 Once the class code is entered and the OK button selected, the class form will display.
All fields in that form are editable except for the Class Code field.
All fields are also optional except for the Class Name field. This field however is for information use only. Where the system is concerned, the class only exists under its class code and therefore only the code must be unique.
The fields restrictions are as follow:
| General Information Tab |
| Field name |
Field state |
Input |
Description |
| Class Code |
Mandatory - Non Editable |
Max 8 alphanumeric and punctuation characters. Space character will be ignored. |
Unique in the system. Access to any of the other class function will require that code. |
| Class Name |
Mandatory - Editable |
Max 40 alphanumeric and punctuation characters. Space character allowed. |
For information purpose only. Shows when a Class Listing is requested |
| Term |
Optional - Editable |
max 8 alphanumeric and/or punctuation characters. |
For information purpose only. |
| Instructor |
Optional - Editable |
Max 30 Alphanumeric and/or punctuation characters. |
For information purpose only. The name of the user who created the class appears there by default. Can be changed to the name of the instructor who will teach the class. |
| Class schedule - start |
Optional - Editable |
24:00 format. |
If this field is filled, the schedule will take effect. If this field left blank, there will be no schedule for that class.
For more information about Class Schedules, please read this section. |
| Class schedule - End: |
Default Value - Not Editable |
N/A |
This field is to remind that all schedules end at 23:59 that day |
| Attributes Add Tab |
| Attributes Add |
Pre selected - Editable |
Click to select or deselect |
This tab shows all attributes that the class has. By default, the class has inherited the same attributes than its creator. Any attributes listed in that tab will be added to the class member's profile, if the class member does not already have it assigned.
This is used to show menus that are otherwise hidden in sites that use attributes for their menu layout. |
| Attributes Remove Tab |
| Attributes Remove |
Deselected by default - Editable |
Click to select or deselect |
This tab shows a list of attributes. The Instructor selects the attribute(s) that will be removed from the profile of the class member.
i.e.:
a users registered with all system attributes can have some attributes removed when in that class |
Once all the fields of the form are filled in, or at least the mandatory ones, press the OK button in the bottom right corner to create the class.
Edit/Modify Classes
The Modify Class command is located in the Class Functions submenu. This submenu comes by default with the system, but may have been moved to another place by the site's System Supervisor.
To modify a class, click on the Create/Modify Class link.
The form that is presented is common to both the Create Class function and the modify Class function.
Class codes are composed of a maximum of 8 alphanumeric characters.
In the Class Code field, type the code of the class you wish to modify and select OK.
Note that class codes can be deleted, but cannot be edited and that they must be unique.
Only certain fields can be modified, as described in this section .
Select OK to save these changes.
List Classes
When selected, this option displays a list of all classes that currently exist in the system as follows:
 Each column can be sorted alphabetically or by order by clicking on the respective header title. (Class Code , Class Name, Students in Class, Class created by)
This list can then be saved in .txt or .csv format.
Select File > Save in the interface top menu. In the SAVE AS window, type the file's name and select the file format, then click on the Save button.

Add Student to Class
The Add student to Class command is located in the Class Functions submenu. This submenu comes by default with the system, but may have been moved to another place by the site's System Supervisor.
There are several ways to add a student to a class, using the class function is one of them.
When adding a student to a class, it is assumed that both the student and the class already exist in the system. This function cannot be used to create any of them.

Use this procedure when you want to add students to a class after they have already been
registered. By grouping students into a class, you will be able to change the menu items
available to the entire group of students at one time, rather than changing the attributes of
individual students.
- Select Add Student to Class from the Class Functions menu.
The Add Student to Class form appears.
- Use the Browse buttons to select the Student ID and the browse button on the following field to select the class code, or simply type both codes in their respective fields.
- Select OK to save the changes to the system.
- Repeat this procedure for each student to wish to place in that class.
Note:
Instructors can also be added to classes. Placing instructors in classes affects their monitoring rights. Please refer to the Display By Class section for more details.
Remove Student from Class
The Remove Student from Class command is located in the Class Functions submenu. This submenu comes by default with the system, but may have been moved to another place by the site's System Supervisor.
Use this function to remove a student from a class.
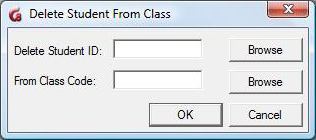
- Select Remove student from Class.
The Delete Student from Class form appears.
- Use the Browse buttons to select the Student ID and the browse button to select the class code, or simply type them in their respective field.
- Select OK to save the changes to the system.
- Repeat this procedure for each student you wish to remove from that class.
List Students in Class
The List Students in Class command is located in the Class Functions submenu. This submenu comes by default with the system, but may have been moved to another place by the site's System Supervisor.
- Select List Students In class from the Class Functions Menu.
- Use the Select buttons to find the class code or simply type the class code in the required field.
This list provides all the information available for the specified class as follows:
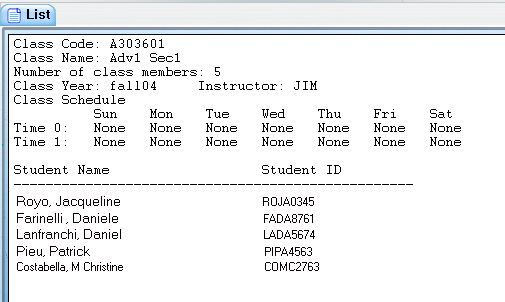
Once displayed, this list can be saved in .txt or .csv format.
Select File > Save in the interface top menu. In the SAVE AS window, type the file's name and select the file format, then click on the Save button.
Delete Entire Class
The Delete Entire Class command is located in the Class Functions submenu. This submenu comes by default with the system, but may have been moved to another place by the site's System Supervisor.
It is most important to understand that deleting a class does not delete the students belonging to that class from the system, it only removes any links and menu restrictions the students had while in that class.
- Select Delete Entire class from the Class Functions Menu.
- Use the Select buttons to find the class code or simply type the class code in the required field.
- click OK to delete the class.
Class Schedule
Schedule timing is meant to ease the navigation and simplify menu layouts. It is not meant to prevent students from accessing certain menus outside of class time. Indeed if a student is only a member of one class, that student will have access to all the menus and items attributed to that class regardless of schedule.
Note that schedules are initialized upon sign on only. If a user belonging to a class with a schedule signs on before the schedule, the schedule will not take effect since it has not been initialized.
The class schedule allows for two start times for a class in each day of the week.
The content format of these fourteen fields is HHMM. To set a start time for a day of the week, the instructor must enter the hour and minute of the beginning of the class. Hours are specified in 24-hour format. Two o'clock in the afternoon is entered as 1400.
Each scheduled class begins at its start time and continues until a different class begins or the specified day ends.
By setting the class times, the system can alter the attributes and menu selection of students who are enrolled in multiple classes, depending on what time it is. This can simplify the display for a multiple class student.
CASE STUDY.
On this site, the menu layout has been organized with attributes.
- The menu linking to the Spanish lessons is assigned the attribute S only
-
The menu linking to the English lessons is assigned the attribute E only.
The instructor creates 2 students, STUD1 and STUD2.
Their profile profile's details are as follow:
| Student ID |
System attributes assigned |
Menu displayed if not in a class |
| STUD1 |
None |
None - This user has been registered with no attributes therefore does not see any menu when entering CAN-8. |
| STUD2 |
All system attributes |
ALL- This user has been registered with all attributes therefore sees all the students menu entries when signing in CAN-8. |
The instructor then creates and defines two classes as follow:
| Class |
Class Code |
Attributes Add |
Attributes Remove |
| Spanish Class |
SPAN |
S |
All other system attributes |
| English class |
ENGL |
E |
All other system attributes |
- If we place both students in the class SPAN, both students will have only the attribute S, no matter when they log in:
- STUD1 will have the S attribute added by the ATTRIBUTE ADD of the SPAN class.
- STUD2 will have all his attributes but S removed by the ATTRIBUTES REMOVE tab of the SPAN class.
- If Both students are placed in both classes, as they will at some point during the day take both courses we have to go back to the beginning of the Classes chapter, where it stated:
...If a student belong to several classes, students attributes are managed by the first class listed in their profile...
So if STUD1 is placed in both classes but the first class listed in this profile is SPAN, Stud one gets the S attribute, and if the first listed is ENGL, STUD1 gets the E attribute.
The same is valid for STUD2.
This is where Class Schedules come in.
The idea is that depending on what time the students sign in, they will be controlled by the class that is scheduled at that time.
Let's say that:
- The Spanish class takes place at 8:00 AM and at 2:00 PM.
Schedule entries for SPAN are 0800 and 1400.
- The English class starts at 10:00 AM; then again at 4:00PM
Schedule entries for ENGL are 1000 and 1600.
Study the results below to see the impact of these schedules on the students:
| Time |
Student ID |
Student's attributes |
Visible menu |
Description |
| 12:00 Am to 7:59 AM |
STUD1 |
None |
None |
Before the class starts, this user has no attributes |
| STUD2 |
ALL |
All entries in the student menu |
Because all attributes are listed in this user's profile, by default all menu entries are displayed. |
| 8:00 AM to 9:59 AM |
STUD1 |
S |
Spanish menu |
The S attribute is added to STUD 1 via the ATTRIBUTE ADD tab of the scheduled class. |
| STUD2 |
S |
Spanish menu |
All attributes except the S attribute were removed from STUD2 via the ATTRIBUTE REMOVE tab of the scheduled class. |
| 10:00 AM to 1:59 PM *** |
STUD1 |
E |
English menu |
The E attribute is added to STUD 1 via the ATTRIBUTE ADD tab of the scheduled class. |
| STUD2 |
E |
English menu |
All attributes except the E attribute were removed from STUD2 via the ATTRIBUTE REMOVE tab of the scheduled class. |
| 2:00 PM to 4:00PM |
STUD1 |
S |
Spanish Menu |
The S attribute is added to STUD 1 via the ATTRIBUTE ADD tab of the scheduled class. |
| STUD2 |
S |
Spanish menu |
All attributes except the S attribute were removed from STUD2 via the ATTRIBUTE REMOVE tab of the scheduled class. |
| 4:00 PM to 11:59 PM *** |
STUD1 |
E |
English menu |
The E attribute is added to STUD 1 via the ATTRIBUTE ADD tab of the scheduled class. |
| STUD2 |
E |
English menu |
All attributes except the E attribute were removed from STUD2 via the ATTRIBUTE REMOVE tab of the scheduled class. |
Note:
***
Since by default all schedules end at 11:59 PM, the last schedule that is entered in any of the classes the students belong to, is the one that will remain valid for the rest of the day. In the case above, the English class at 4:00PM is the one with the last schedule, therefore E is the attributes the students will have until 12:00 AM (midnight) where their default with start again.
If it is necessary to restore the original student's attributes, a third class should be created with a schedule covering the time the students are no longer in class until midnight. This "DEFAULT" class will be the one with the last schedule and therefore the one last altering the student's attributes.
Make sure to fill in the ATTRIBUTES ADD and ATTRIBUTES REMOVE tabs for that class.
Registration Functions
When newly delivered, the system comes with one pre-registered user ID only: MASTER.
This ID comes with the system's default settings, and can only be edited by the person signed on as MASTER.
MASTER 's default password is PWORD.
All other users will have to be registered according to the site's requirements and policies.
Registration functions are available from the System Supervisor menu and from the instructor menu.
However, these functions behave slightly differently depending if they are accessed with System Supervisor or with instructor privileges.
As we progress through each of these functions, the differences will be emphasized.
Registering Users
IMPORTANT NOTE:
The only way for the System Supervisor to register a student is via an IMPORT FILE.
It's important to understand that although the System Supervisor can change an instructor menu tag to STUD, thus restricting the displayed menu of the user to the student's menu, this user will keep full instructor's privileges and can Plan, Track, author, register and delete students.
As well, some internal functions, present different interfaces to the users depending on their privileges and will not behave properly if the System Supervisor attempts to register students in this manner.
Registering an Instructor
Instructors can only be registered by the system Administrator (MASTER), either using the internal CAN-8 function Register a User from the Master menu, or by using an Import Registration file.
To create an instructor using the CAN-8 internal function:
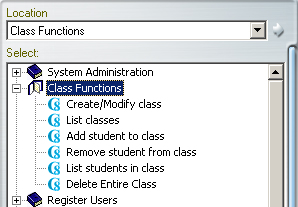
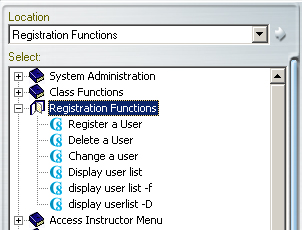
Locate and expand the Registration Functions menu entry as illustrated, then select Register a User.
The user registration form is displayed.
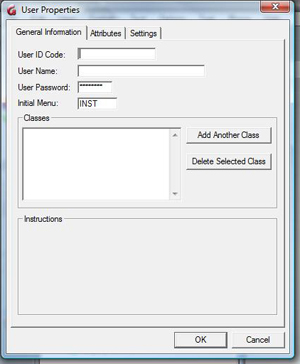
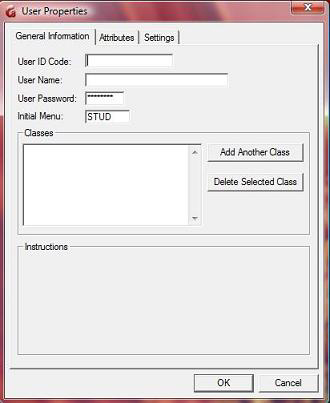
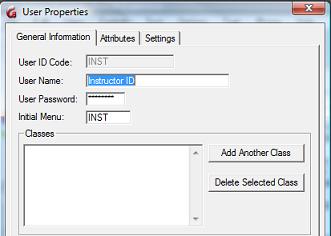
The General Information tab
-
User ID Code is the identification code that the Instructor signs on with. It must be unique within the system.
Any alphanumeric combination with a maximum of 18 characters is supported. Punctuation and symbols are not accepted. The space character will be ignored.
-
The User Name is the Instructor's name.
A maximum of 30 characters is supported.
This field will accept alphanumeric characters, punctuation, spaces and symbols.
-
The User Password is the password to be used for the user to sign on.
The default is set to PWORD and the user may change it at any time using the Change Password option.
A maximum of 8 characters, alphanumeric only, is supported for this field. The password does not display when being changed or entered.
-
The Initial Menu is the starting point of the user in the menu system. The default for Instructors is called INST. If left as is, the instructors signing in will see the default instructor's menu layout.
As seen in the Creating a Submenu section of this chapter, menu may be created by the Master on a site-specific basis and attributed to the instructor. If the System Supervisor creates a menu, then assigns this menu code to the instructor's profile, the instructor will only be able to access that menu.
-
The Classes field specifies which classes the instructor belongs to. Each user can belong to a maximum of 16 classes. Each of the classes is listed by class name in the form. The classes must have been created prior to enrolling a user in it. In the event a user belongs to more than 1 class, the attributes by default are the attributes of the first (top) class listed in that section. If the attributes of the classes are too restrictive for the instructors, the System Supervisor can create a class reserved for instructors, which would then give them the appropriate attributes.
Registering an Instructor in a class will facilitate student's monitoring as it allows the instructor to use the View by Class option in the Tracker.
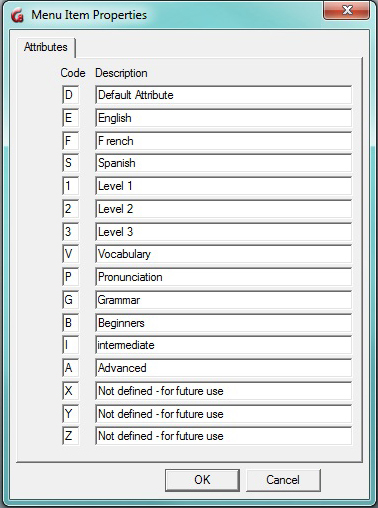
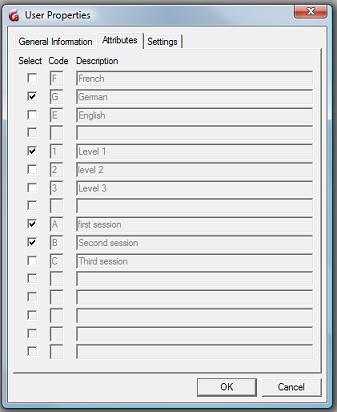
The Attributes tab
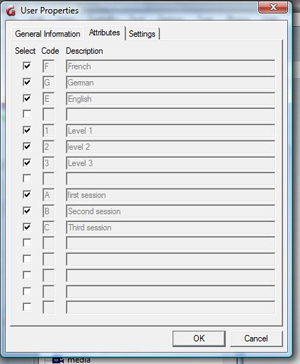
The Code and Description fields are pre-filled with all of the system-defined attributes. These attributes have been setup by the MASTER user at some earlier point in the operation of the system.
By default, all existing attributes are selected.
The System Supervisor should uncheck the attribute(s) that should not be assigned to the Instructor.
The Instructor will see only menu entries that have been assigned one of these attributes.
For more information about System Attributes and how to use them to customize menu displays, please refer to the About Attributes section of this chapter.
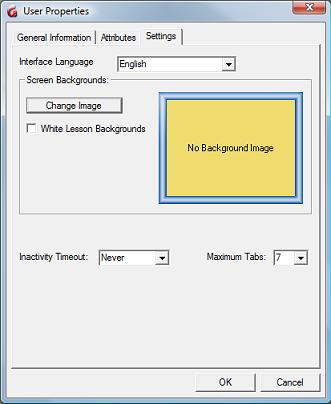
The Settings tab

This is where the users' personal settings are set.
They include:
- Interface Language
Use the drop down arrow at the end of this field to select if this user's interface should be in French or English.
- Change Image.
When selected, a choice of several images previously entered in the system will display. Others can be added using drag/drop.
Images that are added to this section can be .gif, .jpg, .bmp and of a maximum size of 320px wide by 240 px high. Larger images placed there will be truncated to that size from their top left corner.
The background image selected will be displayed over the system's main interface for that user. It will not display in the lesson background.
To select the user's background, simply click on the image of your choice. The image selected will show in the Screen Background section of the form. If no image is selected, the default interface background will show when the user signs in.
- Inactivity Timeout.
When a user is signed in, one license out of the pool of licenses available on the server is being used. If the user signs in, but forgets to sign out, that license is being held and cannot be used by anyone else until it is released and re-placed in the license pool.
The Inactivity timeout settings prevent licenses from being held by a user who is no longer using it.
If the Inactivity Timeout is set to 15 minutes, a timer (not visible) is started on the client machine as soon as there is no longer ANY activity in CAN-8 reported to the server (ie: no mouse selections, audio playing/recording, etc.). After 15 minutes has elapsed, the user's session is automatically logged out and the license freed for someone else.
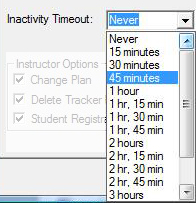
To see all timeout possibilities, click on the down arrow at the right of the Inactivity Timeout field, as illustrated. The choices go from None (no timeout ever) to 3 hours and 45 minutes. Select the time that seems most appropriate by clicking on it.
The default setting is None, meaning the user can keep the license indefinitely.
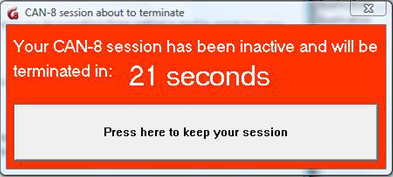
30 seconds before logoff, a warning message appears on the user's screen.
If the user clicks the button on the message, the countdown is then stopped and the session is kept open on that station. The countdown will start again if the session becomes inactive. The user on the client station cannot prevent this.
- Maximum tabs
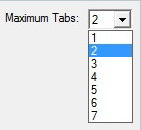
Sets the maximum number of simultaneous menu entry tabs a user can open at the same time. The default number is 7.

If the user exceeds the tab limit number, the above warning message will appear.
- Change Plan
If checked, the instructor will have permission to create or alter an existing Planner.
- Delete Tracker Data
This option can be unchecked, in which case the instructor will not be able to delete the student's data from a Tracker.
All other Tracker functions will remain available to the instructor.
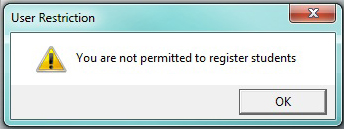
- Student Registration Controls
This option allows the instructor to create, delete and change students profiles. If this option is not checked, when attempting to create, delete or change a user profile, the instructor will be presented with the following error message:
- Enable tests in Tracker
If this option is checked, the instructor can change the lesson mode, from practice to test or waiting mode.
- Observe Online Users
This option is not available in all CAN-8 distributions. If the licensing purchased by the site includes the Real Time Student Management function, you may allow or restrict an instructor from having access to that feature by either checking or un-checking that option.
The Instructor's user ID is created as soon as the OK button is pressed.
The Create a User form can also be accessed by selecting FILE from the menu bar and the option CREATE then INSTRUCTOR.
User profiles can also be created via an import file.
Registering a Student
Students can only be registered by instructors via the Register User command.
Students registered by an instructor belong to that instructor.
Subsequently an instructor can only edit the settings of the students who belong to that instructor and only display a list of the students that the instructor created.
To create a student using the CAN-8 internal function:
Locate and expand the Registration Functions menu entry as illustrated, then select Register a User.
The user registration form is displayed.
The General Information tab
-
User ID Code is the identification code that the student will sign in with. It must be unique to that student within the system.
Any alphanumeric combination with a maximum of 18 characters is supported. Punctuation and symbols are not accepted. The space character will be ignored.
-
The User Name is the student's name.
A maximum of 30 characters is supported.
This field will accept alphanumeric characters, punctuation, spaces and symbols.
-
The User Password is the password to be used by the user to sign on.
The default is set to PWORD and the user may change it at any time using the Change Password option.
Alternatively, the System Supervisor can remove the Change Own Password link from the student's menu to make the assigned password permanent.
A maximum of 8 characters, alphanumeric only, is supported for this field. The password does not display when being changed or entered.
-
The Initial Menu is the starting point of the user in the menu system. The default for students is called STUD. If left as is, the student signing in will see the default student's menu layout.
As seen in the Creating a Submenu section of this chapter, a menu may be created by the MASTER user on a site-specific basis and attributed to the student. If the System Supervisor creates a menu, then assigns the menu code to the student's profile in the Initial Menu field, the student will only be able to access that menu.
-
The Classes field specifies which classes the student belongs to. Each user can belong to a maximum of 16 classes. Each of the classes is listed by class name in the form. The classes must have been created prior to enrolling a user in it. In the event a user belongs to more than one class, the attributes assigned by default are the attributes of the first (top) class listed in that section.
Registering students with a class designation simplifies the monitoring of student progress in the Tracker as it allows the instructor to use the View by Class option and display only the group of students they may be interested in at that time.
The Attributes tab
When the instructor registers a student, by default the student inherits the same attributes and settings than the instructor.
Therefore the Code and Description fields of the student attributes tab are pre-filled with the attributes that the instructor registering the students has been assigned.
The Instructor can change that default by adding or removing the check mark in the Select field in front of the attribute.
The student will only be able to access the menu entries that have been assigned one of these attributes.
For more information about System Attributes and how to use them to customize menu displays, please refer to the About Attributes section of this chapter.
The Settings tab
The default settings shown in the tab are inherited from the instructors who register the students, however they can all be changed if desired.
- The Interface Language
Use the drop down arrow at the end of this field to select what language is used for the student's interface.
- Change Image.
By default, the image assigned to the instructor's background is also assigned to the student and will show there. It can be removed or changed.
When the Change Image button is selected, a choice of several images previously entered in the system will display.
Instructors cannot add more images in that section, but can use any of the images available.
The background image is displayed over the system's main interface for that user. It is not displayed in the lesson background.
To select the user's background image, simply click on the image of your choice. The image selected will show in the Screen Background section of the form. If no image is selected, the default interface background will show when the user signs in.
- Inactivity Timeout.
When a user is signed in, one license out of the available pool of licenses available to the site is being used. If the user signs in, but forgets to sign out, that license is being held and cannot be used by anyone else until it is released and returned to the license pool.
The Inactivity timeout settings prevent licenses from being held indefinitely by a user who no longer needs it.
If the Inactivity Timeout is set to 15 mn, a timer (not shown to the student) is started on the client machine as soon as there is no longer ANY activity in the CAN-8 client (ie: no mouse clicks/audio played/etc). After 15 mn, the user's session is automatically logged out and the license returned to the license pool.
To see all timeout possibilities, click on the down arrow at the right of the Inactivity Timeout field, as illustrated. The choices go from None (no timeout ever) to 3 hours and 45 minutes. Select the time that seems most appropriate by clicking on it.
The default setting is None, meaning the user can keep the license as long as they are signed on.
30 seconds before disconnection, a warning message appears on the user's screen. If the user clicks on the button, the session is kept open on that station. The warning will appear again if the session becomes inactive for the required time. The user on the client station cannot change this setting.
- Maximum tabs
Sets the maximum number of simultaneous lesson tabs a user can open at the same time. The default number is 7.
If a student is assigned 1 tab, the student will only be able to open one lesson at a time. If a student is assigned 7 tabs, the student can have up to 7 lessons opened.
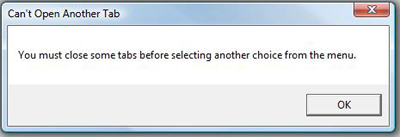
Exceeding the tab limit number, the above warning message will appear.
The Create a User form can also be accessed by selecting FILE from the menu bar and the option Create then Student.
Student users can also be created by Master using an import file.
Delete a User
This function will permanently remove a user ID and all associated records and recorded data for the user from the system.
Note:
Whereas an identical ID can be recreated, the data associated with the deleted ID cannot be recovered by recreating the ID.
Master can remove any (student and instructor) ID on the system,
Instructors can only delete IDs of students they have registered themselves. (see the Registering a Student section above)
Instructors cannot delete students who belong to other instructors.
They cannot delete an Instructor ID
The user deletion procedure is as follow:
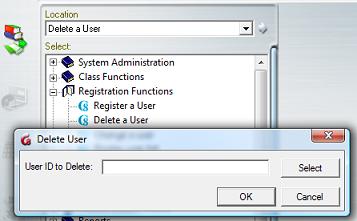
In Registration Functions select Delete User.
The following dialog will be shown:
Enter the User ID to delete, or press Select and click on the user ID in the list of users available then OK to confirm the deletion.
The Delete a User form can also be accessed by selecting FILE from the menu bar and the option DELETE then User From System.
Users can also be deleted via an import file.
Change a User
Use the Change a User function to modify the settings of a user profile.
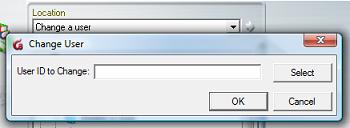
From Registration Functions, select Change User.
Enter the User ID you want to edit, or press Select and click on the user ID in the list of users available then OK to confirm the selection.
 The User Properties form containing the user's settings is displayed with the pre-filled information.
Note:
All fields (including the Settings and Attributes tabs' fields) of this form may be changed except for the user ID code.
The password in the Password field is never visible. If a password has been forgotten, it cannot be retrieved by looking at the Users Properties; instead the password has to be replaced by typing a new one in that field.
The Change a User form can also be accessed by selecting Edit from the menu bar and the option User.
User profiles can also be modified using an import file.
Display User List.
The Display User List function behaves slightly differently if accessed by an instructor rather than by the System Supervisor (signed in with Master ID).
System Supervisor
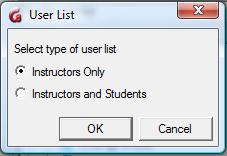
The System Supervisor can bring up a list of all the system users. When selecting DISPLAY USER LIST, the System Supervisor can chose to display the instructors only, or both, Instructors and Students.
Click on the option desired then select OK.

Once displayed, the user list can be saved locally by selecting FILE > SAVE from the menu bar.
The user list shows 4 different fields:
User name
Name entered in the User Name field of the registration form.
User ID
User ID associated with the user name.
Initial Menu
List the menu the user will be shown when signing in.
User Serial Number
Lists the order of creation of the users. This number is assigned to this ID when it is created. This number is unique.
When a REFRESH ALL is done, these numbers are reset and the numbers will start again from one.
User data folders on the server are created with these serial numbers to identify the answers in a unique way.
Click on any of the column header bars to view the list in order (either alphabetical or numeric)
Instructors
Instructors can only display students therefore do not see the Select User List dialog when selecting Display User List.
Furthermore, instructors can only display the list of students they themselves have registered.
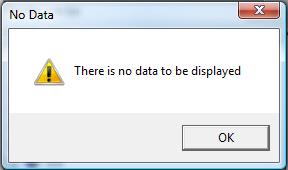 If the instructor has not registered any users, a message will display as illustrated.
If the instructor has registered students, the list of students will show. The fields displayed in the list are the same as described above.
Saving the User List
Once displayed, this list can be saved in .txt or .csv format.
Select File > Save in the interface top menu. In the SAVE AS window, type the file's name and select the file format, then click on the Save button.
Import Registration File
Overview
The import registration function allows the System Supervisor to import, modify or delete registration information for a number of users at one time.
Imported data can be:
- Student registration data
- Instructor registration data.
- Class creation/deletion
- Users and corresponding data deletion
- System maintenance data removal.
Note:
If users are being deleted the import process locks the user and class database during the file import
process. No other users should be using the system.
This process requires a specially formatted import file, created with a regular text editor (like Notepad), an output from a database, or a specialized program created to
extract data from the institutions' database.
The file must
be entirely in ASCII with the field delimiters used as described: all fields are delimited by tabs. The tab character is the character with ASCII code 0x09. Each line must be terminated with a carriage-return (or line-feed).
Once created, the import file is saved as a .txt file either locally or on a network share accessible to the station where the System Supervisor will import the registration.
When the importation process is done, a report file, (xxx.rep) is created in the same folder the import.txt file is located in. The report file contains details of the import process, successful registrations, warnings, and registration errors. This topic will be further discussed.
The import file can be created in several sections each starting with a different header followed by as many registration lines as necessary (one per class or user created). Alternately, several files can be generated, one to create classes, one for students, one for instructors, and another one for the system refresh, or all the above files can be condensed into one file only that will do all the different sections in sequence.
Each header will define to the system what to do with the lines below, and depending on the
header, the following lines will have to be formatted accordingly.
The order in which the [headers] are placed in the file matters. The file is read by the server and the registration generated from top to bottom. Therefore, any deletions should come first, followed by class creation, instructor creation, and finally student creation.
If the order is incorrect, the import process will generate warnings and error. For instance a student cannot be placed in a class if the class has not been created first. Equally the student cannot be assigned to an instructor if the instructor has not yet been created.
The description of the file format with headers is as follows:
| Header |
Item |
Data |
|
[CLASSES] |
Data Format |
CODE [t] CLASS NAME [t] INSTID [t] TERM [t] ATT ADD [t]ATT REMOVE[carriage return] |
| Field info |
| CODE: |
Class code, minimum 1 character, maximum length 8 characters
|
| CLASS NAME: |
min. length 1 character, max. length 40 characters, alphanumeric, punctuation and symbols accepted |
| INSTID: |
Instructor User ID code that has been previously registered. Alphanumeric only. Can be replaced by a *. |
| TERM |
Term information field, maximum length 8 characters. Can be replaced by a * or a [sp] |
| ATT ADD |
Class attributes. Attributes must exist in system. The attributes placed in this field will be added to the users belonging to that class. This field can be ignored or you can add the spaceholders * or [sp] |
| ATT REMOVE |
Class Attributes, maximum length 16 characters. These attributes MUST exist in the system. The attributes placed in this field will be removed from the profile of the users placed in that class. If no attribute should be removed, enter the [cr] * or [sp]. |
| [t] |
Tab character. (Code 0x09 in the ASCII table.) |
| [CR] |
[Carriage Return] Or Enter key on the keyboard |
| [SP] and * |
Space bar key or * charcter. Both can be used as space holders |
|
| Sample File |
[CLASSES] [cr]
ESL01 English, level 1 JSMITH fall E1 F2 [cr]
FRE02 French, level 2 MDUPONT F2 E1 [cr]
|
|
| Note |
- If using copy/paste to create your import file, please note that the carriage returns are lost in the process.
A carriage return has to be manually added at the end of each line that has been pasted.
- The Code and Class Name fields are mandatory fields and must include at least one alphanumeric character.
The content of the ATT fields can be left undefined, in which case this class will not add nore remove any attributes to the users profiles. * can be used as a space holder for visual help when creating the file.
|
|
[INST] |
Data Format |
legacy format:
INSTID [t] NAME [t] PASS [t] ATT[[t]CLASS][cr]
New format:
INSTID [t]NAME [t] PASS [t] <+/-> ATT [t] & [t] MENU [t] INACT [t] MAXTAB [t] BACKGROUND-NUM [t] LANG [t] CAPS <[t]CLASS>[cr]
|
| Field info |
| INSTID: |
The user ID to be created/modified (max 18 alphanumeric characters. Punctuation not accepted.)
|
| NAME: |
Instructor's name (Min 1 char, Max 30 chars). This field will accept alphanumeric characters, punctuation, spaces and symbols. |
| PASS: |
Initial Password of user (Max 8 alphanumeric characters only).
If it is preferred that the user is assigned no password (blank password), a [sp] character must be entered in that field. |
| ATT |
Attributes to assign to the user (Max 16) These attributes must exist in the system.
<+/-> These characters are optional and used when editing users' settings via an import file.
- The + character placed in front of one or more attributes will add these attributes to those the user already has.
- The + character on its own, or followed by a [sp] or a * leaves the previously assigned attributes untouched (when editing a profile) or will assign no attributes to that user when registering a user.
- The - character will remove the following attribute(s) from the list the user has previously been assigned.
- The [sp] character by itself will remove all attributes from the user's profile.
The ioptions <+/-> are only valid if using the "new format" import records.
|
| & |
Format flag. Must be present. It differentiates the legacy file format from the regular format |
| MENU: |
Initial Menu for the instructor. Type in:
- INST for the default instructor menu.
- The menu tag of a submenu to restrict access to that submenu.
|
| INACT: |
Sets the inactivity timeout. You must type at least one digit. Accepted Values range from 0 (no time out) to 195 (3 hours 15 mn maximum timeout allowed)
The time is rounded up to the nearest 15 minute interval. From 1 to 15, timeout it is rounded up to 15 mn. From 16 to 30, it is rounded to 30 mn, etc...
Numbers greater than 195 will be defaulted to 195. Non numeric characters will generate an error.
|
| MAXTAB: |
Maximum number of tabs in the main interface allowed to be open at one time
Only digit from 1 to 7 must be entered. 0 will be defaulted to 1, and all numbers greater than 7 will be defaulted to 7. Non-numeric characters will result in an error during the import. |
| BACKGROUND-NUM: |
This field takes numeric characters only and must contain at least one. Enter the number of the background image shown on the background selector screen.
0 gives CAN-8 default background.
Numbers non-attributed to any image will default to the CAN-8 background.
Any other non-numeric character will result in an error during import. |
| LANG |
Interface language:
- EN - English (default)
- FR - French
- SP - Spanish
This field is mandatory.
|
| CAP: |
Only accepted characters are P, T, R, C, O and [sp]
It can be a combination of any number of the above letters, each
letter enables one of the following instructor function:
- P - Enables changes in Planner
- T - Enables delete in Tracker
- R - Enables registration controls (create/change/delete) on students
- C - Enables start/stop test in Tracker
- O - Enables RTSM
If the ID created should have none of these functions enabled in the profile, then a space [sp] or a * should be typed in to keep the file format valid.
|
| CLASS |
Optional field. A class would have to be created first in order to use this field. If the user does not need to be placed in a class, this field can be simply ignored. There is no need to enter a [sp] character.
NOTEYou can also use this field to remove users from classes. Place the "-"character in front of the class code. You need to create 1 line per class to delete from the user's profile. |
| [t] |
Tab character. (Code 0x09 in the ASCII table.) |
| [sp] or * |
Space key on the keyboard or * character. They are necessary in all optional fields when no data is entered to keep the file format, except in the CLASS field. |
| [cr] |
Carriage return or Enter key on the keyboard |
|
| Sample File |
[INST]
Jane Marquis, Jane pword abcefg & inst 0 7 0 en Ptrco
Liane Rosetti, Liane pword ab & inst 20 3 0 en Pt class02
Liane Rosetti, Liane pword ab & inst 20 3 0 en Pt class01
|
|
| Note |
- [ATT] field. When editing a user, if you do not want to edit the user's attributes, either enter all the attributes the user already has in this field, or enter +[sp]. Be careful not to omit the + character in front of the [sp] as this would instead reset the user's attributes to NONE.
- Any import file previously created with both legacy (normal and extended) formats is still valid. Fields no longer in use, like Button Style or Display Style will be ignored. New fields such as MAXTAB will get default settings.
- If using copy/paste to create your import file, please note that the carriage returns are lost in the process.
A carriage return has to be manually added at the end of each line that has been pasted.
- Only the CLASS field is optional (does not require to be filled in).
All other fields are mandatory.
- The content of certain fields (i.e.: password) can be left empty, but in order to keep the file format valid, a space character [sp] must be entered, as in the PASS field of line 2 in the above example file.
- If it is necessary to place the instructor in more than one class, the entire user line must be repeated as many times as necessary each with a different class code. (See line 4 in example above.)
- If you place a character "-" directly in front of the class code, the Instructor will be removed from that class. If there is a space between the "-" character
and the class name it will cause an error.
|
|
[STUDENTS] |
Data Format |
legacy format:
USERID [t] NAME [t] PASS [t] ATT [t] INSTID [[t]CLASS] [cr]
New format:
USERID [t] NAME [t] PASS [t] <+/-> ATT [t] INSTID [t] & [t] MENU [t] INACT [t] MAXTAB [t] BACKGROUND-NUM [t] LANG [[t]CLASS][cr]
|
| Field info |
| USERID: |
User ID the student will sign in with. (min 1, max 18 alphanumeric characters. Punctuation not accepted.) |
| NAME: |
Student's name (min 1, Max 30 chars). This field will accept alphanumeric characters, punctuation, spaces and symbols. |
| PASS: |
Initial Password of user (Max 8 alphanumeric characters only).
If it is preferred that the user is assigned a blank password, a [sp] character must be entered in that field. |
| ATT |
Attributes to assign to the user (Max 16 attributes).
This is a mandatory field. Type here the attributes thatthe user should have.
<+/-> These characters are optional and only used when editing exisitng users' settings via an import file.
- The + character placed in front of one or more attributes will add these attributes to those the user already has.
- The - character will remove the following attribute(s) from the list the user has previously been assigned.
- The combination +[sp] or +*(+ character followed by a space or the * character) will leave the attributes previously assigned to this user untouched.
- The [sp] and * characters by themselves will remove all attributes from the user's profile.
|
| INSTID: |
The Instructor's ID the student will belong to (Max 18 alphanumeric characters). This ID must be valid (see NOTE below)
|
| & |
Format flag. Must be present. It differentiates the legacy file format from the regular format |
| MENU: |
Initial Menu for the Student. Type in:
- STUD for the default student menu.
- The menu tag of a submenu to restrict student access to that submenu.
|
| INACT: |
User timeout in minutes. Digits only ranging from 0 (no time out) to 195 (3 hours 15 mn maximum timeout allowed) . At least one digit must be entered in this field
The time is rounded up to the nearest 15 minute interval. From 1 to 15, timeout it is rounded up to 15 mn. From 16 to 30, it is rounded to 30 mn, etc...
Numbers greater than 195 will be defaulted to 195.
|
| MAXTAB: |
Maximum number of tabs (lessons) the student can open at one time in the main interface.
Only digit from 1 to 7 must be entered. 0 will be defaulted to 1, and all numbers greater than 7 will be defaulted to 7. Non-numeric characters will result in an error during the import. At least one digit must be entered. |
| BACKGROUND-NUM: |
This field takes digits only and requires at least one. Enter the number of the background image shown on the background selector screen.
0 gives CAN-8 default background.
Numbers non-attributed to any image will default to the CAN-8 background.
Any other non-numeric character will result in an error during import. |
| LANG |
Interface language:
- EN - English (default)
- FR - French
- SP - Spanish
|
| CLASS |
Optional field. A class would have to be created first in order to use this field. If the user does not need to be placed in a class, this field can be simply ignored. There is no need to enter a [sp] character. If you are editing an existing student record, you can add a "-" character in front of the class code to remove the student from that class. You will need one line for each class to remove from the user's profile |
| [t] |
Tab character. (code 0x09 in the ASCII table.) |
| [sp] |
Space key on the keyboard. Used as space holder or when fields should remain blank. |
| * |
Used as space. |
| [cr] |
Carriage return or Enter key on the keyboard |
|
| Sample File |
[students]
CHRIS Leandro, Chris pword +abcefg carole & stud 0 7 0 EN class01
ALEX Fabian, Alex pword -a carole & stud 0 7 0 EN class02
XAVIER Guillaume, Xavier pword bca carole & stud 0 7 0 EN class02
XAVIER Guillaume, Xavier pword bca carole & stud 0 7 0 EN class01
|
|
| Note |
- [ATT] field. When editing a user, if you do not want to delete the user's attributes, either enter all the attributes the user already has in this field, or enter +[sp] or >B>+*. Be careful not to omit the + character in front of the [sp] or the * as this would instead reset the user's attributes to NONE.
- [INSTID] field. The instructor ID must be created first. If the instructor ID does not exist, the student will be created, but assigned to the System Supervisor. A warning will be shown in the import report file.
- Any import file previously created under both legacy (normal and extended) formats is still valid. Fields no longer in use, like Button Style or Display Style will be ignored. New fields such as MAXTAB will be assigned default values.
- If using copy/paste to create your import file, please note that the carriage returns are lost in the process.
A carriage return has to be manually added at the end of each line that has been pasted.
- Only the CLASS field is optional (does not require to be filled in).
All other fields are mandatory and must hold at least a [sp] or * character.
The content of certain fields (PASS, INSTID) can be left blank, but in order to keep the file format valid, a space character [sp] must be entered, as in the [PASS] field of line 2 in the above example file.
- If it is necessary to place the student in more than one class, the entire user line must be repeated as many times as necessary, each time with a different class code. (See line 5 in example above.)
- When editing an existing Student, the "-" character directly in front of the class name will cause the system to
remove the student from that class. If there is a space between the "-" character
and the class name it will cause an error.
|
|
[DELETE] |
Data Format |
Short format:
USERID [cr]
long format
USERID [t] NAME [t] PASS [t] <+/-> ATT [t] INSTID [t] & [t] MENU [t] INACT [t] MAXTAB [t] BACKGROUND-NUM [t] LANG <[t]CLASS>[cr]
|
| Field info |
| USERID: |
Valid user ID you wish to delete. It can be a student ID or an instructor ID. Each user ID is followed by a carriage return. |
| User Registration Line |
It is sometimes convenient to simply take a copy the file that was used to import the users, change the header to [DELETE] and keep the user registration line as they were. This will result in the same than using the short format above.
|
|
| Sample File |
[DELETE] [cr]
JSMITH [cr]
JDUPONT [cr]
|
| or |
[DELETE] [cr]
JSMITH Smith, John PWORD DEF MGAGNON & STUD 30 2 0 en [cr]
JDUPONT Dupont, Jacques PWORD DE & INST 30 7 0 en PT [cr]
|
|
| Note |
- Use the [delete] header when you want to delete only some users from the system. (See the
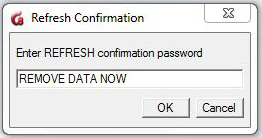
[refresh] section below for more deletion options)
- When importing a registration file that includes the [DELETE] header, the system prompts for a password to be allowed to continue the deletion process. This password is REMOVE DATA NOW.
- Only Instructors and students can be deleted using the [DELETE] headers.
- Classes cannot be deleted using this method.
- If using copy/paste to create your import file, please note that the carriage returns are lost in the process.
A carriage return has to be manually added at the end of each line that has been pasted.
|
|
[DELETE-CLASSES] |
Data Format |
Short format:
CLASSCODE [cr]
long format
CLASSCODE [t] CLASS NAME [t] INSTID [t] TERM [t] ATT ADD [t]ATT REMOVE[carriage return]
|
| Field info |
| CLASSCODE: |
Existing class you wish to delete. Each class code is followed by a carriage return. |
| Class registration line |
It is sometimes convenient to simply take a copy the file that was used to import the classes, change the header to from [CLASSES] to [DELETE-CLASSES] and keep the class registration lines as they were. This will result in the same than using the short format above. If you do not have an existing [CLASSES] section, use the short format to delete your classes.
|
|
| Sample File |
[DELETE-CLASSES] [cr]
ESL01 [cr]
FR02 [cr]
|
| or |
[DELETE-CLASSES] [cr]
ESL01 English, level 1 JSMITH fall E1 F2 [cr]
FRE02 French, level 2 MDUPONT F2 E1 [cr]
|
|
| Note |
- Use the [delete-classes] header when you only want to delete specific classes from the system. (See the
[refresh] section below for more class deletion options)
- When importing a registration file that includes the [DELETE] header, the system prompts for a password to be allowed to continue the deletion process. This password is REMOVE DATA NOW.
- Only Instructors and students belonging to that class are NOT deleted.
- If using copy/paste to create your import file, please note that the end carriage returns are lost in the process.
A carriage return has to be manually added at the end of each line that has been pasted.
|
|
[REFRESH] |
Data Format |
| refresh all
|
refresh classes |
refresh students |
|
| Description |
| Refresh all |
Removes all registration information from the
system including students and their recorded data, instructors and classes.
Menu entries and Lessons are not affected. They remain untouched.
The MASTER password is also reset to PWORD.
|
| Refresh classes |
Removes all classes from the
system. Students and their recorded data, Instructors, Menu entries and Lessons
are not affected. They remain untouched.
|
| Refresh students |
Removes all student registration information from the
system including their recorded data.
Menu entries, Lessons, instructors and classes are not affected. They remain untouched.
|
|
| Sample File |
[REFRESH] [cr]
refresh all
|
[REFRESH] [cr]
refresh classes |
[REFRESH] [cr]
refresh students
|
|
| Note |
- When importing a registration file that includes the [REFRESH] header, the system prompts for a password to be allowed to continue the deletion process. This password is
REMOVE DATA NOW.
- Whereas [DELETE] allows to delete some specific user IDs (including instructor IDs), [REFRESH] will delete them all (either all users from the system including the instructors, or all students from the system).
- [REFRESH] never alters nor removes the menu layout. All lessons and menu links remain.
- [REFRESH] followed by refresh all deletes classes as well. It is the only import format that does delete classes.
- If using copy/paste to create your import file, please note that the carriage returns are lost in the process.
A carriage return has to be manually added at the end of each line that has been pasted.
|
Once the file is created, save it as .txt in a path easily accessed and proceed with the import:
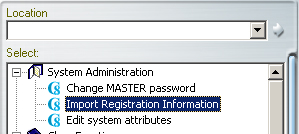 In the CAN-8 supervisor menu, select System Administration then Import Registration Information.
-
The first warning will appear:
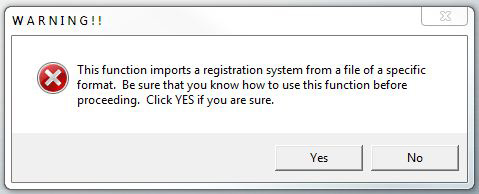 Select Yes to continue.
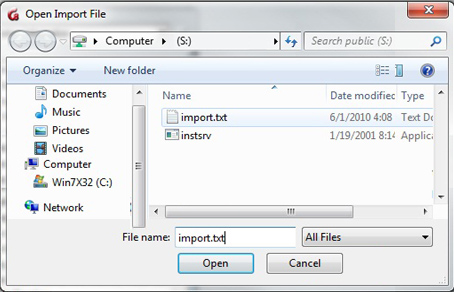
In the Import file window, locate the registration file previously created and select OPEN.
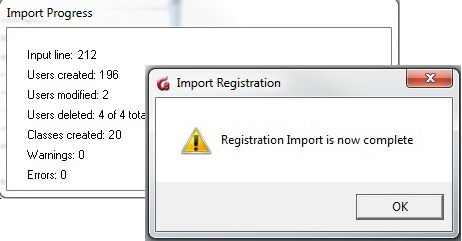
The Import Progress Window shows the number of records being processed as the system is processing the registrations.
When all records have been processed, the Import Registration window appears.
This registration process was completed, and no errors or warnings were reported.
Reading the Import log File
Independently of the numbers of warning or errors reported in the Import Progress window once the import is completed, the system will create a report file logging all the processed records.
Whereas it is not necessary to read that log file if the Import Progress windows shows no error and no warnings, it will be necessary to verify it if some errors or warning are reported as illustrated below:

The registration process illustrated was completed, however several errors and warnings were reported.
These are logged in a file created by the CAN-8 system. This file can be found in the same folder the registration file was saved in.
This file is named after the registration file, only the extension is changed from .txt to .rep.
If the original import file was placed in the following location:
C:\CAN8\import2010.txt
The system will create:
C:\CAN8\import2010.rep
This *.rep file can be opened with the text editor of your choice. The errors or warnings are listed per line.
Some warnings are to be expected and are a normal matter in a registration import where students are edited instead of created, as shown in the illustration above. It is however important to verify the report file to analyze it and make sure the registration was successful.
Both warnings and errors may result from formatting error, in which case the import file may have to be revised, and re-imported, however some errors can be reporting a failed registration or issues at the server level. If such is the case, basic troubleshooting of the server software and the server machine is necessary. An IT technician may have to be contacted for that purpose.
The table below lists the warnings and errors reported and their signification:
| Error/Warning Reported |
Error Type |
Troubleshooting |
Import ABORTED at line xxx
ALL RECORDS IN IMPORT FILE MAY NOT HAVE BEEN PROCESSED! |
Server error.
The registration import was not successful |
Check network connection. Check CAN-8 server process. Contact IT |
| line xxx: ***ERROR - Found unknown record tag: |
Format error - The line or section was ignored. |
Check for spelling mistake or invalid header. Also check if the [ or ] characters are present in one of the fields on the line mentioned. These characters are reserved for headers. |
line xxx: *** ERROR - Minimum info ID, NAME, PASSWORD was invalid
line xxx: Line ignored! |
Format error.
The user was not created |
Check if line xxx was blank. If yes, you may ignore this error. Otherwise check on the line mentioned if the fields are all present and properly separated by tabs. There might be a tab or a mandatory field missing. |
| line xxx: *** ERROR - Unknown refresh command in refresh section |
Format error
The refresh section was ignored. |
Check for spelling mistake, or invalid command. The only 3 valid commands are refresh all, refresh classes and refresh students |
| line xxx: *** ERROR - No username on line |
Delete format error
Line was ignored |
Check for empty (blank) line. Also check that the line format is respected if the line is of the full format (check tabs and fields). |
| line xxx: --- Line found - no tag: % |
Format error.
Section ignored. |
The system did not find any section header before the line specified. Add the headers. |
| line xxx: *** ERROR - Strange characters in record: %s |
Format error.
The line was ignored. |
Check fields for characters that are not accepted in these fields. Also check if no field is missing, thus moving the next field input to the wrong place. |
| line xxx: *** ERROR - Class xxx already exist |
Class format error
|
The system's logs shows the class already exists. The line was ignored. Delete this line from the import file. You may ignore this error. |
| line xxx: *** ERROR - write error creating class %s |
System error
Class was not created |
The system was unable to create the class on the server. The server file may have been locked or the server inaccessible. |
| line xxx: *** ERROR - class code is invalid %s |
Format error.
Class was not created |
Check if the name either includes too many characters or characters not allowed |
| line xxx: *** ERROR - server would not create class |
Server error.
Class not created. |
The maximum number of classes allowed might have been reached, the server's disk might be full, server files are flagged Read Only. Try to create a class manually. If the same error appears, try to delete a class then recreate a new one. If no error appears, then the maximum classes allowed has been reached. Delete the classes no longer in use. Otherwise contact IT. |
| --- Instructor: xxx not found, student will belong to MASTER |
Warning
The student has been registered. |
Format error in [students] section. The instructor ID entered does not exist. This student, although successfully created, does not belong to any instructor. If it is important that the student be registered under the instructor's name, correct the INSTID field and run this line again or the instructor can delete then recreate the student manually. |
line xxx: *** ERROR User xxx has invalid icon/normal setting. Must be I, N, L, M, O, or B
line xxx: *** ERROR User xxx has invalid windows/traditional style setting |
Legacy format error.
The user was not created |
Check the mentioned fields and correct them. You may be missing one of these fields, a tab, or have used characters not allowed. |
| line xxx: *** ERROR User xxx has invalid language specified - |
Format error User was not created |
Check for error in the language field or tabs missing in the line. |
| line xxx: *** ERROR User xxx already exists but is not being added to another class |
Format error.
Line ignored |
Check if this line appears twice. Since the user was previously registered, and this line did not bring any changes to the existing profile, it is ignored. Remove the line to avoid the error in the log file.
|
| line xxx: --- User xxx already exists, adding to class xxx if possible |
Warning.
User is added to the class. |
This warning is for information purpose during user edition. The system recognizes that the user ID already exists, and is processing the changes to the profile. In this case, the user is being placed in another class |
| line xxx: --- Student xxx already in class xxx |
Warning.
No changes done to the user |
Information purpose only. The system recognizes that the user ID already exists, and that this line is identical to the student settings. Either that line is doubled or the user was previously created. Delete the double entry to avoid warning in the log file. |
| line xxx: *** ERROR user xx was not created by the server . |
Server error.
Student NOT created |
The server's disk might be full or the files locked. Check if the user can be created manually. |
| line xxx: *** ERROR Student xxx just created could not return number! |
Server error.
Student NOT created |
Disk error. Check if the disk is full. |
| line xxx: --- class xx not found. Unable to add student to class |
Warning.
Student created |
The class code does not exist. The student has been created, but has not been added to that class. - Check for spelling mistake in the class field, check for missing tabs in the line
- Make sure the [classes] section is placed before (above) the [students] section in the import file so that the classes are created first, then the students added.
- If the class does not exist in the system, add a [classes] section and add a line to create the class
|
| line xxx: *** ERROR Student xxx is already in 16 other classes |
Format error. Student not added to class |
This error shows when the student is being edited. This student already belongs to the maximum class allowed and cannot be added to another one. Manually remove the student from some of the other classes using the class function menu before importing again. |
| line xxx: *** ERROR Write error when adding student to class |
Server error. |
Disk error. Check if the disk is full or the server files locked |
| line xxx: *** ERROR User: xxx not found, not deleted |
Delete format error
Student not deleted |
Under the [delete] section, the student at the line mentioned does not exist therefore cannot be deleted. Check for spelling mistake in the USERID field |
| line xxx: *** ERROR student xxx was not deleted by the server. |
Server error
Student not deleted |
Disk full or server files locked |
Report Functions
Detailed and Summary Reports are two internal functions of the CAN-8 software.
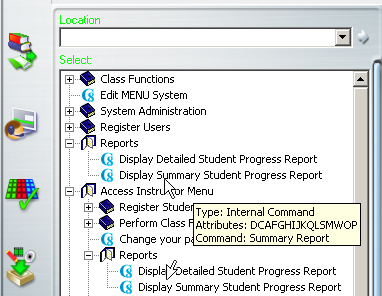
They come by default in the system administrator's and instructor's menu.
These functions can be deleted or added to other menus using delete or copy/paste in the treeview, or by manually creating an Internal Command item type and assigning the command
SUMMARY REPORT or DETAILED REPORT.
Detailed vs Summary Student Progress Reports
The Detailed Report provides information on a sessions-by-session basis and includes dates and times of user login, IP address, and what actions the user took during that session.
Each selected item from the menu is displayed along with the time spent on it. At each login the report shows an elapsed time during the session, along with a duration for each lesson item selected by the user.
This report is suitable to trace user activities and to determine where the students spend the most time. It is also helpful as a tool to diagnose unusual activities such as the registration of unknown users and other system level changes.
The Summary Report provides only a total of time spent by users on the system. It also includes their last login date. This function is more suited to creation of reports regarding student attendance and if they have spent enough time on the system to complete the assigned work.
Report Options
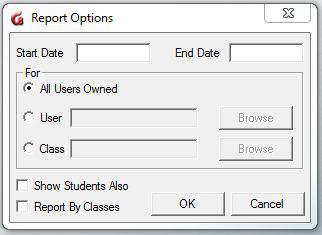 When selecting Display Detailed Student Progress Report or Display Summary Report, you are presented with a Report Options window.
The options available are the same for both types of report.
They can be combined in different ways to create individual or group reports.
These options are detailed in the sections below:
The Date fields
These fields are optional.
- If you do not enter a start and end date, the report will start from the last system refresh (or the installation of the CAN-8 system on the site) and end at the current date.
- If you enter a start date but no end date, the report will be issued from the date given to the current date and time.
- If you enter an end date but no start date, the report is created from the first records available on the system, until midnight of the end date given.
- Finally, if you enter a start date and an end date, the report shows activities that took place on the system from the start date at 12:01AM to the end date at midnight.
The date format, for these fields, is CCYYMMDD where CC is the century (ie 20), YY is the year, MM is the month and DD is the day. All numeric fields must be two digits. For example March 8, 2010 would be represented as 20100308 in the date fields.
Note:
For same day activity reports, either enter identical dates in the Start Date and End Date fields or the current date in the Start Date field and leave the End Date field empty.
The FOR section
You have three options in this part of the window:
1. All Users Owned.
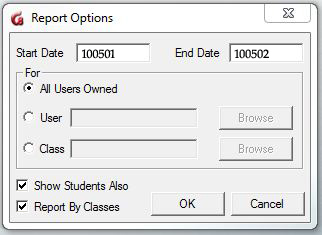 If you choose this option, you will have a detailed report of the activities of all the users that were created under the ID you signed in with. Since the system administrator only creates instructors, the report will show the activities of all the instructors during the time frame specified in the DATE fields.
- If you signed in as MASTER, the option Show Students Also can be selected. The report will show all activities recorded for the instructors and the students in an alphabetical order.
- If the option Report By Class is also selected, as above, the instructors and their students' records will be listed, but will be listed by classes instead of alphabetical order.
Note:
If the report function is accessed by an instructor, the options Show Students Also and Report by Classes will not appear on the Report Options Window since instructors can only display the records of the users they have created themselves, implying only students.
2. User
If this option is selected, you may either enter the User ID in the User field or select Browse and choose a User ID from the user list. The report will show the activities from that user only, and for the time frame specified in the date fields or from their first entry recorded in the system if no dates were specified.
Note:
The System Supervisor can type in any user code in that field, student or instructor.
An instructor can only type the code of the students they created themselves. The browse button will display the list of available IDs the report can be made for.
3. Class
To view a class report, or activities recorded for all users (including the instructor's) belonging to a specific class, select Class, enter the class code or click on Browse to select a class from the class list.
Note:
The System Supervisor can type in any class code in that field, and will have a report of all the users belonging to that class.
An instructor who does not belong to any class can select
any class that exists in the system and view its students, even if the students were registered by an other instructor.
Instructors who belong to one or more classes will only be able to view reports for the classes they belong to.
Report Generation
Depending on the date frame entered and the number of activities recorded on the system for that period, the report can take several minutes before being displayed.
Reading the Detailed report
The report is displayed in the Detailed Student Progress report window.
Depending on the size of the report, it may take a few seconds to a few minutes to display the report. The entire report is displayed, and the user can use the scroll bar on the right side of that window to show data that cannot be displayed at once.
At the top of the report window is the header bar. It divides the report in columns. There are 4 headers in that bar; each header corresponds to a column. The data shown in each column gives a specific type of information.
The headers are as follow:
| Start Time |
Type |
Activity |
Elapsed Time |
| Gives the absolute system time at which the action took place |
Indicates that the following action modified the user database, the lesson plan or the Tracker screen at an instructor (INST) or system administrator (admin) level. |
Describes the action taken by the users and their position in the menu |
Gives the time of the action relative to the starting time as well as the total session duration. |
Activity
The reports can display the activity records of several users, therefore the activity data reports always displays:
- The User ID and Login information
- The activities for the user listed.
User Information
The report always starts with the 3 following lines:

- The top line gives the name and user Id of the person whose records are being displayed.
- The second line gives the start date of the records that follow.
- The third gives the IP address of the station the user was signed on, and the time at which the CAN-8 session was started.
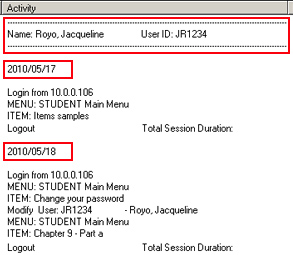 If a report is done for a period over several days, and the user has been active in the system on different dates during that period, the Activity report for that user will show the login date followed by the activities, then the next login date, and the corresponding activities.
The name and user ID are not repeated.
If a report is done for a period over several days, and the user has been active in the system on different dates during that period, the Activity report for that user will show the login date followed by the activities, then the next login date, and the corresponding activities.
The name and user ID are not repeated.
The Station's IP information may change if the student started the session on a different machine.
NOTE:
If the report lists the activities for several users, the users are sorted alphabetically by name. To sort by date, create a new report using the Date Start and Date End fields.
Activity details
After the User information comes the activity details.
The table below lists the entries you can find in a report and a short description for each.
| Entry |
Description |
Privileges Required |
| System Admin |
Instructor |
Student |
Name: Julie Breton User ID: Jbret
No Activity records stored for that user |
The user Julie Breton did not sign in CAN-8 during the time period specified in the report |
X |
X |
X |
Logout
Total Session Duration: 00:04:35 |
The user signed of CAN-8. The duration of this session was 4min 35 sec. |
X |
X |
X |
| MENU: MASTER Menu |
Accessed master menu. This person was signed in with the MASTER ID. |
X |
|
|
|
| MENU: INSTRUCTOR Main Menu |
Accessed the Instructor's menu. |
X |
X |
|
| MENU: STUDENT Main Menu |
Accessed the Student's menu. |
X |
X |
X |
MENU: STUDENT Main Menu
ITEM: Chapter 9 |
Accessed the Student's menu's. Entered the lesson titled "Chapter 9" as a student. |
X |
X |
X |
Create Menu Item (Serial 142): ESL Level 1
Submenu: ESL1 |
The First line shows a menu creation record, the title ESL Level 1 and the serial number for the item created. This serial number will be referred to again if and when the menu entry is deleted.
The second line shows the item type (Submenu in this case) and the MENU TAG (ESL1)
|
X |
|
|
| Delete Menu Item: Item Name Not Available (Serial 00003) |
The menu item that was assigned the serial number 3 was deleted. |
X |
|
|
Create Menu Item (Serial 1): ESL Level 1 - Part 1
EAASY - Item Path: SVI\ESL11 |
This is also a menu entry creation record. The first line shows the same type of information as above: Serial number and title.
The second line shows the item type (EAASY) and the path assigned to the lesson. |
X |
|
|
MENU: User Registration Menu
ITEM: Register a User
Create User: JR1234 Name: Royo, Jacqueline |
User created. ID and name are shown below. If this line is found under the system admin records, the user created is an instructor. If this line is part of an instructor's record, the user created is a student. |
X |
X |
|
| INSTRUCTOR ITEM: Chapter 9 |
Accessed a menu item (chapter 9) through a function that requires instructor's privileges, like the Planner or the Tracker. |
X |
X |
|
MENU: Report Functions
Display Detailed Student Progress Report |
Created a detailed progress report |
X |
X |
|
| Modify User: MASTER - System Supervisor |
The System Supervisor's changed his profile's settings |
X |
X |
X |
| Modify User: JR1234 - Royo Jacqueline |
Changes were made to the profile settings of the user mentioned |
X |
X |
|
MENU: User Registration Menu
ITEM: Display user list |
Entered the User Registration menu and selected the display user list function |
X |
X |
|
| ITEM: Edit system attributes |
Modified the system Attributes.(Added, removed, or modified)
| X |
|
|
Reading the Summary Report
The report is displayed in the Display Summary Student Progress report window.
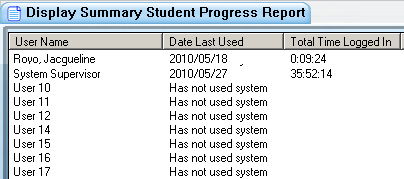 Depending on the size of the report, it may take a few seconds to a few minutes to display the full report. The entire report is displayed, and the user can use the scroll bar on the right side of that window to show data that cannot be displayed at once.
The header bar divides the report in columns. There are 3 headers; each specifies the content of the column below.
The headers are as follows:
| User Name |
Date Last Used |
Total Time Logged In |
| User names, listed in alphabetical order |
Displays either:
- The date the user last used the CAN-8 system
- Has Not Used System if the user is registered yet
- has not used the system during the date frame selected in the report window.
- never signed in CAN-8 since the ID's creation if no time frame was entered.
|
Gives the total time of all recorded sessions for that user since the user ID's creation.
The time displayed is in the format HH:MM:SS |
Saving the reports
It may be desired to save the report to a file to print it, for
inclusion into some other document or to refer to later.
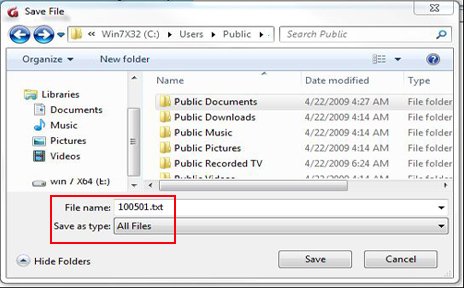 If such is the case, once the report is display, select FILE > SAVE in the top menu bar.
In the Save File window, select the folder you wish to save the report in, then enter the name and extension of the file (.txt).
Once the report is saved locally as a text file, you can open it with the editor of your choice to view or print as desired.

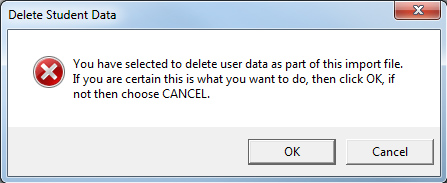 if the line specified refresh students.