The Tracker
- About the Tracker
- Access the Tracker
- Open the Tracker
- The Tracker's Interface
- The Header Bar
- List Users
- User Status
- Online Users
- Help Request
- Customized Student List
- List Students Alphabetically
- List Students By Progress
- List Students By Score
- Simplified List
- List Students Online
- List Your Own Students
- List Students by Class
- View by Class Procedure
- Activity Modes
- Change Lesson Mode
- Practice Mode
- Test Sequence
- Wait to start
- Start Test For All Students
- Start Test For Selected Student
- Start Test For Online Students
- Review Results
- Show Scores
- Final Mark
- Monitor the Students Progress
- Cells Colour Code
- Zoom in & out
- Answer Display Area
- Listen to Audio Responses
- Listen to Students' Recordings
- Listen to Sample / Instructors' Recordings
- View Students' Written Responses
- Self-Correcting Answers
- View Multiple-Choice Answers
- View Fill-In -the-Blanks Answers
- Leave a Message/Oral Feedback
- Procedure to Leave a Message
- Call a Student
- Broadcast to All Students
- Evaluate the Answers
- Marking tools
- How to Read the Mark Field
- Mark an Item
- Change a Mark
- Display Marks
- Display Marks Per Item
- Display Total and Subtotal Marks
- Add Mark Columns
- Cumulative Marks
- Mark Calculation Options
- Record Keeping
- Export Students' Oral Answers
- Export One Answer From One Student
- Export All oral Answers From One Student
- Export All oral Answers from All Students
- Export Evaluation Marks
- Export Marks Procedure
- Export Marks Format
- Export Scores Only
- Mark Out of Export format
- Mark Summary Export Format
- Include Legend in Export
- Print the Tracker
- Delete Student's Data
- Delete The Data of One User
- Delete Data From All Users
- About the Planner
- Create a New Planner in the Menu
- Prepare for Recording
- Get the Material Ready
- Planner Interface
- Build a New Plan
- Open the Planner
- Add Items to the Planner
- Create New Item
- Item Types List
- Item List
- Move Items Between Planners
- Edit the Planner
- Delete Items
- Save the Planner
- Add Content to an Item
- Add Text to an Item
- Format Text
- Add a Recording or an Audio File
- Record Sound/Audio
- Import Sound/Audio in an Item
- Drag/drop Audio in an Item
- Play Audio
- Edit Sound/Audio
- Synchronize Text and Sound
- Emphasized Text
- Add Images
- Import Images
- Link a video
- Delete Item content
- Save items Content
- Introduction Item
- Teach Item
- Example Item
- Simultaneous Item
- Verify Item
- Read and Record Item
- Ask Item
- Multiple Choice item
- Fill-in-the-Blank item
- Write/Dictation item
- Conversation item
- Disabled Item
- Item Properties
- Change Item Type
- Marks
- Item's Name
- Part Marks
- Match Case
- Randomized Answers - Multiple Choice
- Play Limit
- Match Case
- Item Options
- Timers
- Student Controls Locked
- Item View Time Counter
- No Limit View Time
- Sound Play Time View Limit
- Set View Limit
- Recording Time Limit
- Virtual Keyboards
- Select a Keyboard
- Create a Keyboard
- Save a Keyboard
- Optional Keyboard
- Deleting a Keyboard from a lesson
- Planner Options
- Slow Enable
- Legacy Window Size
- Item Selection
- Hide Lesson Menu
- Display Items in Sequence
- Display Items Randomly
- Back Button
- Feedback
- No Feedback
- Partial Feedback
- Full Feedback
- Users Preferences
- Introduction
- System Tools Privileges
- System Attributes
- System Attributes Assignment Sample
- Define System Attributes
- Hide Menu with Attributes
- Manage Menus
- Add Items In Main Menu
- Create New Menu
- Edit Menu Items
- Move Menu Items
- View Menu Items Properties
- Copy Lessons/tests
- Link to an Existing Lesson
- Link to an Existing Menu
- Users & Groups Administration
- Class Functions
- Create Class
- Class Schedule
- Sample Schedule
- Edit/Modify Classes
- List System Classes
- Add Student to Class
- Remove Student from Class
- Delete Class
- User Registration Functions
- About Users
- Register an Instructor
- General Information Tab
- User Attributes Tab
- Instructor Settings tab
- Register a Student
- Student Settings tab
- Delete a User
- Change a User
- Display User List
- Save Display User List
- Detailed vs Summary Reports
- Create a Report
- Select a Report
- Report Options
- Detailed Report
- Summary Report
- Save Report
- About Importing Registration
- Import Overview
- Import File Format
- Sample Import File
- Import File - Lines and Fields Format
- Import Classes
- Import Instructors
- Import Students
- Delete Users Via Import
- Delete Classes Via Import File
- Refresh System
- Reresh Students
- Reresh Classes
- Import Procedure
- Reading the Import Log
- Babilon
- Add Babilon to Menu
- The Babilon interface
- The Babilon Instructor's Console
- The Babilon Options Menu
- Student WAIT List-Babilon
- Babilon Groups
- The Babilon Student's Console
- Starting a Babilon Session
- Manual Placement in Babilon Group
- Manually Pre-set Babilon Groups
- Automatic Assignment To Babilon Groups
- Move Student to Different Group
- Remove student from Babilon Group
- Listen to a Babilon Discussion
- Join a Babilon Discussion
- Record a Babilon Discussion
- Settings for Babilon group recordings
- Stop Babilon Recording
- Listen to the Babilon Recordings
- Deleting Babilon Recordings
- CAN-8 Overview
- Using CAN-8. Getting Ready
- Installing CAN-8
- Starting CAN-8
- CAN-8 Login Screen
- Errors Signing in
- About User Roles
- System Supervisor Role
- Instructors' Role
- Students' Role
- Default Menu per ID
- Tools Available per ID
- About the Player
- Open the Player
- Player Interface Description
- Player's Menu vs Main Menu
- Player's Menu Icons
- Navigate the Player's Menu
- The Player's Work Area
- The Player's item Bar
- The Player's Text Area
- The Player's Graphics Area
- The Player's Sound Graph Area
- The Player's Button Bar
- The Player's Audio Controls
- The Player's Items' Description:
- The Introduction Item - Player View
- The Teach Item - Player View
- The Example Item - Player View
- The Simultaneous Item - Player View
- The Verify Item - Player View
- The Read and Record Item - Player View
- The Ask Item - Player View
- The Multiple-Choice Item - Player View
- Multiple-Choice - Full Feedback - Player
- Multiple-Choice - Partial Feedback - Player
- Multiple-Choice - No Feedback - Player
- The Fill in the Blanks Item - Player View
- The Writing or Dictation Item - Player View
- The Conversation Item- Player View
- the Player's Keyboards Options
- Character variants - Player
- The Player's Virtual Keyboards
- The Player's SV Phone
- The Player - Send Call request
- The Player - Receiving a Call
- The Player - Messages from Instructor
- The Player - Timers
- The Player - Preparation Timer
- The Player - Recording Timer
- The Player - Practice and Tests
- The Player - Practice Mode
- The Player - Pre-Test Mode:
- The Player - Test Mode
- The Player - Review mode
- The Player - Final Mark
About The Tracker
The Tracker Screen allows an instructor to:
- Change the activity mode (practice or test).
- Grant access to an activity or place it offline.
- List the names of the students who have accessed the activity and identify those currently taking it.
- Enable a test for a class or an individual.
- See a real time graphical display of the progress of each student as they go through the activity.
- Listen to each recording submitted.
- View submitted written, Multiple-Choice and Fill-in answers.
- Evaluate and mark the answers.
- Record messages or special instructions to individual students.
- Speak in real time to a group.
- Initiate a conversation with a single student.
Accessing the Tracker
To access the Tracker, chose any one of the 3 following options:
-
 Select a lesson from the main CAN-8 menu, and then press the Tracker icon located in the tool bar on the left of the interface.
-
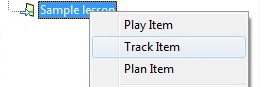 Select the lesson title from the main CAN-8 menu, right click on it, and then select Track Item from the contextual menu.
-
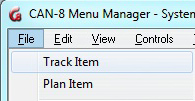 Select the lesson title from the main CAN-8 menu, and then select File > Track Item from the menu bar.
NOTES
- check that the lesson is selected (highlighted blue in the tree menu).
- verify that the item you are trying to track is a lesson
 and not a submenu.
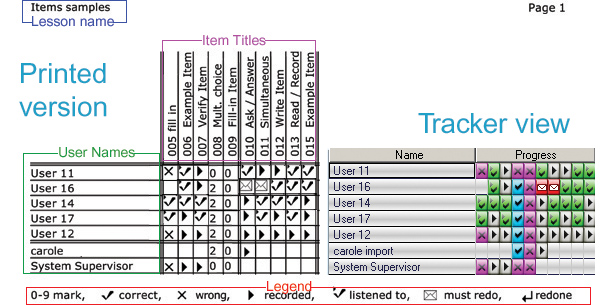
The Tracker's Interface
The Tracker's interface is placed within the user's main work area, thus leaving the User's Tab Bar visible and available at all times for the instructor:

You can easily switch from a Tracker to a lesson, a planner or even another Tracker without having to exit the Tracker screen.
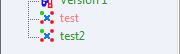
Since up to 7 tabs (including Planners, Trackers and Students Programs tabs) can be opened simultaneously, the icon located to the left of the Tracker tabs  will help locate opened Trackers at a glance. The lesson's name is also shown on that tab.
A blue tab (as in the image above) shows which tab is presently active. Tabs are otherwise grey.
The Tracker's interface is composed of:
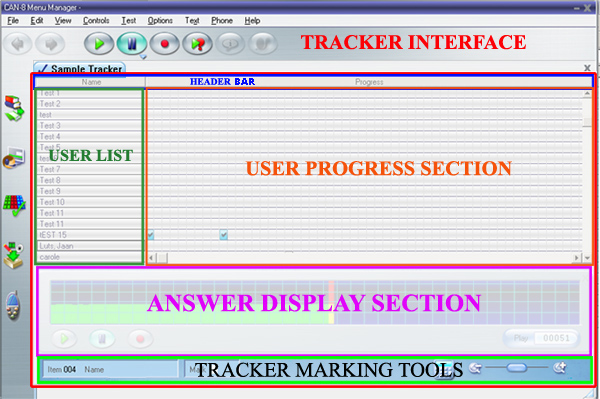
- A Header Bar that references the information displayed below. Also used to sort the information by category and relevance.
- A User List, where the name of the users who have accessed the lesson are displayed as well as their status: offline or online.
- A Progress Area where users' data is displayed by colour on a per item basis.
- An Answer Display section, where the students' recorded data can be viewed or listened to.
- A Marking section, which provides tools to assign marks and calculate mark totals and to change the view size of the Tracker cells to facilitate access to the answers.
NOTES
It is important to be familiar with the layout of this interface and the names that have been given to each area of the Tracker as they will be referred to throughout the Tracker's manual.
The Header Bar
This header bar is divided in several sections, each describing the data displayed.
There are 3 different headers:
- Name. Under that header is the list of users who have accessed that lesson since the last time the Tracker was refreshed or the system first installed.
- Progress. The data in that section is displayed as colour coded cells. Each cell in that area represents one exercise (or lesson item). The entire section, made of coloured and/or empty cells, represents the entire lesson.
- Mark. Marks listed in this column represent the mark per user for a specified section of the lesson.
- The Mark section can be absent if there is no need to score the results.
- There could be more than one Mark field in the header bar if it is necessary to mark the test by subsections. In which case, the Mark listed in the column below is the sum from either the first cell (or item) to the last cell directly before the Mark section, or from the first item after the previous mark section, to the last cell directly before the new Mark section.

Each of these headers can be clicked on to sort the information listed under.
- Click on the Name header to list the students alphabetically.
- Click on the Progress header to list the students in the order of progress, with the student with most progress on top.
- If you click on the Mark header, the information below is listed from the highest mark to the lowest one.
The User List
This section displays the names of the students who have accessed the lesson since the Tracker was last refreshed and their data deleted.
By default, users are listed by the order in which they signed on to the lesson.
This list also indicates the user's status.
User Status
The users' names are displayed on different background colours depending on their status:

If the student is currently active in the lesson or waiting for a test to start, the name is displayed on a blue background.

If the student is currently taking a test, the name is displayed on a green background.

If the student has accessed the lesson in the past but is no longer in, the name is displayed on a white background.

If the student is calling for help, the name is displayed on a red background.
Customized Student List Display
Over time, the student list may become too large or cluttered to easily view the progress of only the few students the instructor wishes to monitor, or it may be preferable to view only a specific group of students for monitoring purpose.
Several tools are available to help reduce the display to a sub-listing of students, or change the order of the list:
| List | Tool | Display | |
|---|---|---|---|
Alphabetically |
Click on the Name header of the header bar or Select VIEW > SORTED from the menu bar. |
Sorts the list of users in alphabetical order. Can be combined with any function that minimizes the display, like View By Class, View Own and View Online. The system will keep the settings for that Tracker for the entire CAN-8 session. The default display will be restored when the instructor logs back in CAN-8 for a new session. . |
|
By progress |
click on the Progress header in the header bar |
Lists all users who have entered the lesson by order of progress.
This option is only available from the Header bar. If the progress section is separated by mark columns, each progress section can be ordered independently. Can be combined with any function that minimizes the display, like View By Class, View Own and View Online. |
|
By score |
click on the Mark header in the header bar |
Sorts the students by score; the highest scoring student is displayed at the top of the screen. If there is more than one Mark section, each section is sorted individually. The total scores for each student out of the maximum possible (only for the questions taken) are shown at the right of the screen. As students take more questions or marks are given for items recorded, the scores and the maximum for the questions are updated. However, the list of students is not sorted again until Show scores is selected again. Can be combined with any function from the Simplified display section below. |
|
Restricted view |
Select VIEW > ONLINE ONLY from the menu bar |
Displays only the list of users currently using the lesson. Their name is highlighted in cyan. Can be combined with View Own and View By Class to further limit the display and with any of the sorting options. |
|
| Select
VIEW > OWN STUDENTS from the menu bar |
Reduces the list to only the students who have been registered by the instructor who is monitoring.
If the students were registered via an import file or by another instructor, selecting this option would display an empty Tracker, even if the students were added to the instructor's class. Can be combined with View By Class and View Online Only to further limit the display and with any sorting options. |
||
| Select
VIEW > BY CLASS, and then select the class name |
Displays only the list of students who belong to the class(es) selected. For more information on how to select classes to view, read the Display By Class section. Can be combined with View Own Students and View Online Only to further limit the display or with any of the sorting options. |
||
NOTES
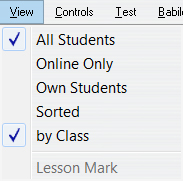
- Using one of the above options to simplify the list display does not delete the other users' data from the Tracker. It only hides it. To view the full list again, select VIEW > ALL STUDENTS from the menu bar, except if you had selected VIEW > By Class as addressed below.
- Some of these functions can be combined.
- The settings are kept for that Tracker for the duration of the CAN-8 session.
- If when using the simplified display functions, the user restricts the display to nothing at all, the following alert will show:

You must de-select some of the options checked in the View menu.
Display By Class
The list of students displayed in the Tracker depends on the following condition:
- Instructors belonging to NO class at all will be able to monitor all students who enter the lesson, independently if these students belong to a class or not.
- Instructors belonging to one or more class(es) will only be able to monitor the students who belong to the same class(es)
Considering the above condition, the option VIEW > BY CLASS will reduce this list to a more manageable one but will yield different results:
Example
- The instructor Inst1 does not belong to any class in the CAN-8 system.
- The Instructor Inst2 belongs to Class A and Class B
- 4 groups of students belonging respectively to Class A, B, C and D all took TEST T.
- When INST1 monitors the TEST T, the Tracker displays all the students registered in the CAN-8 system who entered the test, including those from class A, B, C and D.
- When INST2 monitors the TEST T, the Tracker displays only the students from Class A and B who entered the test. INST2 will not see students from class C or D
-
Both instructors can use the VIEW > BY CLASS option to limit the display to one class, but whereas INST1 can select any (one or more) of the classes available in the system (A, B, C, D and all other available), INST2 can only limit the display to one of the 2 classes (A or B).
If any of these 2 instructors select Class A, but none of the students from Class A took the test, the following alert will show:
This message indicates that although some students have taken this test, none belong to Class A. The instructor must de-select the class in order to display the other students.
VIEW > BY CLASS Procedure
From the menu bar, select VIEW > BY CLASS.
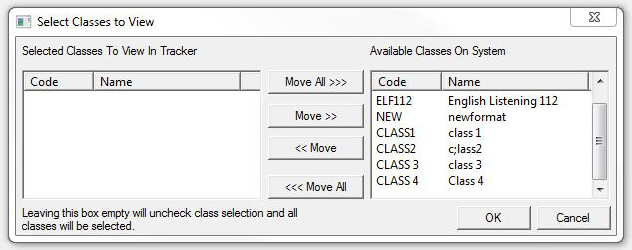
- The available system's class list on the right
- The selected class list on the left.
By default, no class is selected; therefore, none is listed on the left panel.
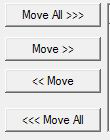
You can toggle the classes from one side to the other by selecting them with the mouse and using any of the Move buttons in the center section of the window.
Select OK When the selection is complete.
NOTES
- It is possible to select more than one class to view.
- To return to the default Tracker view that includes all the system users, move all classes from the Selected Classes section to the Available Classes section.
The Users Progress Area.
As soon as students submit their answers, colour-coded cells appear in the lines corresponding to their names. Each cell corresponds to one answer.
These cells indicate the type of item the answer was for, the students' progress in the activity and if these answers were evaluated or not.
More details regarding the cells' colour-code and the evaluation of the answers are available in a subsequent paragraph.
The Answer Display Area
This area is not visible when the Tracker is opened, to allow the display of the student's progress.
When the instructor evaluates the answers, either written or oral, the progress area will be reduced to allow the display of the answer below. The line of the student being evaluated will show just above this area to simplify the instructor's navigation from one answer to the other.
This area's display will vary depending on the type of the answer: oral answers will show in an audio player, whereas written answers, including Fill in the Blanks and Multiple-Choice answers, will display in a text area.
When a voice message is being recorded, the recorder will also show in this section to allow the instructor to listen to the message before sending it.
The Tracker Marking Tools bar.
This bar is located at the bottom of the Tracker and is always displayed.
It contains all the tools necessary to identify the question being evaluated, score the answers, change the display of the progress area and calculate sub-totals and final marks.
Each of these tools will be described in the Evaluation section of this chapter.
Activity Modes
Unless otherwise specified, the lesson is used by default as a drill and practice.
This can be changed from the Tracker and the activity can be administered as a test instead.
This chapter is an overview of the different modes an activity can be set in, and their impact on the students' display.
Students who access the practice lesson can record answers or practice their pronunciation as many times as they wish.
The instructor can however administer the material as a test instead of a practice.
The behaviour of the software for that activity will change if it is set as a test. Furthermore, depending on the Planner options selected, students will or will not be allowed to redo skipped item.
The table below shows the difference between the same activity in Practice and in Test mode:
| Planner Option Item Selection |
Tracker Mode - Test | Tracker Mode - Practice |
|---|---|---|
| Menu |
|
|
| Sequential Back button on |
|
|
| Sequential Back button off |
|
|
| Random Back button on- |
|
|
| Random Back button off |
|
|

Changing the Lesson Mode
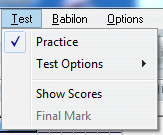
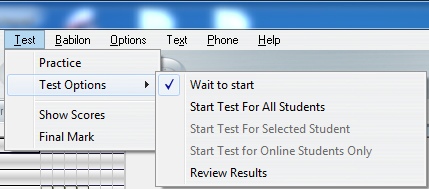
To change or set the mode of an activity, select Test in the top menu bar.
The options listed under TEST allow an instructor to set the lesson to practice or to administer supervised tests to a class or to one or more individuals.
When the Test menu is displayed, a check mark will indicate the current selection for the activity.
1. Practice
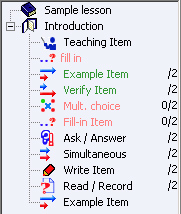
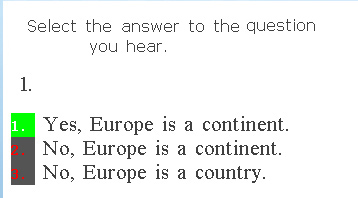
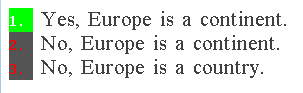
This is the default mode of any activity created in CAN-8. In practice mode, the colour of the items in the student menu indicate if the item has been done or not, and in the case of the Fill-In-the-Blanks and Multiple-Choice Items, if the answer was correct or not.
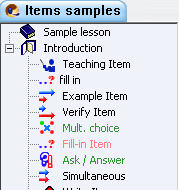
- Green item titles are for correctly answered Multiple-Choice and Fill-in questions and for all recorded answers, corrected or not.
- Red item titles are incorrect Multiple Choices and Fill-in answers.
- Black titles mean the item has not been answered.
In this illustration, the 3 first items have not been answered, the next 3 have, but 2 are correct and one is wrong.
2. Test Sequence
The sequence to assign an activity in TEST mode involves 3 steps.
- Wait to start,
- Start test,
- Review results.
Wait to start
This is the very first step to start a test. This option places the test offline while the students are signing on to the test.
-
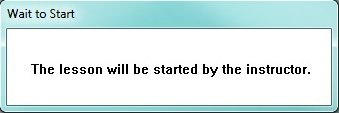
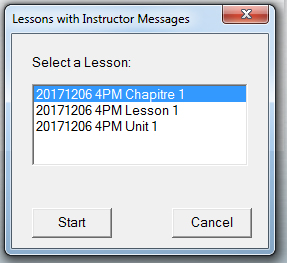
Students signing on to the test receive a message indicating that the test is not yet available. Students scheduled for a test must wait with that window displayed on their screen until the instructor starts the test. The names of the students who are waiting to take the test are highlighted in blue (see Online user list). Depending on which options below is chosen for the test, the instructor either waits for all scheduled students to be online or, for an open test, can start it anytime.
-

The wait to start status is also indicated to the instructor in the Tracker's information field at the bottom of the screen.
As soon as the lesson is placed in one of the 3 Test modes, the Wait to Start message will disappear from the students' screens and the test will start automatically.
NOTE
when a lesson is set to TEST, the students cannot access oral messages previously left by instructors.
Start Test For All Students
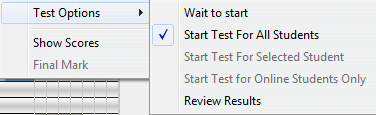
This mode opens the test to all users who select it in the menu, independently of the class they belong to or when they enter it, and it will remain available until it is placed in the Wait to Start mode again.
NOTES
- When in Test mode, the student will not receive feedback when taking a Multiple Choice or Fill-in Item if there is a mark assigned to these items.
- To help students identify the items that have been completed and those that were skipped, the completed items will show in green font in the menu, items that have been skipped in black font.
- As opposed to the Practice mode, if the Planner setting includes to leave the test menu to the students, the items titles will not turn red if incorrect. They will only show in green, for completed.
For test with the default Menu layout, students can select which question they want to answer first and redo some of the questions at will.
Placing the lesson in sequential or random mode in the planner will remove the menu but not prevent the student from retrying items or submitting answers to skipped items unless the enable back button option is removed in the Planner.
NOTES
- To stop the test, but leave the students a chance to review their answers or view the questions they missed, select Review Results. Students will not be able to submit any answer.
- To stop the test and remove it from the test takers' screens, select the Wait to Start option. Student will no longer have access to their answers or to the questions they missed.
Start Test for Selected Student
If testing needs to be done on an individual basis, it is possible to start one student at a time while preventing all other students from accessing the test.
The procedure is as follows:
-
The lesson must be on Wait to start.
When the student logs in and selects the lesson they will see the Waiting... window.
-
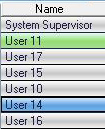
Once the student is in the lesson, the name is highlighted in blue in the Tracker's name section.
Click on the student's name to select it.
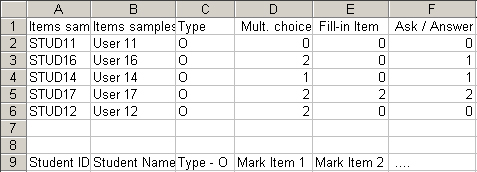
In this illustration the instructor selected User 14 -
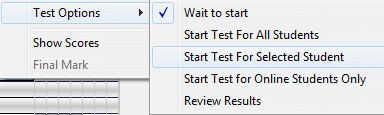
To start the test, the instructor selects Test Options from the menu bar, and then Start Test For Selected Student. This starts the test for this student and this student only.
-
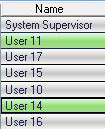
When the test starts, the student's name is highlighted in green in the Tracker.
In the example on the left, there are 2 users started in this test: User 11 and User 14.
NOTES
- You can start several users individually, one at a time, by repeating this procedure for each one.
- You cannot stop the test for one student only if other students are taking the same test.
Start Test for Online Students Only
The Start Test for Online Students Only option is a variation of Start test for all Students
Whereas Start test for all Students makes the test available to all users who access the lesson until the test is placed back in Wait to Start mode, Start Test for Online Students Only makes the test available to users who are waiting to start (Highlighted in blue in the Tracker) at the time the test is started.
Users attempting to access the test after the online group has started will receive the Wait to Start window and will be denied access to the test unless the instructor starts them individually.
To use the Start Online Students function:
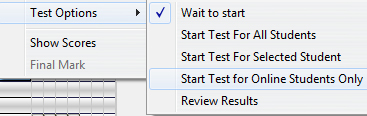
- Highlight one of the students whose name is highlighted in blue.
- select the option Start Test for Online Students Only from the test menu.
NOTES
- Users entering the lesson after the test is started will be highlighted in blue as they will not be able to access the test.
- It is possible to start another group or individual students using the procedure for Start Test For Selected Student or Start Test for Online Students while others are already taking the test.
- Switching the test mode to wait to start will stop the test for all students and make it u\inaccessible again.
Review Results
At the end of a test the instructor can select Review Results.
This ends the test for all students, even if they have not yet reached the end of the test.
Students can see the questions and their own answers if they previously took that test, but can no longer record or change previous answers, as indicated in the item's header bar.

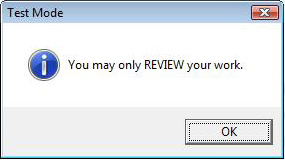
Any attempt to record or type an answer while the test is in review mode will bring the warning message illustrated.
Students can access any oral message left before the test, or after the evaluation.
If a menu is present, Multiple-Choice and Fill-in Questions that were correct are show in green; they are shown in red if the answers were incorrect.
Since Multiple-Choice and Fill-in Questions are corrected by the system, the marks for these items are available right away and displayed. If the test is made entirely of Multiple-Choice or Fill-in items, the students will see their results right away.
All other types of items that need to be corrected and marked by instructors are displayed in green if they have been answered. If the Instructor has already marked them, the score shows beside the item name. If the answer has not been marked yet, only the score the answer is out of is displayed.
Items not taken are displayed in black.
To confirm that that the test is no longer available and that students are now unable to record, the instructors have a red alert located at the bottom of their Tracker screen

3. Show Scores
Selecting this option sorts the students on the Tracker screen by score.
The highest scoring student is displayed at the top of the screen.
The scores for each student out of the maximum possible (only for the questions taken) are shown at the right of the screen. If students continue to work and answer more questions, or the instructor assigns more marks, the scores and the maximum for the questions are updated. However, the list of students is not sorted again until Show Scores is selected again.
NOTE
This option has no effect on the students' screen, only on the instructors' screen. It can be combined with any of the lesson modes.
4. Final Mark
This option will display the final results onto the students' screens.
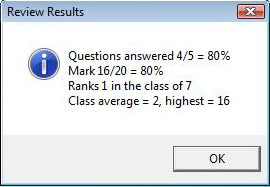
Only the Class Average and Highest (Mark) are common to all students who took that test. All other information like Mark and Rank are given individually. Each student sees his\her own mark out of the maximum possible in the test
The Final Mark is displayed to the student when the test is in Review Results or Practice mode.
The Final Mark window will be removed once the instructor deletes the student's data from the Tracker.
NOTE
This option should only be used at the end of the test, as the information it contains will not be updated if the students answers additional questions after it has been set.
Monitor the Students' Progress
While the students are working in the lesson, the instructors can monitor their progress and evaluate the answers submitted. They can also call the student, or answer a call request to provide help, or leave a recorded message if the student is no longer online.
Monitoring can be done in real time or at a later time.
The Progress Area.
To the right of each student's name is a set of colour-coded boxes that show the student's progress through the lesson.
This area, composed of coloured and/or empty cells, represents the entire lesson, with one cell per item that require an answer.
Unless the user list has been customized, the first cells row represents the answers of the user who first connected to that lesson.
But if you click on the Progress header, the data below will be listed by order of progress for the section:
- The lines with the most correct answers first
- followed by the lines with the most answers, including wrong answers
- and finally, the lines with less answers, or no answers at all.
Independently of the order in which the student is recording the answers (for example when a lesson is set to random mode, the student may have to answer the last item of the lesson before being presented with the very first item of the same lesson) the cells will always be placed in the order they appear in the planner.
Each box or cell corresponds to a lesson item that requires a response from the student. Instruction, Teaching, and Conversation items do not have cells to represent them since the student cannot record in these items.
As soon as a student submits an answer (selects Next after recording in an item), the corresponding cell in the tracker is filled with the color that represents its content type. If the student skips an answer, the corresponding cell remains empty.
The cells' colour code is as follow:
| zoom level | Response Type | Colour Code | ||
|---|---|---|---|---|
 |
 |
 |
||
 |
 |
 |
Empty cell | Default display of an empty Tracker cell. The student has not given an answer to that item. |
 |
 |
 |
Audio or text | The student has submitted a response. The response is now available for listening. |
 |
 |
 |
Audio or text | The instructor has listened to or viewed the response for this item. |
 |
 |
 |
Audio or text | The instructor has recorded special audio instructions (left an audio message) for this item, but the student has not yet listened to the message. |
 |
 |
 |
Audio or text | The student has listened to the message that was left and submitted a new response. |
 |
 |
 |
Text | The student has correctly answered this Multiple-Choice or Fill-in question item. |
 |
 |
 |
Text | The student has incorrectly answered this Multiple-Choice or Fill-in question item. The incorrect answer is available for review by the instructor. |
|
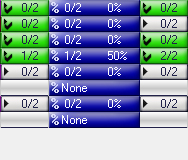
NOTE:  The largest view of a cell displays None instead of a score when the item has not been assigned a mark in the Planner. The largest view of a cell displays None instead of a score when the item has not been assigned a mark in the Planner.
| ||||
- The default display is the middle zoom that shows fixed size cells with icons.
Since a lesson can hold up to 240 items, all items cannot be displayed all at once on the same screen and a horizontal scroll bar at the bottom of the display area allows to view the rest of the lesson.
- The cells can however be displayed in a smaller size to give the entire overview of the students' progress for the entire lesson, even if it holds 2240 items.
- Alternatively, the cells can be displayed in a larger size to show additional details about each recorded cell and to facilitate the navigation when viewing the content.
To change from the default display to a global display or a more detailed one, click on the icons or of the zoom bar located at the bottom right of the interface
or slide the zoom cursor at the desired level:
Default display |

|
| Global Display
|

|
| Detailed display |

|
Answer Display Section
For monitoring purposes, students' answers are divided into two types: Those the computers can evaluate, and those the instructor must evaluate and mark.
Whereas a computer can evaluate if an answer from a Multiple-Choice or a Fill-in question is correct or not by comparing it to the instructor's answer, it cannot evaluate an answer that does not meet these criteria, such as a recorded answer to an open question. These answers are easily identified in the Tracker by their colour. All answers (oral or written) that must be evaluated by an instructor are represented in the progress area by a grey cell.
To view or listen to an answer that requires an instructors' evaluation, double click on its corresponding cell.
Listen to Audio Responses
While a student is in an item that requires a recorded response such as an Example, a Read, or an Ask item, the student may record the response, listen to it, and re-record it several times to try and get it right. The item indicator (or corresponding cell in the Tracker) remains empty (light grey) during that time.
Only when the student has completed a satisfactory recording and presses the Next button does the indicator turn grey to show that the recording is available for listening by the instructor.
The instructor can then listen to the student's answer and to the original audio that was recorded in the item by the instructor.
Listen to Students' Recordings
To listen to students' recordings the instructor can:
- Using the mouse, select the item by clicking on it.
-
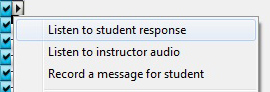 Right click on the cell and select Listen to Student Response
 - Using the arrow keys of the keyboard, navigate to the cell you wish to listen to, and then press F2.
The Sound graph of the student response appears on lower part of the Tracker interface ( Answer Display section) and the response starts playing automatically.
The Play and Pause buttons can be pressed to listen repetitively to the recording, or part of it.
Alternatively, the Play cursor can be moved by clicking the mouse on any spot on the volume display. The sound will play from that point.
Listen to the Sample/Instructor's Recordings
It might be necessary for the instructor to listen to the question the student was responding to or compare the student's recording with the audio example given:
-
 Press the Example button in the button bar.
 -
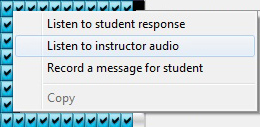 Right-click again on the cell you are listening to and select Listen to Instructor Audio
-
 The sound graph of the instructor's recording appears above the student's sound graph. To differentiate them, the audio part of the sound graph is displayed in cyan for the instructor, and green for the student.
To navigate from one recording to another, the instructor can:
- Use
 and
and  on either sound graph respectively.
- Use and in the button bar, where the Play button activates the student audio and the Example button activates the Instructor's audio.
- Click directly on either volume graph to place the sound cursor at the desired pace and activate it.
- Use any combination of the above methods.
Once the recording has been listened to:
- select the Exit button located at the top right corner of the Sound graph if you wish to exit the listening mode.
- Or click on the next item cell if you wish to continue listening to more answers.
- Alternatively, use the Arrow keys and the F2 key to navigate through the Tracker and listen to another item.
As soon as you exit the volume graph, or move to another cell, the previously selected item now appears in green to indicate that it has been listened to.
NOTES
- When entering a Tracker, you may notice that the Progress Display area of the Tracker is full and extends over the Answer Display area. If such is the case, when you click on the cell to listen to the student's recording, the progress display is reduced in size to allow space for the sound graph.
- If the cell you are listening to is located within the Answer Area (the lower part of the progress area), the entire Tracker row is then shifted above the Sound graph, thus allowing to view and listen to the other answers from that same student.
- If necessary, a scroll bar will appear on the right side of the progress area to view the cell rows that were shifted upwards.
View Students' Written Responses
Answers to the Written open questions can be viewed by double clicking on the items.
Alternatively, you can right click on the cell and select LISTEN TO > STUDENT'S ANSWER
To listen to the instructor's question, right click on the cell and selecting LISTEN TO > INSTRUCTOR'S RECORDING.
Once you exit the display window, the cell will turn green to indicate that it has been evaluated.
Self-Correcting Answers
The computer corrects the student's answers to Multiple-Choice and Fill-in answers.
Question items that are answered correctly are displayed in cyan cells.
Question items that are incorrect are displayed in magenta cells.
These answers can be displayed for verification, independently of their status.
View Multiple-Choice Answers
In the Tracker, the answer to a Multiple-Choice is represented by a Cyan cell if it is correct or a magenta cell if the answer was incorrect.
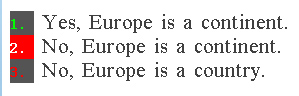
Double-clicking on one of these cells displays the question text and the answers. The response the student selected is shown on a red or on a green background.
 This is the answer the student selected and is the correct one. The number of the answer is displayed on a green background.
-
 This is the answer the student selected, but it is incorrect. Incorrect answers are displayed on a red background.
The status of the options (correct or incorrect) set by the instructor in the planner are also displayed and colour coded:
-
 The answer(s) the instructor set as correct in the planner are displayed in green on a dark grey background.
-
 The answer(s) the instructor set as wrong in the planner are displayed in red on a dark grey background.
 |
 |
In the example above, the student chose answer #1.
|
In the example above, the student chose 2. for answer.
|
NOTES
Although it is possible to change the mark assigned by the system to a Multiple-Choice item, it is not possible to change its status (correct/incorrect). It is therefore possible to have a red cell for a Multiple-Choice item showing the full mark.
The cells of Multiple-Choice questions never turn green.
View Fill-In items
In the Tracker, answers to a Fill-in question are represented by cyan cells if correct, magenta cells when incorrect.
When clicking on one of these cells, both, the question and the text, are displayed.
 |
 |
| In the above image, the response given was correct. The student's answer is shown in the black text area. | The Answer given in the above example is wrong. The student's wrong answer is shown in the black text box, the correct answer is shown underneath and is highlighted in green. |
Select the exit button on the Answer Display area to return to the full Tracker screen or select the next cell to view the next item.
NOTE
As for the Multiple-Choice questions, it is possible to change the mark assigned by the system to a Fill-In-The-blanks questions, but not its status. It is therefore possible to have a red cell for a Fill-in item showing the full mark. This indicates that the question was wrong but the score changed afterwards.
The cells of Fill-in questions never turn green.
Leave a Message/Oral Feedback
After listening to a response, the instructor may decide to leave some oral feedback for the student or decide that the student should redo the item.
The student at login will receive a notification of the message. The student can then opt to listen to the message by selecting the link provided and will be brought directly to the lesson and the item where the message was left, or opt out opt out and proceed with another lesson.
The alert will come back as the student opens the main menu, until the message has been listened to.
All messages left in an item over time are kept and accessible by the students until the students' answers are deleted from the tracker.

In this illustration, the instructor has left 7 messages as indicated by the number on the icon. If the number is red, it indicates there is an unread message. If the number is black, it indicates the student has listened to all 7 messages.

To listen to the messages, the student can click on this button, then select the message to play.
Procedure to Leave a Message:
- Select a cell in the tracker
- Press
 either on the sound graph or in the button bar, or right click on the cell and select Record a Message for Student.
To differentiate the message volume graph from the student's answer graph or the instructor sample audio, the message volume graph is red. - Once the message is finished recording, and as soon as the instructor either exits the graph or selects the next cell, the following prompt is displayed:
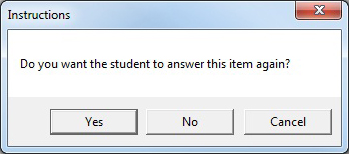
- OK - The student will have to redo the exercise. The student will not be able to move to another exercise until this one is re-done.
- NO- The student will hear the message, but redoing the exercise is optional.
- CANCEL- removes the message from the item.
- As soon as an option is selected, the cells turn red to show it now includes the message.
- Once the student has listened to the message, the cell turns green if no answer was required or yellow if a new answer has been submitted.
- Any item on the Tracker Screen, whether it contains an answer or not, can be selected for a message.
NOTE
Starting with the version 2018 01 31 of CAN-8, all messages left in an item over time are kept and accessible to the students until the student's answers are deleted from the tracker.
Call a Student
While monitoring a test or a lesson, it might become apparent that one of the students needs assistance, either because that student placed a call request (The Background of the student's name in the student's list turns red) or because the instructor notices skipped items or irregularities in the answers.
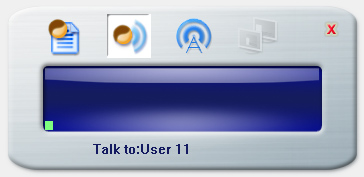
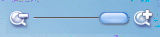
The Net Phone can be used to initiate a real time conversation between an instructor and a student. Students cannot initiate that call; only instructors can. However, students can send a call request.
A similar phone is displayed on the student's screen.
To terminate the call to the student, the instructor presses the Exit key.
There are several ways to initiate a call to a student:
- If the students are in the lesson, the Instructor can initiate the call from the Tracker by either:
-
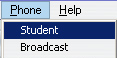
The instructor first places the cursor on the name of the user to call, and then selects Phone > student from the menu Bar.
The Net Phone showing the instructor's voice in the volume display appears on the screen. -

Select the student to call then the Phone icon in the Left button bar. The Net Phone will start.
-
- If the students are NOT in the lesson, the Instructor can initiate the call from the Tracker by either:
-
selecting the Phone icon
-

then the Student List icon
- and finally double clicking on the user name in the list displayed. This list only displays users that are online at the time.
-
NOTES
- The SV Net phone can be used to contact a remote student, someone connecting from home for example. The user does not have to be on the same network than the instructor, as long as they are signed on the same server.
- The instructor can only talk to students who are signed on. The communication is from computer to computer and cannot be saved or edited, therefore instructors cannot leave a message.
Broadcast to All Students
The instructor can speak in real time to the entire class at the same time using the Phone Broadcast function.
This function can be accessed:
-
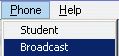
By selecting Phone > Broadcast from the menu bar.
-
Clicking on the phone icon from the left button bar,
-

then the broadcast icon on the SV Phone interface.
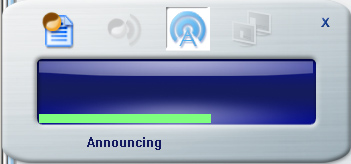
The SV Net Phone appears on the screen showing the instructor's voice.
Each of the CAN-8 users in an active session will receive an on-screen message telling them to Listen to the Announcement.
NOTES
- All users signed in the CAN-8 language lab software will see this message and hear the instructor's voice.
- If a CAN-8 user is recording or listening to an item at the time the broadcast is initiated, it is paused until the broadcast is terminated., at which point the recording will start again automatically.
- Students cannot terminate a broadcast from an instructor
- To terminate this broadcast the instructor must press the Exit button.
- Like for the CALL STUDENT phone function, and since the 2018 release of CAN-8, broadcasting can be done over the Internet for remote users who are signed in. For versions of the software pre-dating 2018, broadcast cannot be done over the Internet.
Evaluating the Answers
When evaluating the answers to a test, instructors can mark them as long as the items have been assigned a mark in the Planner.
This section describes how to use the tools available to mark the answers, calculate scores and subtotals, and export the information out of CAN-8 for record keeping
Marking Tools
The tools necessary to mark items and calculate the score of the students are located at the bottom of the Tracker screen.
To the left is the mark area. This is where the name of the item, its position in the Planner, the score you or the computer have given to the item and the maximum mark the item can be scored on are located

To the right of the screen, you have the calculator. It is used to add mark or subtotal columns in your Tracker, where you need them.
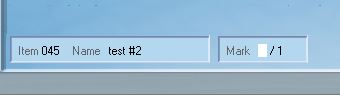
Understanding the Mark Field

If the mark field is blank and followed by /x, then the item has not yet been marked and "x" is the maximum mark you can give to this item. In this illustration, 1 is the maximum mark for this item

If the mark field show 0 followed by /x, then the item has been marked already. It was given a mark of 0. In this example a mark of 0/1

If however you do not see a /x after the mark field, then this item has not been assigned a mark in the Planner and cannot be marked.
Marking an Item
If an item was assigned a mark (../1 to ../10) in the lesson plan, the instructor can score the answer in the Tracker.
Multiple-Choice and Fill-in questions are corrected and scored by the computer. A correct answer gets a full mark; an incorrect gets zero. If the item was set with the Part Mark option in the planner, a partially correct fill in the blank answer will get a partial mark.
For recorded answers, the computer does not mark the answer. The instructor must first listen to the answer and then mark it manually.
To mark the student's work:
- double-click on the cell in the Tracker to display the answer,
- type the digit corresponding to the mark desired.
NOTES
- There is no need to click on the mark box first, or to remove the existing mark if any. Simply type the number that will become the mark.
- The score cannot be greater than the maximum mark allowed for the item.
- You can only mark an item when the answer is displayed. Selecting the cell is not enough.
Changing a Mark
Marks can be edited at any time simply by
- double-clicking on the cell to display the answer
- typing a different number.
There is no need to select the mark area first, it is pre-selected by default.
For items that are marked by the computers, it is also at the instructor's discretion to change the mark assigned. The computer might for example mark a missing capital letter as wrong, and the instructor might decide to overwrite the computer mark and credit part of or the entire mark to the student.
Display Marks
Per Item
Once the item has been evaluated and marked by the instructor, the mark is displayed on the cell itself. The default cell size however is too small to display the information.
the instructor must set the Tracker display to its highest zoom level.

Marks are displayed in the cell only if a mark was assigned for the item in the planner. If no mark was assigned to the item, the word None will show instead.
If the item has a mark assigned, but the student did not record an answer, the cell will be empty.
For detailed information about the Tracker display levels or the cell colour codes, please refer to the Progress Area section of this manual.
Display Total and Subtotal Marks
Additional columns that display the user's marks subtotal and final marks, can be inserted in the Tracker by the instructor.

Adding Mark columns
Mark columns can be added to the Tracker by simply pressing the left mouse button over the Mark calculator  icon, and then while still holding the mouse button down, moving the mouse cursor to the location where the column should be.
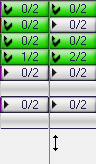
A thin vertical black cursor will show where the mouse is pointing.
Upon release of the mouse button, the mark column will appear where the cursor was. It shows the subtotal of the marks earned by the student from the beginning until this column, or for items located between the last column and this one.
Cumulative Marks
Whereas subtotals give the score obtained within a defined section of the lesson, Cumulative marks show the student's total score from the first item answered in the Tracker to the item placed right before the mark column.
To display the student's cumulative score:
- First place a mark column in the Tracker (see procedure above).
-
Right click on the mark column to bring up the popup selection menu.
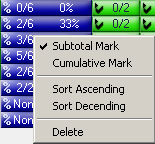
- Select the Cumulative Mark option.
Follow the same steps as above to change a column that was previously selected as Cumulative Mark to Subtotal Mark
Cumulative Mark column can be differentiated from subtotal columns by their background color and icon:
Subtotal Column |
 |
|---|---|
Cumulative mark Column |
 |
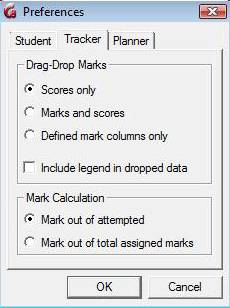
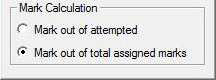
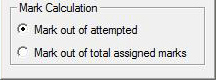
Mark Calculation Options
The marks shown in the mark columns may be calculated in two different ways. The traditional way to calculate final score is to total the mark out of the assigned marks for all questions, even if they were not answered. This is the default setting. Another option is to total the mark obtained by the student only on questions that were attempted.
In the User's Preferences window (EDIT > PREFERENCES from the top menu), the TRACKER tab allows you to change the method to calculating the content of these Mark columns.
These options are located in the Mark Calculation section of this form (lower section)
| Option | Tracker display | Description |
|---|---|---|
 |
 |
Gives the total mark and average in percentage of the total points available in that section. |
 |
 |
Gives the total mark and average in percentage of the items answered only. |
NOTES
The settings in the Mark Calculation section of the Tracker Preferences dialog also apply to the cumulative results.
Record Keeping
It might be important, even necessary to keep records of the students' work or their score achieved on a test or during a session to an external location.
Several tools are available for that purpose.
Whereas tools related to the general use of the system, such as activity reports, are located in the system's main interface, those directly related to the students' submitted work are located in the Tracker.
through these tools, the instructors or the system administrator can
- Export the students' oral answers in wav format
- Copy/paste or drag/drop the information from the tracker directly in a spreadsheet
- Print the information from the tracker
Exporting Students' Oral Answers

Students' recorded answers can be exported from CAN-8 in wave format and saved locally, on a network share or on a removable disk.
The instructor can export:
- one specific answer from a student
- all the answers a student has recorded in a lesson or test.
- all the recorded answers from all the students shown in that Tracker.
Exporting One Answer from One Student
- From the Tracker, select the student's answer you wish to export by clicking once on the corresponding grey box.
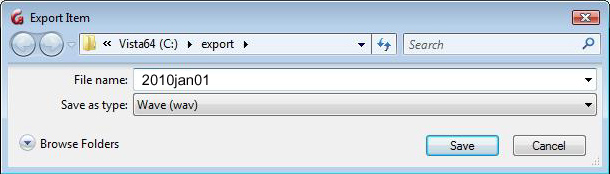
- Next select File-->Export-->Single Answer and the Export Item form will open:
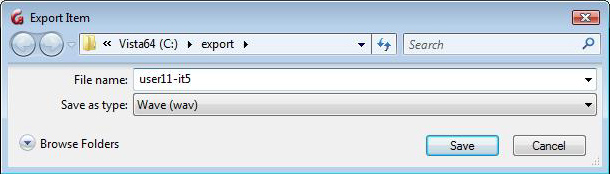
In the Drives section, select the drive you wish to save the answer on, and then locate the appropriate folder by scrolling in the Folders section. You may also use the Network or browse button if you wish to save this file on a network share.
- The File Type field shows wave by default.
- Type a name for the file in the File Name field. This field is mandatory.
- Finally, Click OK to finalize the process.
Exporting All Answers From One Student
- In the Tracker, click on the name of the student whose answers you wish to export.
- Select FILE > EXPORT > Selected Student Answers
-
In the Export Item box:

- In the Drives section, select the drive you wish to save the answers on,
- then locate the appropriate folder by scrolling in the Folders section. You may also use the Network button if you wish to save this file on a network share.
- The File Type field: By default, this field is pre-set as Wave type. Leave it as is.
- This export function is automated to export more than one file at a time and each answer from the student will be saved as a different wave file. Each file will therefore be assigned a different name by the system.
- In the File Name field, enter the name of a NEW FOLDER that will be created during the export and where these files will be saved.
- Since this is a folder, do not add the .wav extension in this field.
- Do not type in the name of an existing folder, as this will
bring an error box:
-
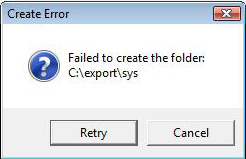
If the error message appears, select Retry, rename your folder and press OK again.
- Finally, Click OK to finalize the process.
To locate these new files:
- Navigate to the path you gave in the Drive and Folder section of the export form.
- Look for the folder that was created during the export.
-
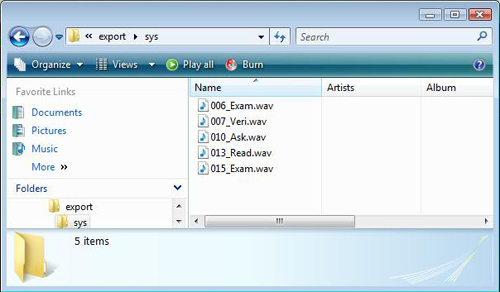
The wave files have automatically be saved in that newly created folder.
The names of these files, assigned by the system is composed of their position in the Planner, followed by an under-score and the 4 first letters of this item's name in the Planner, as illustrated.
File 006_Exam.wav is the answer to the 6th item in the planner titled Example Item.
NOTE
If the item's name in the Planner includes an accented character, this character will also be replaced by an underscore since accentuation is not permitted in the 8.3 file name standard.
Exporting All Answers from All Students
-
From the Tracker, select FILE --->EXPORT --> All Answers
- the Export Item box
will open:
- In the Drives section, select the drive you wish to save the answers on.
- Locate the appropriate folder by scrolling in the Folders section. You may also use the Network button if you wish to save this file on a network share.
- The file type field is pre-set as Wave type.
- In the File Name field, enter the name of the folder that you wish to create. Since this is a folder, do not add the .wav extension in this field. If the folder already exists, you will get an error box:

Select Retry, rename your folder and press OK again.
- Finally, Click OK to finalize the process.
The system has now created the new folder (in the illustration above, the folder 2010jan01).
Inside that folder, the system will create a sub-folder per student. Since several students can have similar names, and to prevent any error as per who the files belong to, the names assigned by the system to these subfolders consists of the unique number that was assigned to the users at creation. (see User Serial Number in the List Display section).
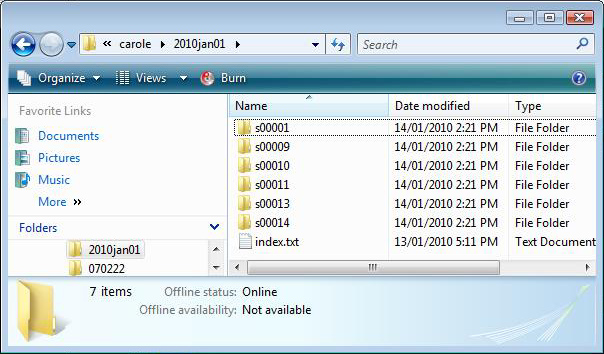
To facilitate matching a name to each of these subfolders, the system creates a text file. Double click on that text file to open it. Each line will have the subfolder name followed by the name of the user it belongs to
Each sub-folder includes one or several wave files, one for each answer that this student recorded in that lesson. If there is none, then the student has not recorded any answers.
The name of these files is composed of 3 digits, corresponding to the item's position in the Planner ( 003_xxx corresponds to the 3rd item in the planner, 005_yyy to the 5th, aso.), followed by an underscore and then the 4 first letters of the item's title in the Planner.
Double click on these .wav files to listen to them with the media player of your choice.
Export Evaluation Marks.
The marks obtained by the users can be exported directly from CAN-8 into any application that read .csv files (Spreadsheet, word processor, etc,...)
Export Procedure
The report is created by selecting a number of or all cells for some (or all) students in the Tracker and dragging this out to another application it is to be used in.
Use the Next button below to go through the detailed steps.
|
||||||
Alternative method:
- Follow the procedure above till step 3
- Right click on the selection.
- Select COPY in the popup contextual menu.
- Open the spreadsheet, or the software intended.
- Place the mouse cursor where the data should be placed
- Select EDIT > PASTE
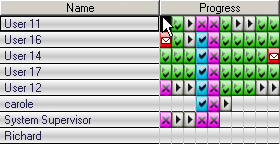
Export Format
There are 3 selectable formats for these reports:
- Scores Only format: Only export student names, item names, and per item scores.
- Mark Out of format: exports student names, item names, per item scores and mark the item is out of.
- Defined Mark Columns Only format: In this format, only the mark summary column totals and the available score are stored.
The report format is selected in the Tracker Tab of the Preferences
dialog box accessed through EDIT > PREFERENCES from the menu bar.
These preferences are set in the instructor's profile and can be changed at any time.
The system will keep the last settings selected as the default settings next time the instructor signs in.
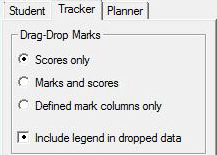
1. Scores Only (o)
In this format, only the mark for each item is stored. It is
assumed that the total mark each item is out of is either known or un-necessary.
This type of report is assigned the letter O.
Report fields are as follow:
| First line | User_ID | User_name | Type | Ex. 1 | Ex. 2 | ... | Ex. X |
|---|---|---|---|---|---|---|---|
| Contains | Column header | Column header | Column header |
Name of the first item | Name of item number 2 | ... | Name of item number X |
| All subsequent lines | Student_ID | Student_Name | O | 0 to 10 | 0 to 10 | ... | 0 to 10 |
| Contains | User ID of the student | The student's user name | Indicates a Summary report | The score received for the first item | The score received for the second item | ... | The score received for item X |
| Example |
 |
||||||
NOTESFor items that did not have a mark assigned in the Planner, the corresponding cell will indicate:
|
|||||||
2. Mark Out of format (P)
In this format, each field shows the mark the student received per item and the
maximum mark available for each item.
This type of record is assigned the letter P
| First line | User_ID | User_name | Type | Ex. 1 | Mark Out Of | Ex. 2 | Mark out of | etc... |
|---|---|---|---|---|---|---|---|---|
| Contains | Column header | Column header | Column header Type of report created: p |
Name of the first item | Maximum Mark for item 1 | Name of the second item | Maximum mark for item 2 | Repeat until last item exported |
| Subsequent lines | Student_ID | Student_name | P | 0 to 10 | /1 to /10 | 0 to 10 | /1 to /10 | etc... |
| Contains | The student user ID | The name of the student | Indicates a Mark Out Of report | Mark received for the first item | Maximum mark for that item | Mark received for second item | Maximum mark for that item | Repeats until last item exported |
| Example |
 |
|||||||
NOTESFor items that did not have a mark assigned in the Planner, the corresponding cell will indicate:
|
||||||||
3. Mark Summary Format (S)
In this format, only the mark summary column totals and
the available score are exported.
In order to export in this format, mark columns must be defined in the Tracker first.
This type of report is assigned the letter S.
| First line | User_ID | User_name | Type | Mark | Out Of | Percent | C | Cumulative mark | Out Of | Percent |
|---|---|---|---|---|---|---|---|---|---|---|
| Contains | The name of the student | The student user ID | Type of report created: S | Mark obtained in the first subtotal | Max. Mark for that section | Percentage achieved in that section | Indicates the following column is a cumulative mark. | Cumulative mark obtained | Maximum mark for the section | Cumulative percentage |
| Subsequent lines | Student_ID | Student_name | S | 0 to 10 | /1 to /10 | 0 to 100% | C | 0 to 10 | /1 to /10 | 0 to 100% |
| Contains | The name of the student | The student user ID | Indicates a Mark Summary type record | Mark received as a subtotal | Score the subtotal is out of | Percentage for the section | Indicates that a Cumulative mark column follows | Cumulative mark | Score the mark is out of | Cumulative percentage |
| Example |
 |
|||||||||
Include Legend
The Include Legend In Dropped Data option is located in the same section of the Preferences box. Checking this option will add an extra line to the exported data.
The legend is placed at the end of the report, below the last student's records.
Printing the Tracker
Results can also be printed to either keep as records or hand out to the students.
All information present in the Tracker is included in the Tracker print out, including:
- If the item has been listened to by the instructor
- Correct/incorrect mentions for Fill in the blanks and Multiple-Choice items that had no marks assigned in the Planner
- Marks obtained, including subtotals and cumulative marks if applicable.
NOTES
- if items have been marked, their score rather than their status is shown in the print out. So instead of showing an X for Wrong Answer on a wrong Multiple-Choice item, a score of 0 will show.
- To export the subtotals and/or cumulative marks in the printout, the instructor must first display them in the Tracker and select the appropriate Tracker export option in the user's preferences
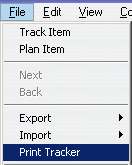
To access the Tracker printer function, select File > Print Tracker from the menu bar.
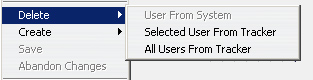
Deleting Student's data
Once the student's data has been corrected or reviewed, it can be deleted from the Tracker.
NOTE
It is necessary to delete the data in a test for users who have previously taken the test as it can prevent these users from seeing all the questions.
Data deletion is permanent. If it is necessary to keep a copy of their recordings, refer to the Exporting Data section of this Chapter prior to proceeding with the deletion. In case of accidental deletion, contact your IT person right away.
Delete The Data of One User
- Select a student by clicking on the name.
- Select FILE > DELETE > Selected User from Tracker from the top menu.
- Confirmation is required before the data is deleted. Select OK at the prompt.
Delete Data from All Users
- Access the File > Delete > All Users from Tracker option from the top menu bar.
- Confirmation is required before the data is deleted. Select OK at the prompt.
All student data will be deleted, and the screen will be cleared.
NOTES
- Deleting users from the Tracker does not delete them from the system.
- Deleting users' data from a Tracker does not affect their data in other Trackers.
- When a student's data is deleted, the student's progress and recorded sound files (for this lesson only) are also deleted.
- Students who are currently active (highlighted blue or green) in the lesson cannot be deleted from a Tracker, neither will their data. An error message will advise you at the time of the deletion. All other offline users will be deleted.